|
|
The script hereafter is outdated and has been replaced by a newer version. Please Check the Download page for latest version. |
Hello World,
Lately, we have been working a lot on xRDP software package and Ubuntu 18.04. In the last weeks, we have been publishing a lot of posts about xRDP, how to install it and how to fix some of the most common issues encountered. We have spend so much time in refining the standard installation script that we have not check yet the custom installation process and what can be improved when compiling from source.
As a reminder, the following posts have been published around xrdp and Ubuntu 18.04
- Ubuntu 18.04 – Install xRDP the easy way (Scripted Installation – Version 0.2
- xRDP – The Infamous “Authentication Required to Create Managed Color Device” Explained
- xRDP – How to Fix the Infamous system crash popups in Ubuntu 18.04 (and previous versions)
- xRDP – How to Fix Theme issues in Ubuntu 18.04 remote session
- xRDP – Install xRDP the easy way (Scripted Installation – Version 0.3)
- xRDP – How to Fix different lock screen colors in Ubuntu 18.04 remote session
Today, this post will provide an updated version of the Standard installation script. The version of the script will be set to 0.4 and include the logic to fix the gdm visual aspect of the lock screen when remotely connected. This updated version of the script offer the possibility to implement the fix for the GDM lock screen or to simply perform a standard installation where no gdm fixes will be implemented
So, Let’s proceed….
The Standard Installation Script – Version 0.4
Overview
The version 0.4 of the script perform a standard installation of xRDP (i.e using the xRDP package available in the Official Ubuntu Repository) and perform also the additional configuration tasks needed to have a workable xRDP solution. Version 0.4 includes the logic to implement a visual fix related to the gdm lock screen (for more info – check this post). Because we are modifying some gdm system files, the script will not enforce the fix. The user running the script will have the option to implement the fix or not. The script will accept parameters to detect if the fixgdm option is selected or not…
Assumptions
Before running this script, be aware of the following assumptions
- We have tested the script on Ubuntu 17.10 and later
- No additional desktop interface has been installed.
- We have performed the test on a Virtual Machine running on Virtual box and Hyper-V Virtual machine (on Windows 2012 R2)
- The following procedure has been performed on Ubuntu 18.04 where xorg is the default Display manager
Prerequisites
We assume that you have internet connection on the Ubuntu machine. The internet connection is needed to download the necessary packages that will be installed on your system.
The script version 0.4
Important Note :
If you copy/paste the script, you might encounter some issues because font formatting might be not maintained during the copy/paste operation. Please ensure that format is accurate before launching the script. A downloadable version of the script is available at the bottom of the post
Disclaimer : As usual, use this at your own risk !!
#####################################################################################################
# Script_Name : Std-Xrdp-install-0.4.sh
# Description : Perform an automated standard installation of xrdp
# on ubuntu 17.10 and later
# Date : May 2018
# written by : Griffon
# Web Site :http://www.c-nergy.be - http://www.c-nergy.be/blog
# Version : 0.4
# History : 0.4 - Add parameter option to fix gdm lock screen in remote session
# 0.3 - Adding logic to fix theme and extensions for any users login through xrdp
# 0.2 - Added Logic for Ubuntu 17.10 and 18.04 detection
# - Updated the polkit section
# - New formatting and structure
# 0.1 - Initial Script
# Disclaimer : Script provided AS IS. Use it at your own risk....
####################################################################################################

echo
/bin/echo -e "\e[1;36m#-------------------------------------------------------------#\e[0m"
/bin/echo -e "\e[1;36m# Standard XRDP Installation Script - Ver 0.4 #\e[0m"
/bin/echo -e "\e[1;36m# Written by Griffon - June 2018 - www.c-nergy.be #\e[0m"
/bin/echo -e "\e[1;36m#-------------------------------------------------------------#\e[0m"
echo

#---------------------------------------------------#
# Step 0 - Try to Detect Ubuntu Version....
#---------------------------------------------------#

echo
/bin/echo -e "\e[1;33m#---------------------------------------------#\e[0m"
/bin/echo -e "\e[1;33m! Detecting Ubuntu version # \e[0m"
/bin/echo -e "\e[1;33m#---------------------------------------------#\e[0m"
echo

version=$(lsb_release -d | awk -F":" '/Description/ {print $2}')

if [[ "$version" = *"Ubuntu 17.10"* ]] || [[ "$version" = *"Ubuntu 18.04"* ]];
then
echo
/bin/echo -e "\e[1;32m.... Ubuntu Version :$version\e[0m"
/bin/echo -e "\e[1;32m.... Supported version detected....proceeding\e[0m"
else
/bin/echo -e "\e[1;31m!!!!!!!!!!!!!!!!!!!!!!!!!!!!!!!!!!!!!!!!!!!!!!!!!!!!!!!!\e[0m"
/bin/echo -e "\e[1;31mYour system is not running Ubuntu 17.10 Edition.\e[0m"
/bin/echo -e "\e[1;31mThe script has been tested only on Ubuntu 17.10...\e[0m"
/bin/echo -e "\e[1;31mThe script is exiting...\e[0m"
/bin/echo -e "\e[1;31m!!!!!!!!!!!!!!!!!!!!!!!!!!!!!!!!!!!!!!!!!!!!!!!!!!!!!!!!\e[0m"
echo
exit
fi

#---------------------------------------------------#
# Step 1 - Install xRDP Software....
#---------------------------------------------------#
echo
/bin/echo -e "\e[1;33m#---------------------------------------------#\e[0m"
/bin/echo -e "\e[1;33m! Installing XRDP Packages...Proceeding... # \e[0m"
/bin/echo -e "\e[1;33m#---------------------------------------------#\e[0m"
echo

sudo apt-get install xrdp -y

#---------------------------------------------------#
# Step 2 - Install Gnome Tweak Tool....
#---------------------------------------------------#
echo
/bin/echo -e "\e[1;33m#---------------------------------------------#\e[0m"
/bin/echo -e "\e[1;33m! Installing Gnome Tweak...Proceeding... # \e[0m"
/bin/echo -e "\e[1;33m#---------------------------------------------#\e[0m"
echo

sudo apt-get install gnome-tweak-tool -y

#---------------------------------------------------#
# Step 3 - Allow console Access ....
#---------------------------------------------------#
echo
/bin/echo -e "\e[1;33m#---------------------------------------------#\e[0m"
/bin/echo -e "\e[1;33m! Granting Console Access...Proceeding... # \e[0m"
/bin/echo -e "\e[1;33m#---------------------------------------------#\e[0m"
echo

sudo sed -i 's/allowed_users=console/allowed_users=anybody/' /etc/X11/Xwrapper.config

#---------------------------------------------------#
# Step 4 - create policies exceptions ....
#---------------------------------------------------#
echo
/bin/echo -e "\e[1;33m#---------------------------------------------#\e[0m"
/bin/echo -e "\e[1;33m! Creating Polkit File...Proceeding... # \e[0m"
/bin/echo -e "\e[1;33m#---------------------------------------------#\e[0m"
echo

sudo bash -c "cat >/etc/polkit-1/localauthority/50-local.d/45-allow.colord.pkla" <<EOF
[Allow Colord all Users]
Identity=unix-user:*
Action=org.freedesktop.color-manager.create-device;org.freedesktop.color-manager.create-profile;org.freedesktop.color-manager.delete-device;org.freedesktop.color-manager.delete-profile;org.freedesktop.color-manager.modify-device;org.freedesktop.color-manager.modify-profile
ResultAny=no
ResultInactive=no
ResultActive=yes
EOF

#---------------------------------------------------#
# Step 5 - Fixing Theme and Extensions ....
#---------------------------------------------------#
echo
/bin/echo -e "\e[1;33m#---------------------------------------------#\e[0m"
/bin/echo -e "\e[1;33m! Fix Theme and extensions...Proceeding... # \e[0m"
/bin/echo -e "\e[1;33m#---------------------------------------------#\e[0m"
echo
#Check if script has already run....
if grep -xq "#fixGDM-by-Griffon" /etc/xrdp/startwm.sh; then
echo "Skip theme fixing as script has run at least once..."
else
#Set xRDP session Theme to Ambiance and Icon to Humanity
sudo sed -i.bak "4 a #fixGDM-by-Griffon\ngnome-shell-extension-tool -e ubuntu-appindicators@ubuntu.com\ngnome-shell-extension-tool -e ubuntu-dock@ubuntu.com\n\nif [ -f ~/.xrdp-fix-theme.txt ]; then\necho 'no action required'\nelse\ngsettings set org.gnome.desktop.interface gtk-theme 'Ambiance'\ngsettings set org.gnome.desktop.interface icon-theme 'Humanity'\necho 'check file for xrdp theme fix' >~/.xrdp-fix-theme.txt\nfi\n" /etc/xrdp/startwm.sh
fi
echo

#---------------------------------------------------#
# Step 6 - Fix GDM Lock screen color ....
#---------------------------------------------------#

#Detect if argument passed
ARGS=$1
echo $ARGS

if [ "$ARGS" = "--fixGDM" ];
then
echo
/bin/echo -e "\e[1;33m#---------------------------------------------#\e[0m"
/bin/echo -e "\e[1;33m! Fix for GDM Lock Screen color... # \e[0m"
/bin/echo -e "\e[1;33m#---------------------------------------------#\e[0m"
echo
# Step 1 - Install prereqs for compilation later on
sudo apt-get -y install libglib2.0-dev-bin
sudo apt-get -y install libxml2-utils

# extract gresource info (from url...)
workdir=${HOME}/shell-theme
if [ ! -d ${workdir}/theme ]; then
mkdir -p ${workdir}/theme
mkdir -p ${workdir}/theme/icons

fi
gst=/usr/share/gnome-shell/gnome-shell-theme.gresource

for r in `gresource list $gst`; do
gresource extract $gst $r >$workdir/${r#\/org\/gnome\/shell/}
done

# create the xml file
bash -c "cat >${workdir}/theme/gnome-shell-theme.gresource.xml" <<EOF
<?xml version="1.0" encoding="UTF-8"?>
<gresources>
<gresource prefix="/org/gnome/shell/theme">
<file>calendar-arrow-left.svg</file>
<file>calendar-arrow-right.svg</file>
<file>calendar-today.svg</file>
<file>checkbox-focused.svg</file>
<file>checkbox-off-focused.svg</file>
<file>checkbox-off.svg</file>
<file>checkbox.svg</file>
<file>close-window.svg</file>
<file>close.svg</file>
<file>corner-ripple-ltr.png</file>
<file>corner-ripple-rtl.png</file>
<file>dash-placeholder.svg</file>
<file>filter-selected-ltr.svg</file>
<file>filter-selected-rtl.svg</file>
<file>gnome-shell.css</file>
<file>gnome-shell-high-contrast.css</file>
<file>logged-in-indicator.svg</file>
<file>no-events.svg</file>
<file>no-notifications.svg</file>
<file>noise-texture.png</file>
<file>page-indicator-active.svg</file>
<file>page-indicator-inactive.svg</file>
<file>page-indicator-checked.svg</file>
<file>page-indicator-hover.svg</file>
<file>process-working.svg</file>
<file>running-indicator.svg</file>
<file>source-button-border.svg</file>
<file>summary-counter.svg</file>
<file>toggle-off-us.svg</file>
<file>toggle-off-intl.svg</file>
<file>toggle-on-hc.svg</file>
<file>toggle-on-us.svg</file>
<file>toggle-on-intl.svg</file>
<file>ws-switch-arrow-up.png</file>
<file>ws-switch-arrow-down.png</file>
</gresource>
</gresources>
EOF
cd ${workdir}/theme
sed -i -e 's/background: #2e3436/background: #2c00e1/g' ~/shell-theme/theme/gnome-shell.css

##Delete the file noise-texture.png (grey one)
rm ${workdir}/theme/noise-texture.png

#Download the noise-texture.png with purple background
wget http://www.c-nergy.be/downloads/noise-texture.png

#Compile file and copy to correct location....
cd ${workdir}/theme
glib-compile-resources gnome-shell-theme.gresource.xml

# make a backup of the file and copy the file....
sudo cp /usr/share/gnome-shell/gnome-shell-theme.gresource /usr/share/gnome-shell/gnome-shell-theme.gresource.bak
sudo cp ${workdir}/theme/gnome-shell-theme.gresource /usr/share/gnome-shell/gnome-shell-theme.gresource
else
echo "No Parameter Pass for GDM FIX....."
fi

#---------------------------------------------------#
# Step 6 - Credits ....
#---------------------------------------------------#
echo
/bin/echo -e "\e[1;36m#-----------------------------------------------------------------------#\e[0m"
/bin/echo -e "\e[1;36m# Installation Completed\e[0m"
/bin/echo -e "\e[1;36m# Please test your xRDP configuration....\e[0m"
/bin/echo -e "\e[1;36m# Written by Griffon - June 2018 - Ver 0.4 - Std-Xrdp-Install-0.4.sh\e[0m"
/bin/echo -e "\e[1;36m#-----------------------------------------------------------------------#\e[0m"
echo
How to Use the Script
Set Execute Right on the script
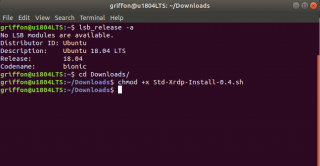
Download the Std-Xrdp-install-0.4.sh script to your system. You need to mark the script as executable . To do this, perform the following action in a terminal console
chmod +x ~/Downloads/Std-Xrdp-Install-0.4.sh
Click on picture for better resolution
Note : Adjust the path where the Std-Xrdp-Install-0.4.sh script to reflect your environment
Execute the script
With this version of the script, you have basically the possibility to pass some parameters. These parameters allow the script to perform some additional configuration tasks if desired by the user. Before running it, ensure that internet connection is available (so you can download the necessary packages needed for the installation)
Standard way
In the standard way, you simply execute the script with no parameters. In this scenario, no fix for the GDM visual issue will be implemented. This mode is basically equivalent to running the Std-Install-Xrdp-0.3.sh script.
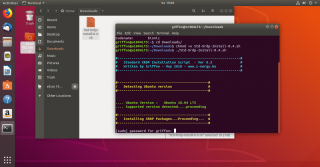
and simply open a Terminal console. In the Terminal console, Browse to the location where the script has been stored and then issue the following command
./Std-Xrdp-Install-0.4.sh
The script will start executing and when the xrdp installation package will start, you be requested to enter your password
Click on picture for better resolution
Provide the password and proceed with the installation. Wait for completion of the script. The machine will not reboot automatically when done so you can review the actions performed by the script….
Click on picture for better resolution
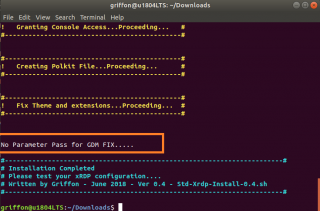
You can see in the screenshot above that the script has detected that no fixGDM parameters has been provided so no actions have been performed to fix the different color background in local and remote session.
Advanced way
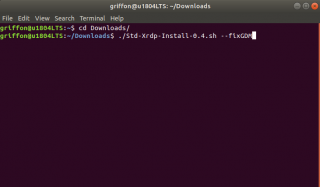
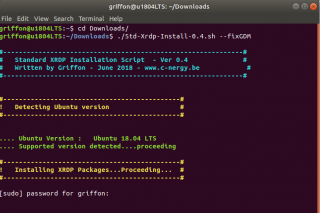
The Std-Xrdp-Install script version 0.4 accepts a single parameter (so far, more options might be added in the future…). To implement the fix for the visual GDM lock screen issue, you will run the script using the parameter “fixGDM”. So, in the Terminal console, you will need to type the following
./Std-Xrdp-Install-0.4.sh --fixGDM
Click on picture for better resolution
Again, the script will ask for a password. Provide it and let the script complete.
Click on picture for better resolution
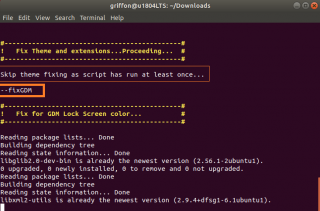
Here, the script has detected that the “fixGDM” parameter has been passed to the command line and that an additional action will be executed by the script
Click on picture for better resolution
Note :
In the screenshot above, you can see an additional message displayed “skip theme fixing….” . An Additional check has been included in the script to see if the script has run at least once. This check is there to ensure that the fix for the theme does not get overwritten if the script is run multiple times. Actually, you could run the script without the – – fixGDM parameter first and if later you change your mind, you could technically re-run the script to implement to fix avoiding to break your previous installation.
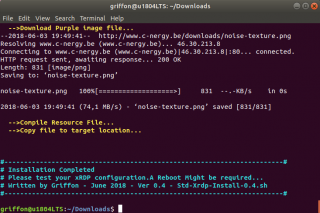
At completion, it’s recommended to reboot the machine so the changes made to the GDM files can be applied to the system.
Click on picture for better resolution
Test your configuration
To Test your configuration, you need to perform the following steps
- step 1 – Logout from the Ubuntu machine because you can only have a single connection to the machine for the same user (either local either remote)
- step 2 – Start your favorite remote desktop client and provide the ip address or hostname of your ubuntu machine
- step 3 – At this stage, you should see the xRDP login page. Provide your credentials
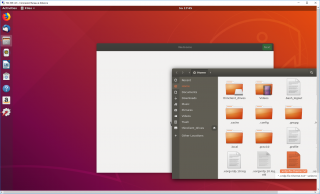
- step 4 – At this stage, you should see your standard Ubuntu Gnome Desktop with the Dock visible, the Ambiance theme displayed and the icons set are set correctly as well
Click on picture for better resolution
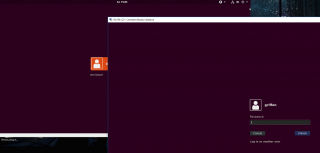
- step 5 – Lock the remote session and unlock it again. If you have executed the script with the fixGDM parameter, the background color should be purple (and not gray)…
Click on picture for better resolution
Download the Script
Please download the script : Std-Xrdp-Install-0.4.zip
Final Notes
That’s it for today !
xRDP is becoming a good option for remote session and performs actually quite well. There are still some hickup, issues, unexpected behavior (which will be covered in a coming post) but all in all the solution is workable. The version 0.4 of the script does provide again a fix for a minor issue (the gdm lock screen color discrepancy). This version of the script actually bring an additional level of flexibility and usability as we have introduced the use of parameters. This might lead us to revisit again the script and re-write it to make it even better.
Stay tuned and do not forget to check for the latest version of the script…
Provide feedback and let us know if you like the changes or if you have some ideas that could make the script better
Till next time
See ya
Hello,
In previous version on Ubuntu (14 and 16) xRDP could be installed and enable multiple users to connect via xrdp simultaneously. Apparently Ubuntu 18.04 cannot offer that feature. For a user to xRDP into the server he/she would need to logout (either remotely or locally).
Do you think that in the future there will be a way to configure xRDP for multiple users to connect simultaneously?
Thank you
Eric
Is there a reason why this script is not checking out the sources from github anymore? I found the old install-xrdp-2.0.sh very convinient to get the newest version from github…
Cheers
Markus
@Markus,
The Std-Install script is using the default xrdp package found in the Ubuntu repository. This package might or might not been updated by UBuntu given that this package is part of the LTS Ubuntu repository
The “old” script is performing a custom installation (installation from source) and a new version is being worked out… But as we have been working on so many different topics and focused a little bit on the standard installation (we have fixed quite a lot of small issues and annoyances), we had no time yet to validate and publish the script….
Script will be (or might be) available possibly August or September 2018
Till next time
See ya
Griffon,
Been following your guides for a while now (16.04 and Mate) and they are great. With my upgrade to 18.04 I had problems xrdp-sesman would crash on launch. Even after removing xrdp and all the related files I could find and using V 0.4 of your script. Then today I found a post by someone else. Literally I removed xrdp again, then followed his step by step to get it working with Mate. Though xrdp wouldnt start until I finished his 3rd step. Don’t know if you plan to update your script to support Mate or not but figured I would share the link just in case. https://www.hiroom2.com/2018/05/07/ubuntu-1804-xrdp-mate-en/
@Richard;
Thank you for your visit and your comments. The Std script for XRDP will not be updated to include mate desktop. The script has been developed specifically for Ubuntu edition with Gnome Desktop. We could extend the script and include multiple Ubuntu Flavors and desktop environment. However, we want to provide a standard experience for installing xrdp package and access the familiar gnome desktop on UBuntu. We are sorry to hear that it didn’t work for you. But we are also happy to see that you have found a way to meet your requirements 🙂 This is the Linux flexibility….
Till next time
See ya
Dear Griffon,
thank you very, very much for all your effort about xRDP.
Thanks to your posts and scripts I was able to install xRDP on Ubuntu 18.04.01 LTS on a test environment.
Background information: Productive I am using Ubuntu 17.04 with Gnome and xRDP as a Terminal Server. In case of emergency I need to support my users using screen sharing. So we use the shared Xvnc-Session of the user to support him remote:
vncviewer 192.168.1.100:12 -Shared -passwordFile /home/user1/.vnc/sesman_user1_passwd:12
While testing 18.04.01 we are facing several problems with Xvnc – Xorg seems to be the only solution as a xRDP infrastructure. But I couldn’t find any way to make Xorg able to share it’s screen.
As far as I understood xorg.conf and x11vnc I guess I need to edit
sesman.ini -> [Xorg]
-> and add:
param=-shared
param=-forever
But, as you guess, this crashes xRDP-Server completely. Do you have any idea how to allow Xorg-session sharing ?
Thank you very much, Take care
dj
@NickNameless,
I have no clue… We do not know if it’s possible to perform shadowing with xorg… Thinking out loud, maybe the user can enable the vinagre settings while in remote session and share the desktop through vnc ?
Really no clue on this one, we will need to perform some tests and see if this is even feasible….. As we are just back from Business Trip, we have to do some catch up so might take some time before we come back to you…
Thanks for the visit, the feedback and the challenge… 🙂
Till next time
See ya
What about @eric alemany question?
oops,
I thought I replied to the question but apparently not…
Will do…..here….
At the moment, it seems not possible to have the same user connecting to local machine and remote session. It was possible in the past but not anymore.. You have to find other ways to connect if you need to take over your own remote session (vnc ? other solutions)… In the future, nothing is yet foreseen….
Hope this help
Till next time
See ya
Many thanks for the blog and script. I have run the script on a brand new installation of Ubuntu 18.04 .2 LTS . There is a single user in the SUDOers group on the system created during installation.
I can successfully connect (via a Windows 10 Pro machine using RDP) to the machine and enter my login details (Xorg). After a couple of minutes waiting whilst a blank blue screen is displayed, I eventually get a box that says:
connecting to sesman ip 127.0.0 .1 port 3350
sesman connect ok
sending login info to to session manager, please wait…
login successful for display 10
started connecting
connection problem, giving up
some problem
I am not logged in on another session. I rebooted after running the script (belt and braces and all that) and have also tried logging in via X11rdp; same error message. Any ideas?
@Martin,
This can be caused by multiple factors. The best way to tackle this would be to have a look at the logs (in /var/log/xrdp.log and /var/log/xrdp-sesman.log) to see if there are some hints about the issue you are facing.
You have also to check the ~/.xsession-errors file if it exists and see if there is an error message over there
Finally, you can run the xrdp in debug mode where you could see live the possible error. Please have a look to this post (http://c-nergy.be/blog/?p=10887)
Hope this help
Till next time
See ya
Thanks for your work on this script and the blog. I have installed the 0.4 script with the fix but since doing this I have lost mouse and keyboard use on the desktop of the system when sitting at it. The login screen works fine with keyboard and mouse works at this point, but when the desktop come up I have no keyboard function and no mouse function or even pointer. Away from the system remmina or a ms android xrdp app work fine.
Any suggestion what I can do remotely to fix this via ssh or remmina?
@Steventon,
if we understand your issue, you have no keybord or mouse access through the xrdp session, try to re-install the following package sudo apt-get -y install xserver-xorg-input-all
No guarantee this would work but some users with similar issues mentioned it worked for them
Hope this help
Till next time
See ya
Just tried your script (0.4 advanced). Thanks.
No errors and connection via RDP was established.
Got a thinclient_drives on my desktop, but I guess that is as it should be.
@Orla,
Thank you for the visit and the feedback. Indeed, the thinclient_drives icons on the desktop is expected and used for drive redirection within your remote session
Btw, there are new versions of the scripts…. Please always check for the latest version for your Operating system… have a look at https://www.c-nergy.be/products.html
Till Next Time
See ya