Hello world,
This post (and the coming ones) are more focused on Microsoft technologies. Microsoft has released a number of new releases of their software and we need to do our home work and check if there is major changes or not. This post will provide a basic description on how to manually install SQL 2016 Server on a Windows 2016 Server. SQL server is used as a back end database and represent the corner stone of multiple Microsoft product such as RDS,SCOM,SCCM, SCVMM,Sharpoint….It’s so widely used that it can be useful to document the installation process in case we need to quickly install it and provide some basic documentation.
This post will cover the manual installation of SQL 2016. Minor changes have been introduced and the installation process looks identical to the previous version.
Let’s start !
Step by Step Installation of SQL 2016
Assumptions
The following assumptions have been made.
- an Active Directory domain infrastructure already exists on your network
- SQL Server is joined to the Active Directory domain
- SQL Server will be installed on a Windows 2016 Server Operating System
- SQL Server will be configured in a stand alone mode (no cluster configuration)
- SQL Server 2016 SP1 will be used
Prerequisites
Service Accounts for SQL Installation
The following service accounts have been created in our Active Directory. These accounts are normal accounts with no specific rights.
- SQL Agent Service Account YourDomain\SVC_SQLAgent
- SQL Service Account YourDomain\SVC_SQLServer
- SQL Reporting Service Account YourDomain\SVC_SQLReport
.Net Framework 3.5 dependencies
SQL 2016 server does not requires anymore the .Net Framework 3.5. You do not need to install this feature beforehand anymore which is a really good thing. We had to restart the SQL installation so many times because the .Net framework feature was not installed on the server that would host the SQL Role. In the meantime, we found a a way to tackle this issue as well (for previous version of SQL – we might publish a post about that).
SQL Firewall Ports
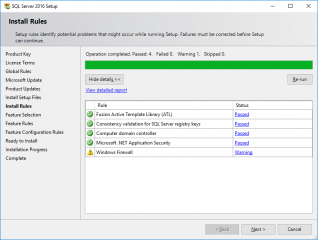
A nice to have is to configure the Firewall ports for the SQL traffic. By Default, SQL server is listening on port 1433 and during the setup, you might see a warning message about that. To have a smooth installation process (with no warnings), we tend to configure in advance the firewall ports for SQL through the following PowerShell command
New-NetFirewallRule -DisplayName “SQL Server Traffic ” -Direction Inbound -LocalPort 1433 -Protocol TCP -Action Allow
SQL Server 2016 Setup Files
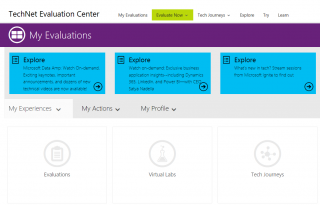
Before performing the installation, you would need to obtain the SQL Server 2016 iso file. This step by step will be based on evaluation software version of Windows 2016 Operating system and SQL 2016 Server which can be downloaded from the evaluation center at https://www.microsoft.com/en-us/evalcenter/
Click on Picture for Better Resolution
Once logged into the portal, you will be able to download iso file.
Step by Step Standard Installation
Mount your iso file into the Windows 2016 server that will be hosting the SQL server and navigate to the location where the SQL Setup binaries files are available.
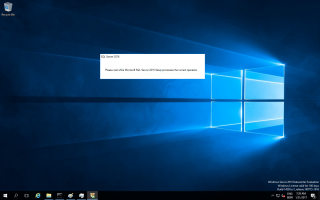
After clicking the setup.exe, you will see the SQL bootstrap file executing
Click on Picture for Better Resolution
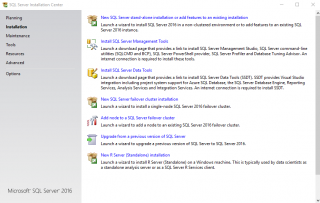
After some time, the SQL Server Installation Center page is displayed. On the left menu, click on the installation option and in the right pane, click on the New SQL Server Stand-alone installation or add feature. This will start the SQL Setup Wizard.
Click on Picture for Better Resolution
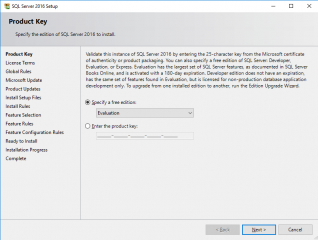
In the SQL Setup Wizard, in the product key page, based on your situation, either accept the Evaluation product version or insert a valid product key. Press Next
Click on Picture for Better Resolution
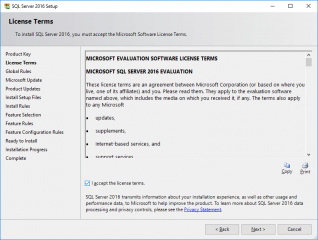
In the License Terms page, tick the I accept checkbox and press next.
Click on Picture for Better Resolution
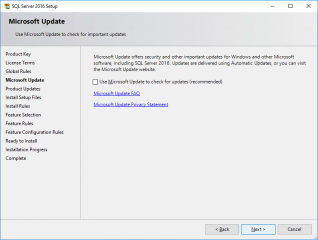
In the Microsoft Update page, Accept default and press next
Click on Picture for Better Resolution
In the Install Rules pages, review the settings and if you are fine with that, press next
Click on Picture for Better Resolution
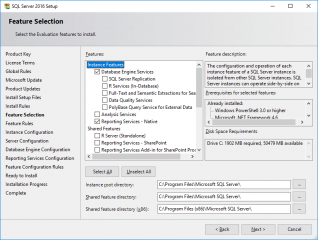
In the feature selection page, select the feature you need for your installation. The feature selection will depend on the type of product that will be using the SQL Database. If needed, you can also specify different directory path for the SQL. Press Next when the correct option have been selected
Click on Picture for Better Resolution
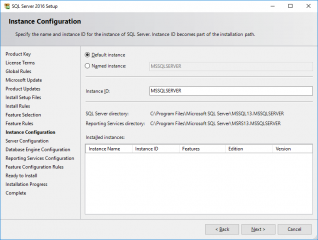
In the Instance configuration page, accept default instance name and Press Next
Click on Picture for Better Resolution
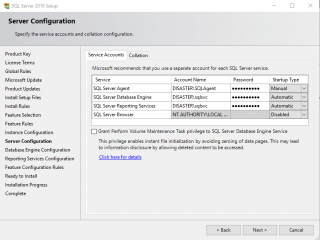
In the Server configuration page, please specify the service accounts that will be used to run the different SQL Services. These services accounts should be Active directory users object and should have been created beforehand. When done, Press Next
Click on Picture for Better Resolution
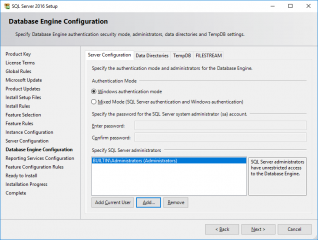
In the database engine configuration page Wizard, select the appropriate authentication mode (which should be in most of the cases Windows authentication). In the Specify SQL Server Administrators section, be sure to add the Builtin\Administrators group. This will ensure that any member of this group will be able to login into the SQL Console and perform administrative tasks.
Click on Picture for Better Resolution
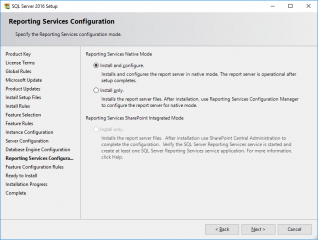
In the Reporting Services configuration, accept default which should be install and configure (as long as you do not use this SQL with SharePoint infrastructure). Press Next
Click on Picture for Better Resolution
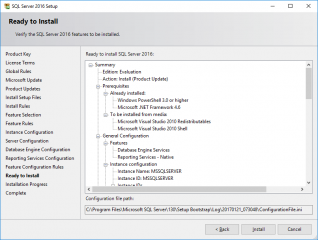
In the Ready to install page, review your settings and press install
Click on Picture for Better Resolution
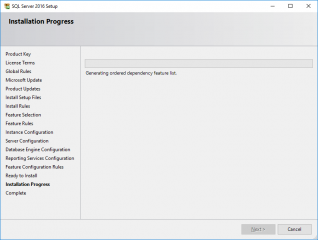
In the installation Progress page, you can monitor the progress. Wait for Completion
Click on Picture for Better Resolution
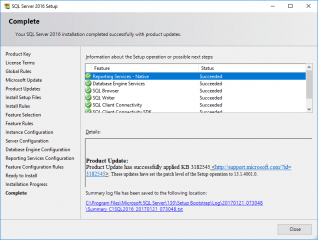
In the complete page, review the result and Press Close
Click on Picture for Better Resolution
SQL Management Studio Installation
In SQL 2016, the SQL Management studio software is no included in the installation binaries. You will need to download them. The SQL Software Installation Center Page provide a link from where to download the SQL Management Studio.
As shown below, Click on the installation node and then click on install the SQL Server Management Tools
Click on Picture for Better Resolution
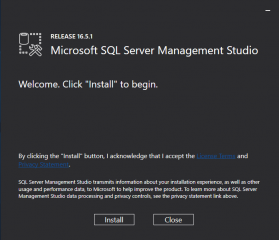
You will be redirected to a web page where you can download the software. Once downloaded, click on the executable file and Welcome. Click to Install page is displayed. Press Install to proceed with the installation of the SQL Server Studio Management Tool.
Click on Picture for Better Resolution
Final Notes
Voila ! The installation of SQL Server 2016 has been performed and completed successfully. All in all the process didn’t changed much compared to previous versions. The main changes are the fact that no dependencies with .Net Framework 3.5 exists in SQL 2016 and also that SQL Server Studio Management is now an downloadable components and it’s not part anymore of the SQL installation binaries anymore.
This post is just the foundation of a new series of post around SQL server 2016 and Windows 2016 Server. As mentioned before, this product is needed for so many different Microsoft product (read System Center Family) that it’s important for us to know how to install it quickly and in a clean way. So far, we have seen the manual installation process. However, because we might be working on huge project where multiple SQL servers will be deployed, the next part of this series will investigate the possible automation solutions provided by SQL/Windows operating system.
Till next time
See ya
