In my previous post, we had a deeper look into the kvm virtual machines and settings that could be configured when creating your virtual machines. We have mentioned that in order to improve performance, it was a good practice to use the paravirtualized drivers for Windows Operating Systems. This post will describe how you can create a windows 2003 virtual machine and taking advantage of the paravirtualized drivers.
Proxmox ve Team has described one way to use the paravirtualized drivers (or virtio drivers) when performing a windows 2003 installation (see here for original instructions). Because we want to bring some added value, we will show another way to perform the installation. This method will be described in part 2
This post will simply will explain how you can mount a floppy driver into your kvm virtual machine and present mass storage drivers to the windows 2003 text based setup routine.
Let’s start the process…
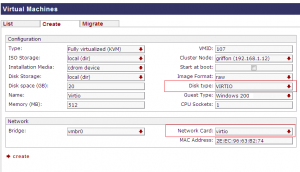
We will first create our virtual machine through the Proxmox Ve web interface. You should ensure that the disk type and network Card is set to Virtio. (If you do not know how to create a kvm virtual machine, you can have a look here and here)
Click to enlarge picture
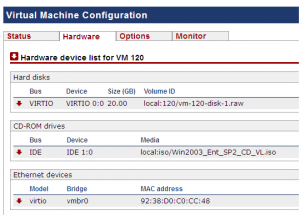
In the hardware tab, ensure that the windows 2003 iso image is mounted into the cdrom.
Click to enlarge picture
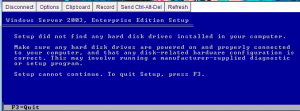
When you boot your virtual machine (configured to use Virtio Disks), the Windows Setup will stop because it has no information about the Virtio disks. You will get message similar to this one
Click to enlarge picture
No Hard disks have been detected. In order to be able to perform the installation, you will need to provide virtio drivers during the text setup stage. You will need to press the famous F6 key and pass the drivers information. This means that you will need to mount a floppy disk drive in Proxmox VE. This operation cannot be done via the Web interface. We will need to issue some console commands in order to be able to mount the floppy drive. Read further to know how to perform this action..
Method 1 – Manually providing virtio drivers during Windows 2003 Installation
To perform this procedure, you will need to
- Download the virtio iso image
- access to the proxmox ve console or using ssh client (putty) to connect to the console
Step 1 – Download the virtio iso image and getting the virtual floppy image
You can download the virtio image from the Fedora project web site : http://alt.fedoraproject.org/pub/alt/virtio-win/latest/images/bin/
Click to enlarge picture
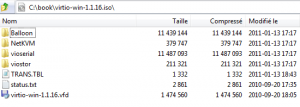
You have to mount the iso image and extract the file virtio-win-xxx.vfd
Click to enlarge picture
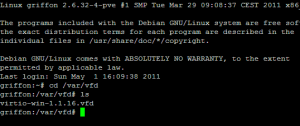
You will then need to copy this file onto the host. I’ve created the following directory on the ProxMox Ve host /var/vfd and copied the file over there.
Click to enlarge picture
Step 2 – Mounting the virtual floppy image
- At this stage, simply start your virtual machine and access the console locally or remotely using an ssh client. In this console, issue the following command
# ps x | grep kvm | grep <VMID> (where VMID is the ID of the virtual machine where the floppy drive needs to be mounted ). This will give you an output similar to the following screenshot
Note: you can find the VMID of a virtual machine in the web interface.
Click to enlarge picture
- Simply copy the output of the command starting at /usr/bin/kvm. As an example, you have something like:
/usr/bin/kvm -monitor unix:/var/run/qemu-server/120.mon,server,nowait -vnc unix:/var/run/qemu-server/120.vnc,password -pidfile /var/run/qemu-server/120.pid -daemonize -usbdevice tablet -name W2K3_VIRTIO_DISK -smp sockets=1,cores=1 -nodefaults -boot menu=on -vga cirrus -tdf -localtime -rtc-td-hack -k fr-be -drive file=/var/lib/vz/template/iso/Win2003_Ent_SP2_CD_VL.iso,if=ide,index=2,media=cdrom -drive file=/var/lib/vz/images/120/vm-120-disk-1.raw,if=virtio,index=0,cache=none,boot=on -m 512 -netdev type=tap,id=vlan0d0,ifname=tap120i0d0,script=/var/lib/qemu-server/bridge-vlan -device virtio-net-pci,mac=92:38:D0:C0:CC:48,netdev=vlan0d0
- Stop the Virtual machine
- In the console (or from your ssh client), you can paste the output from the previous command and you append at the end the following information -fda <path_to_ vfd_image>. This command will restart your virtual machine and mount the virtual floppy as well.
Click to enlarge picture
Step 3 – Specify additional drivers during Setup of Windows
It’s time to perform our windows installation. Open the vnc console. If the setup of windows 2003 has already started, restart the virtual machine. When the Virtual machine reboots, press F12 and select boot from CD/DVD. You will then see, press any key to boot from cd…. message. Press any key and the setup wizard will sart.
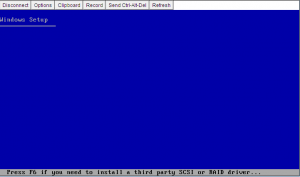
When the Windows 2003 Setup starts, you have to press the F6 Key in order to be able to pass your virtio drivers to the setup routine. You have to be fast because this screen does not stay forever.
Click to enlarge picture
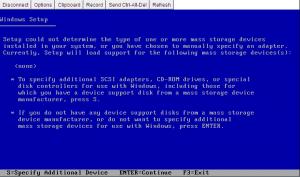
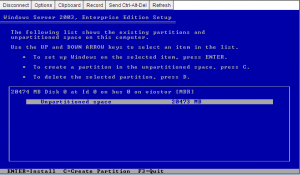
If you’ve been fast enough, you will see the following screen (see below). Press S in order to be able to pass the drivers to the setup routine
Click to enlarge picture
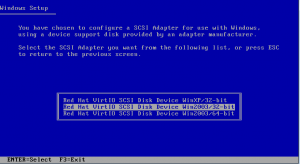
Based on your windows 2003 version, you can select the drivers that needs to be loaded into the system. Press Enter
Click to enlarge picture
Click to enlarge picture
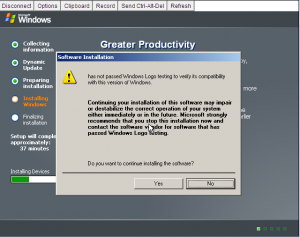
If everything happens as expected, you will be able to perform your windows 2003 installation. Note however that during the setup routine (the GUI part), you might see some warning display boxes telling you that the drivers are not signed. Press Yes
Click to enlarge picture
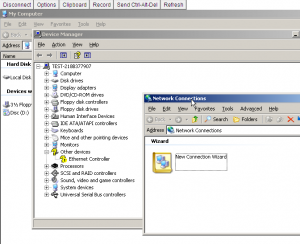
Finally, when your installation is completed, you will notice that the network card is not present within the operating system. You will need to mount the virtio iso image and update the drivers for your network card.
Click to enlarge picture
Final Words
This post has demonstrated how you could perform a windows 2003 installation virtual machine from scratch that was configured to use Virtio Disk type and network card. This method is working but requires a lot of small interaction with the user. You need to copy the vfd file onto the proxmox ve server, you need to start the kvm machine from the console,… after the installation, you will need to install the drivers for the network card…. As I said, a lot of actions needs to be performed with this method…..
Because it’s becoming late…I’ll stop here for today. But the next part of this post will show you how to create a windows 2003 iso image containing the virtio drivers and automate the installation process. With the “automated method”, you will need to prepare only once the windows 2003 iso image and you will be able to perform your kvm installation with virtio the same way you would do with IDE disk Type…
Stay tuned…. if you want to go the easy way
Till next time… see ya
Source : http://pve.proxmox.com/wiki/Paravirtualized_Block_Drivers_for_Windows



Awesome post! Why not just add another CD ROM drive though? That’s what I did, and it worked great for adding the driver.
Hello,
Thank you for the comments. Can you maybe explain in more details your procedure ? Other people might be interested to have other ways to perform installation
Very useful link…
Thank you for usefull tutorial.
Btw, creators of Proxmox are assholes – I saw post from 2010 that they will don’t add floppy drive support, because “paying clients don’t requested it”.
@ProxmoxGuy
Thank you for the positive feedback and your visit.
This post is a little bit old but we are pleased to see that it’s always useful
Till next time
see ya