Hello World,
Again this post will be quite straightford ! As explained recently, I’m working a little bit more with Exchange products. We are upgrading our infrastructure to the latest service pack which prepares our infrastructure to Exchange 2013 transitioning process. Installing the service pack is really not difficult. However, you have to carefully plan the process depending on your configuration.
Let’s see how to perform this update !
Get the Service pack
You can get the service pack 3 from here. You will need to extract the content. I usually placed the files on the Exchange Servers
Installation Order Based on Roles
The Microsoft recommended update sequence is to upgrade the Exchange roles in the following order
- Client Access
- Hub Transport
- Unified Messaging
- Mailbox
- Edge Server (can be done at any time)
Schema Updates
This service pack will perform schema updates. Based on your organization policy, you might need to have the schema updates policy approved first and then you will be able to proceed with the installation of the service pack within your organization. If you have the appropriate rights, the schema updates can be performed during the update process via the GUI interface. The Setup wizard will perform for you the schema extensions. Again, based on your organization policy, Schema updates can only be performed by the Active Directory team. This means that Active Directory team will manually perform the schema update by running the following command line
Setup.exe /PrepareAD
Impact on Mailbox Servers
If you are installing the service pack on a standalone Exchange 2010 server mailbox server (i.e. no DAG or CAS Array), be aware that during the upgrade process, the databases will be dismounted. You might want to foreseen some maintenance window to perform such update.
How to install Service Pack on CAS Array
If your organization is using CAS array, you will need to follow a specific procedure as well which is quite straightforward as well. If you have an Active directory site hosting CAS Array servers and DAG servers, you will need to upgrade all the CAS server first before performing the upgrade on the Mailbox Servers. To upgrade your CAS array, you will simply stop accepting new connection for the CAS server to upgrade and remove it from the load balance group when no more connections are present. When this is done, you can perform the upgrade. When complete, you can add the server back to the load balanced infrastructure and perform the same operation on the remaining CAS Server in the load Balancer.
How to install Service Pack on DAG
If you need to upgrade the DAG, you can follow the instructions we have described for upgrading to service pack 2 (can be found here). The upgrade process has not change since then. In a few words, you will put the server to be upgraded in maintenance mode using a nice powershell script provided by microsoft team. You will then perform the installation of the Service pack 3 on this server and place this server back in the Active Mode. You will then need to perform the same operations on the remaining nodes. Once you start the process, you cannot stop it in the middle. All member servers of the DAG will need to have service pack 3 installed in order to have a fully functional DAG solution (and thus high availability).
Step by Step Installation Guide
In this section, we will go through the setup process and you will see that if you have experience with Exchange installation, there is nothing difficult in this process.
Step 1 – Download the Service Pack 3 from here.
Step 2 – Extract the content
Step 3 – Browse to the extracted content and locate the setup.Exe file.
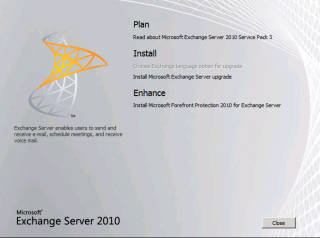
Step 4 – Double-click on it and the Setup Wizard starts. In the splash screen, click on the link Install the Microsoft Exchange server Upgrade
Click picture for better resolution
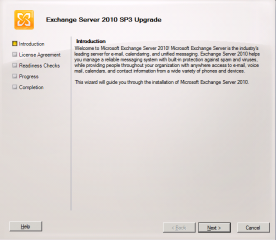
Step 5– In the Introduction Page, Press Next
Click picture for better resolution
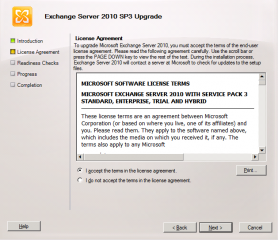
Step 6 – In the License Agreement Page, Tick I accept and Press Next
Click picture for better resolution
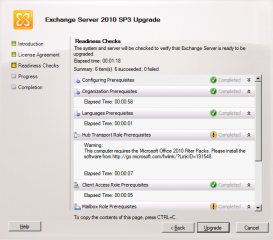
Step 7 – Wait for the pre-requisites check tests to complete. If you meed the pre-requistes, you can go through and press Upgrade. If not, install the missing components and try to run the setup again.
Click picture for better resolution
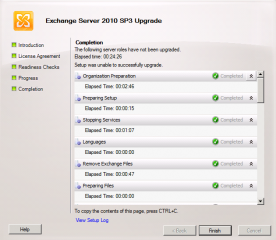
Step 8 – In the Completion page, review the summary installation and Press Finish
Click picture for better resolution
Note :
You can perform the installation of the service pack using a command line only. You would use something like this
Setup.com /M:Upgrade /InstallWindowsComponents
Check your Installation
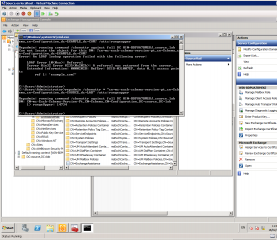
Finally, you can check if the installation has been performed correctly. You have multiple ways to perform this check. You can open the Management console, expand the server configuration node and in the middle pane, you can check the version of the Exchange 2010 server you are running. Exchange 2010 SP3 has the build number 14.3.123.4. If you look at the column Exchange Version, you should see the number 14.3 and then the build number 123.4. You did it, you have installed service pack 3 successfully.
Click picture for better resolution
You can also check the build number by using a powershell cmdlet. You would type something like
Get-ExchangeServer | fl name,edition,admindisplayversion
Final Notes
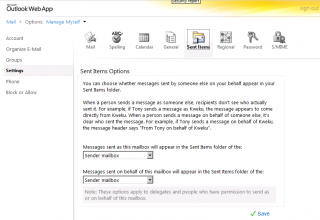
Voila ! As you can see, the process to upgrade Exchange 2010 is not that difficult. In the coming post, we will have a look at a “new feature” called “Sent Items Management Features”. Microsoft advertises it as a new feature but this one was already available in Exchange SP2 RU4 or 5. But apparently, Service pack 3 is providing a fully functional feature.
Click picture for better resolution
I’m quite interested in this feature because I had to deal with such kind of situation. But I’ll explain this in another post.
Till Next Time
See ya
References :
How to install or upgrade Service Pack for Exchange 2010
