Hello World,
Today, I’ll write about freenas solution and show you how to install it on your proxmox ve infrastructure. It has been a long time I’vn’t been working with Freenas and I have to say that I was pleased with the version 8.x of the software. This post will serve as base for a coming post that will explain how to use the Freenas solution as an iscsi storage infrastructure.
Freenas and related projects (Forks)
Apparently, the project has encountered some issues/divergence which leads into some forks. The initial freenas version was about to be put in a maintenance mode. A sponsor came up and decided to rewrite the code and released the FreeNas 8.x. Other people have decided to reuse the original code and have provided updates release. This group have created the NAS4Free “foundation”. Another core developer decided to port freenas on a debian distribution and has developed Open Mediavault NAS software.
In this post, we will focus mainly on the FreeNas solution. In the future, we might want to test the Open Mediavault solution.
Installing FreeNas Software in a virtual environmnent.
Note : we assume that you have a running proxmox ve infrastructure
Freenas documentation is well done and you can find instruction on how to install the freenas software within a virtual infrastructure. It’s possible to install the freenas on a usb key as well but this is not the purpose of this article. To perform the installation on proxmox ve platform, you will need
- Download the iso image from the freesnas.org web site (or from here)
- upload the iso file into your proxmox ve infrastructure
- create a kvm virtual machine that will be hosting the freenas software
- perform the installation
- perform the initial configuration of the freenas software
Step 1 – upload the iso image into the proxmox ve infrastructure
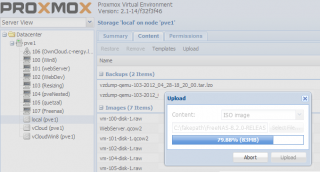
From the Proxmox ve web interface, click on the storage node (on the left menu). in the right menu,click on the content tab and then click on the upload button. A popup box will be displayed. Browse to the location where the iso file is located and press the upload button
Click on Picture for Better resolution
Step 2 – creating the virtual machine
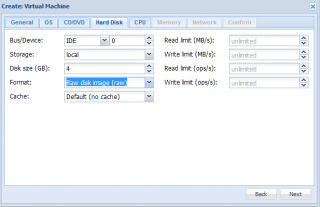
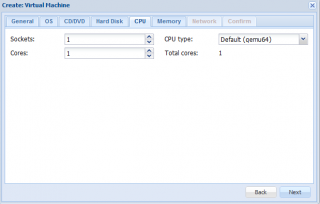
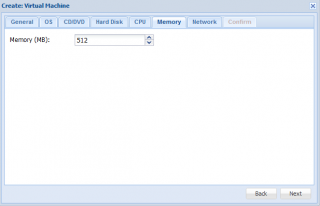
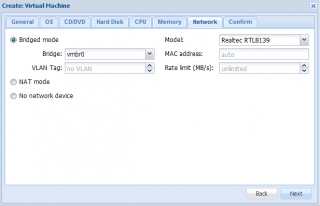
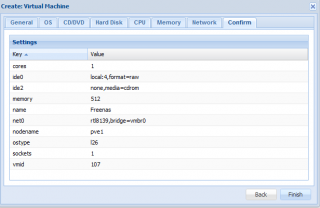
Based on the freenas hardware recommendation when running in a virtual infrastructure, we will create a virtual machine with
- 4 GB disk space (OS)
- at least one 2 GB disk space (Data)
- 512 MB RAM
- 1 Network card
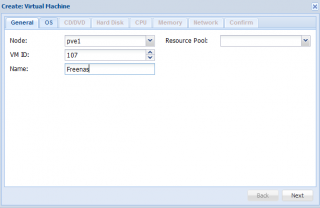
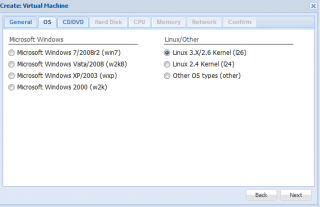
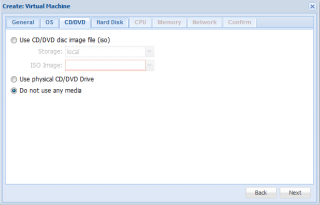
In the proxmox ve web interface, on the right top corner, click on the create vm and the wizard will be displayed. For illustration purposes, we have provided the screenshot of our virtual machine.
Click on Picture for Better resolution
Click on Picture for Better resolution
Click on Picture for Better resolution
Click on Picture for Better resolution
Click on Picture for Better resolution
Click on Picture for Better resolution
Click on Picture for Better resolution
Click on Picture for Better resolution
At this stage, you have created your virtual machine… Let install the software on it !
Step 3 – Install FreeNas on the Virtual machine
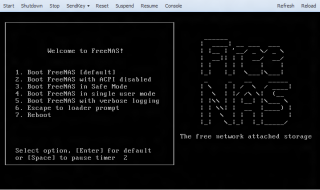
The installation is also quite straight forward. We have provided a quick step by step installation instruction for people who might not be familiar with the software. When you start the virtual machine (assuming that you have mounted the freenas iso image), you will be presented with a menu similar to the following
Click on Picture for Better resolution
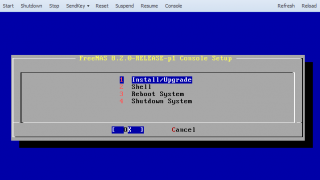
In the setup menu, select the first option Install/upgrade. Press OK
Click on Picture for Better resolution
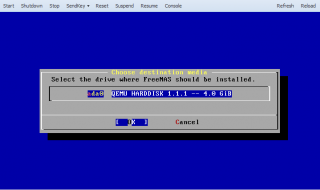
In the next screen, select on which disk you want to install the freenas softtware. When done, Click OK
Click on Picture for Better resolution
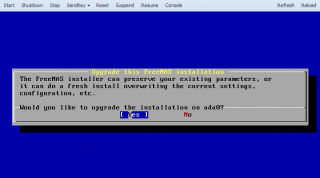
In the next screen, simply press Yes or No given that a new installation
Click on Picture for Better resolution
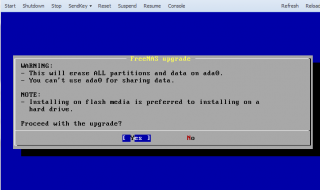
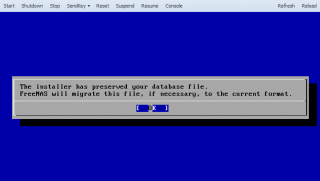
If you have pressed Yes, you will see the following screens. Simply press OK
Click on Picture for Better resolution
Press OK
Click on Picture for Better resolution
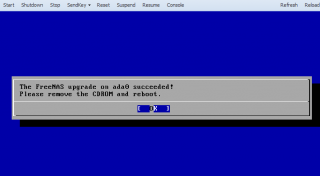
After installation, you will be asked to reboot the machine (and to remove the cdrom).
Click on Picture for Better resolution
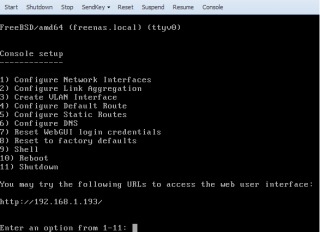
After rebooting, you will see the following menu. Select option 1 as we want to use a fixed ip address
Click on Picture for Better resolution
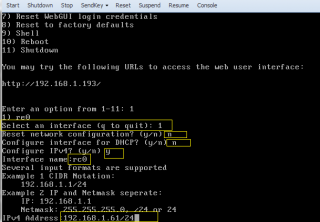
Follow the instruction on the screen (see the screenshot) in order to set your own IP Address configuration
Click on Picture for Better resolution
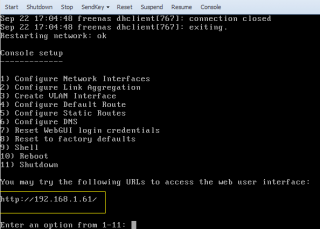
When done, you can check in the menu page that the ip address is set correctly.
Click on Picture for Better resolution
We will not investigate further the console menu given that a lot of these options can be configured via the web administration interface of the Freenas software solution.
Step 4 – Initial Configuration of the Freenas
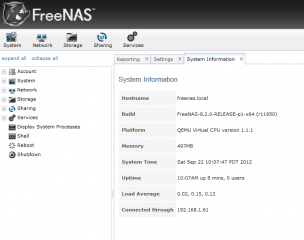
To perform the initial configuration of the Freenas virtual machine, you will simply open your browser and type the ip address you’ve just set above. The admin interface will open and you do not need to provide any user account or password (this is the default behavior).
In the web interface, you will land on a page similar to the following where you can see system information
Click on Picture for Better resolution
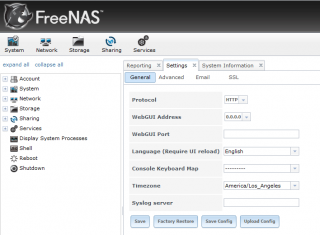
If you click on the settings tab, you can configure settings for the freenas machine. I have changed http from https and set my regional settings as required.
Click on Picture for Better resolution
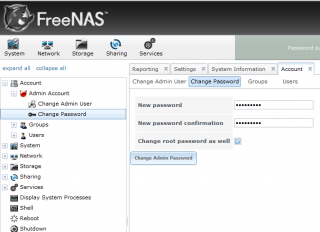
Then on the left menu, we have expanded the account node because we want to protect the access of the web interface with a password. In the admin account node, you can click on the change password node and in the right pane you can set your password.
Click on Picture for Better resolution
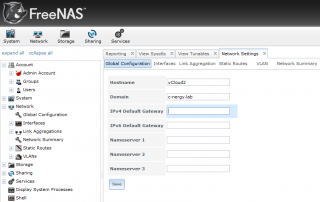
Finally, on the network node level, we have clicked on the global configuration node and we have set a name, a default route and dns service information.
Click on Picture for Better resolution
And Voila ! You have now an up and running freenas box on your network.
Final Notes
In this post, we have simply show how to perform the initial installation and configuration of the freenas software solution. This article will serve as a base of a coming post that will explain how to use this box as an iscsi storage infrastructure. As you have seen the installation and initial configuration is relatively simple, we will see in the future how we can add storage and use it as a cheap storage box
Till Next Time
See ya

Good afternoon. I am not an expert I need your advised, I knew that in other to freenas to work fine need to created some partitions, Root, swap, and space for the application. Please confirm.
If I have a server and I want to virtualized it please sent me the optimun configuration, do I need, in terms of OS, storages, etc.
The best way to distribute the virtual server.
I am spanish speaker .
Joaquin
Hello Joaquim,
Given that I do not know what you want to achieve,I’ll not be able to provide valid answers. If you want to virtualize Freenas, you can have a look at their wiki page where a complete documentation can be found. Freenas recommend to run Freenas from a usb stick. the wizard will take care of the partitioning.
Using the freenas documentation, you will be able to find hardware recommendations and recommendation when virtualizing a freenas.
extract from documentation found here (http://www.freenas.org/images/resources/freenas8.3.0/freenas8.3_guide.html#__RefHeading__1114_145473606)
2.2 FreeNAS® in a Virtual Environment
In order to install or run FreeNAS® within a virtual environment, you will need to create a virtual machine that meets the following minimum requirements:
512 MB base memory size
a virtual disk at least 4 GB in size to hold the operating system and swap
at least one more virtual disk at least 4 GB in size to be used as data storage
a bridged adapter
This section demonstrates how to create and access a virtual machine within the VirtualBox and VMWare EXSi environments.
hope this help
Till next time
see ya
Hi Griffon,
i tried to get freeNAS running in a KVM created with proxmox but ran into some problems.
First: The ISO didnt boot. I saw the startup menu but after selecting an item it freezes.
Solution: I tried the 32Bit ISO.
Now i was able to install freeNAS.
I set the network settings on the console and connected to the webGUI.
But when i try to do any change (Create Storage, Change Admin PW,…) it only says “an error occurred”
Did you get any problems like that?
Hello there,
I have installed the 64-bit as a kvm and didn’t encounter any issues during the installation.
Even after the installation, I was able to change/modify settings and create storage or iscsi target….
The process was really straightforward. It’s seems that your proxmox ve installation has an issue or maybe disks/storage have some problems…
Hope this help
Till next time
Hey
Thanks for your extensive write-up on the Proxmox VE. I’m running Proxmox VE on desktop grade hardware and so far all is running fine. However, I want to virtualize my fileserver and I’m looking for a good way to share the local disks to 1 VM (or VC) that will serve as a fileserver of this data to the internal network.
I’ve been messing arouind with NFSv4, but that didn’t really worked out.
Any ideas?
Thanks in advance from a fellow belgian 🙂
Hey Alchy,
I do not understand what you wanna do
Do you want to present a PVE local physical disk to a virtual machine (passthrough configuration) ? If this is the case, you simply edit the kvm config file and add a line to point to the physical disk
IF you are trying to perform something else, you will have to explain what. IF you want to virtualize a file server, simply convert it to a vm.
Which OS is the file server running Linux/Windows ? Do you want to use freenas as file services solution, then you could configure Freenas to serve NFS or SMB (Windows Shares) requests
Provide me more info on what you want to do
Till then
See ya
Hey
To use your own words, I want to present a physical local disk (like an external hard drive that is connected to the Proxmox server) to a virtual machine (the file server I want to set up – which then will be the frontend to the internal LAN).
Hope this clarfies a bit.
BR//
Alchy
Hello Alchy,
Try the following
Connect the disk to your proxmox ve, then get the name of the disk (something like /dev/sdb)
Open the vmid.conf file and add the following line
ide1: /dev/sdb
or you can use the following command line -ide# /dev/sdb
qm set
Restart the virtual machine and you should see the additional disk
Hope this help
Till next time
See ya
Thanks for the tip, it actually did the trick what I wanted to do.
Thanks!
No Problem Alchy
I’m glad it worked and fixed your problem
Till next time
see ya