Hello World,
Recently, I’m encountering some small issues wit the web based VNC Viewer available within the Proxmox VE management interface. I can launch the vnc viewer and connect to the virtual machine. Howerver, the vnc viewer does not return the full desktop or screen interface. I can see only a portion of the screen and not the rest. The web based VNC viewer cannot be resized.
I already mentioned, this issue in a previous post. Using some workarounds we were able to proceed with the installation and the configuration of the virtual machines. In some cases, It simply not possible to perform installation or configuration activities because you missing the screen part where you need to click on a button or perform a choice or provide information. You are stuck !
So far, the only workaround I’ve found here is to install an external VNC viewer client and perform the connection from this vnc client.
This post will try to explain how you can implement this configuration…Ready ? So, let’s go !
Preparing the proxmox VE host
We assume that you have Proxmox VE 2.x installed. I did not try this on previous version so I do not know if this would work. On the Proxmox VE host, we will need to install the openbsd-inetd package. In a few words, this package will install a network daemon program that will manage incoming network connections. The daemon configuration file will allow you to tell which program needs to run when an incoming request is received. In our situation, installing this package will ensure that the Proxmox VE host listen to incoming VNC incoming requests.
Installing openbsd-inetd package
To install the openbsd-inetd package, you simply type (from the console or using the web “console”) the following command
- aptitude install openbsd-inetd
When prompted, Press Yes to confirm the installation of this package
Click on image for better resolution
Configuring the openbsd-inetd daemon
At this stage, the service is not started because not configured yet. We will need to modify the inetd configuration file. For each virtual machine that you want to connect to using the external vnc viewer, you will need to add a entry in the /etc/inetd.conf file using the following structure
<%port> stream tcp nowait root /usr/sbin/qm qm vncproxy <%vmid%>
- where <%port%> is the port number where the service will listen for incoming requests
- where <%vmid%> is the id of the virtual machine you want to connect to
In my example, I will need to connect to the Virtual machine with ID 104 and I will assign the VNC port (where to listen to) to 59004. You can edit the file and add the following line at the bottom of the configuration file
- 59004 stream tcp nowait root /usr/sbin/qm qm vncproxy 104
Finally, you will need to restart the openbsd-inetd daemon to have the changes applied. You perform this action by issuing the following command
- /etc/init.d/openbsd-inetd restart
Downloading and installing TigerVNC client
In order to connect to the virtual machine from an external vnc client, the client needs to support authentication. Well known vnc client such as RealVnc or TightVNC cannot be used in this scenario because they do not support (yet) TLS authentication mechanism.
The Proxmox Wiki mention that a working client would be the TigerVNC. It’s the first time I’ve been used this vnc client and I’m really happy with it. This vnc client will probably be part of my Toolbox kit from now on.
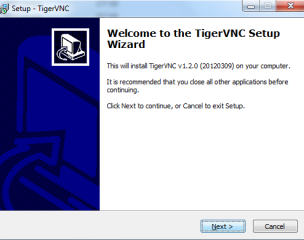
You can download the latest version of the utility here. Howerver, we recommend you to use the version 1.1.0 because it’s seems to be the most complete and most stable one. When you have download the utility, double-click on the exe (I’m assuming that you have chosen the Windows version) and the installation wizard will start
In the Welcome page, Press Next
Click on image for better resolution
In the license Agreement Page, Accept and Press Next
Click on image for better resolution
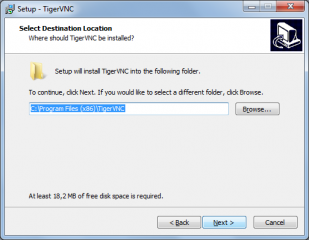
In the Select destination location, accept default or choose a location and press Next
Click on image for better resolution
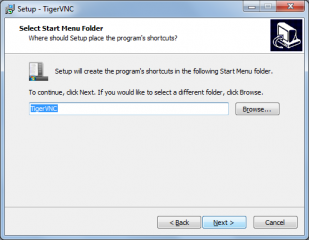
In the Start Menu Page, accept default and Press next
Click on image for better resolution
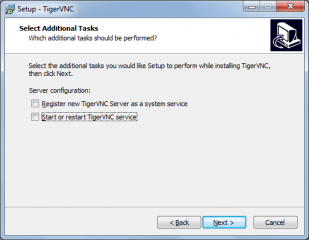
In the additional tasks, uncheck the checkboxes. We only want to have the vncviewer installed (and not the vncserver part)
Click on image for better resolution
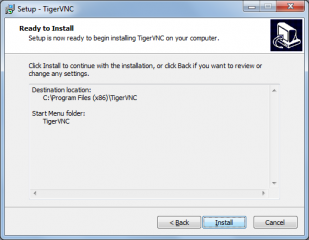
In the Ready to Install page, Press Install
Click on image for better resolution
Wait for the wizard to complete. In the finish page, you simply press Finish.
To check that you have installed the utility correctly, you can open the start menu and locate the TigerVnc Viewer reference.
To ensure that the Proxmox VE host will be accepting incoming vnc connection, you can perform the following test. First ensure that your target virtual machine is running and using the telnet client, try to perform a connection to the Proxmox VE host specifying the port you’ve defined in the /etc/inetd.conf file.
Click on image for better resolution
If everything is fine, you should end up with something like this
Click on image for better resolution
Connecting to the Virtual machine using TigerVNC client
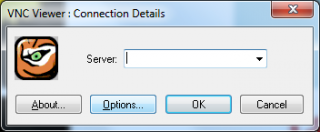
Almost there. We will now try to connect to our virtual machine using the tigervnc client. Click on the tigerVNC icon in the start menu and you should see the following dialog box displayed.
In the server box, type the name of the proxmox ve host followed by the port to be used (i.e. proxmoxhost:59004)
Click on image for better resolution
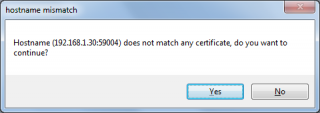
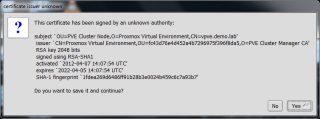
Press on the OK button, you might see a message similar to the following. Press yes
Click on image for better resolution
You might then get a prompt similar to the following. You should see this warning only the first time you make the connection. Again Press Yes to confirm your choice
Click on image for better resolution
In the Authentication box, you will need to provide the credentials to perform the connection. You will use the credentials you use to connect to the Proxmox VE web management interface. Note the format of the user accout, we have used root@pam
Click on image for better resolution
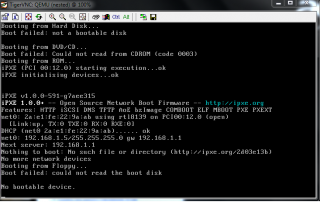
After a few moment, you should see the vnc console displaying the screen of your virtual machine. You have succesfully connected to your virtual machine using an external vnc viewer
Click on image for better resolution
Final Words
With Proxmox VE 2.0, it’s possible to connect to your virtual machines using an external vnc client. This is a nice to have feature. I had to use this method because the web-based vnc viewer was not always working as expected. The web version cannot be resized and this can be problematic when the console does not display the full deskop. This is quite annoying. Indeed, I really like the idea to have to manage my proxmox ve infrastructure using only a web browser. I can perform my job from any machines and I do not need to install any additonal tools. The fact that the web-based version does not always works give us some limitations. Let’s hope that this can be fixed in coming releases.
Till Then
See ya





Hi,
I tried this with the latest 2.1 setup; steps to the tee. It doesn’t work! 🙁
Hello Shantanu,
I have upgraded my Proxmox VE to the latest version and I can see that the VNC tiger viewer is still working. I can use the TigerVNC 1.1 and the version 2.0.
I’ll install a brand new Proxmox VE with the latest iso and make another test…
Can you provide more details about your problems.
Which tigerVnc (from which os) are you using ? Have you checked that the Proxmox ve accept connection (using Telnet command) ?
Where are you blocked ? Do you see a black screen when connecting or do you fail to connect completely
Let me know so I might be able to help you
See ya
Hello Shantanu,
I can confirm you that this setup is working fine for new installations as well. Ensure that you have your system up to date (apt-get update and then apt-get upgrade).
ensure that you have no typo in the inetd.conf
<%port> stream tcp nowait root /usr/sbin/qm qm vncproxy <%vmid%>
restart the service
Use tigerVNC to connect by specifying IP:port and you should be good to go
Hope this help
See ya
I saw something about this being possible using SSH port forwarding…
I would really like to be able to use an external VNC client that is outside of my home network, using ssh port forwarding to route to the proper Guest…
Do you know if this is possible? I’m not familiar with port forwarding enough to know how to make it work. I can establish an SSH session to my proxmox server….and I can set remote and local ports…but I can’t figure out what ports need to be redirected.
Any thoughts?
Thanks
Hello Altreality,
is this what you are looking for http://pve.proxmox.com/wiki/VNC_over_SSH_Tunnel_in_PuTTY ?
If not, let me know, i’ll try to post something on the topic
till next time
See ya
hello!
I’ve tryed this to connect windows 7 to virtual machine windows xp on proxmox lates, and it doesn’t work,
i need help.
thank you.
Hello Lyes,
You do not provide me much information here…. Could you be a little bit more specific
questions :
which vnc client are u using ?
have you install the openbsd-inet package on the proxmox ve
have you updated the /etc/inetd.conf to grant access to the vm you want to vnc
have you test your configuration by making a telnet connection ?
if this is working, you should be able to connect using TigerVNC (as described in the post) to your virtual machine
Please check your configuration first and provide more info about the error you are encountering
Hope this help
See ya
Thank you Griffon
I’m testin proxmox, i’m going to build a server and i’m comparing between proxmox and vmware ESXi, i explain what i done.
I installed proxmox on vmware 9, and i change the ip eth0 to init dhcp, with the server all done right.
I create a virtual machine windows xp on it.
When i ping from VM Win xp to server (proxmox) –> Result OK
When i ping from VM Win xp to my materiel machine –> Result OK
when i ping to server from my materiel machine (windows 7) –> result ok.
when i ping to VM Win Xp from my materiel machine (windows 7) –> no result
I would like install vnc to access the VM Win xp instead of accessing from the web console
I have done what is done on this tutorial well.but no result.
i’ve tested vnc, real vnc, tightvnc v 2.6.4 and tigervnc (with the two v1.2.0 then 1.1.0) always no result
Excuse my english if there any mistakes ( i’m not practicing it).
thank you.
Hello Lyes,
First, the fact that you cannot ping your Windows XP machine might be related to the fact that your XP box has the windows firewall enabled.
For you information, only the tigervnc client will work against the proxmox ve if you have followed the instructions in the post. The other clients vnc,realvnc,tightvnc does not offer TLS encrytpion and thus will not work if you do not change your proxmox ve configuration
In order to debug,
1 – can you provide me the output of the following command qm list (you run this on the proxmox ve server from the console)
2 – can you provide me the content of your inet.conf file
3 – Can you confirm that when you perform a telnet connection from your Windows 7 you can establish a connection to the proxmox ve server. when performing the telnet connection, specify the port you have specified in the inetd.conf file (ex: telnet 10.10.10.10 5901)
if you cannot perform a telnet connection, configuration is wrong….
What’s kind of error are you receiving – error message and at which stage (when providing the credentials, when performing the connection,…)
Hope this help
Till next time
Anyone know a similar process to allow the same guest VNC access with Proxmox VE 3.1?
Hi Jack,
the same works fine for Proxmox 3.1. I use xinetd, here’s a config for one VM:
service vnc-10100
{
socket_type = stream
wait = no
user = root
server = /usr/sbin/qm
server_args = vncproxy 100
#log_on_failure += USERID
}
Regards
Marc
With the Java VM viewer, you can’t resize it directly but if you change the resolution within the VM itself the Java viewer should resize to the new resolution.
Hello There,
We have tried this and this is not always working
Thank you for the info
Till next time
See ya
Works perfect form, but I have a problem when press f8 in the tiger vnc viewer… the software always crash…
Hello There;
We had some issues as well with TigerVnc and F8…
I do not know which version you are using.;..but if i remember…in order to solve the problem we had to downgrade to version 1.1x instead of using 1.2…
The current version is 1.3.x This version might have fixed this issue
Hope this help
Till next time
See ya