Hello World,
As you probably know, Microsoft is working on the next release of itsWindows Operating system. Windows 8 is still in Beta version and you can download a version here for evaluation purposes. I have to start evaluating Windows 8 capabilities and start thinking on how these features can provide added value to my customers.
This post will simply examine if Windows 8 can be virtualized on Proxmox VE 2.0. This post will combine 2 posts in one: How to install Windows 8 and how to create a KVM virtual machine running Windows 8 on Proxmox VE.
Let’s go !
Creating your KVM virtual Machine
In this step, we assume that
- you have already an up and running Proxmox VE 2.0 server.
- you have already downloaded the Windows 8 Beta iso file.
- You have already downloaded the virtio drivers (can be found here)
Step 1 – Upload the iso image in your PVE server
You first need to make the Windows 8 source file available to your Proxmox VE server. You have multiple options,
- you burn a DVD and insert it into your Proxmox VE Host.
- The other more efficient solution would be to upload the iso image to your Proxmox VE server. You can try to perform the operation using the Web Interface but this should fail because there is a 2 GB limitation. So the other way to upload your iso file is to use WinSCP utility, connect to your proxmox VE host and upload your iso image into /var/lib/vz/template/iso
Step 2 – Create your virtual Machine
From the Web Interface, on the right side, click on the button create VM.
Click on picture for better resolution
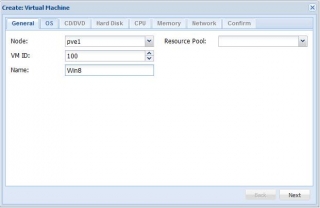
The following “wizard” will be displayed. In the general tab, provide the name of the virtual machine that you want to create. Press Next
Click on picture for better resolution
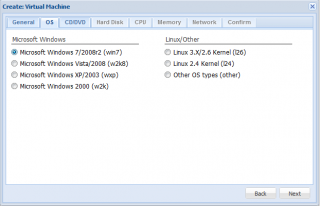
In the OS page, because there is not yet a windows 8 option, you will select the Windows 7 /2008 R2 option. Press Next
Click on picture for better resolution
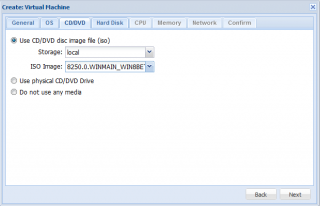
In CD/DVD tab, select install from iso image, select the storage location and the name of the iso file. Press Next
Click on picture for better resolution
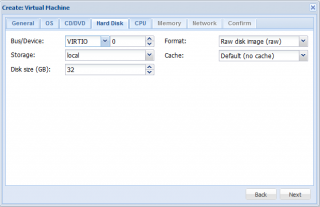
In the Hard disk tab, create a “Virtio” hard disk, specify the size in GB. Accept the default and Press Next
Click on picture for better resolution
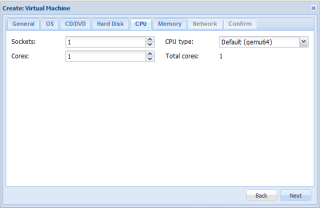
In the CPU tab, Accept default and press next
Click on picture for better resolution
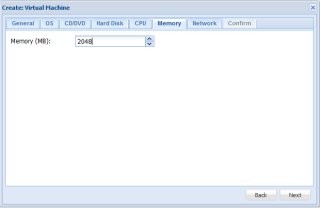
In the Memory page, select the amount of memory you want to assign to your virtual machine and Press Next
Click on picture for better resolution
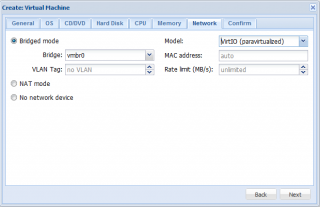
In the network tab, ensure that you have select “virtio” network card type and that you are using the Bridge mode. Press Next
Click on picture for better resolution
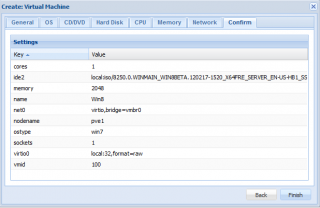
In the confirm page, Press Finish…
Click on picture for better resolution
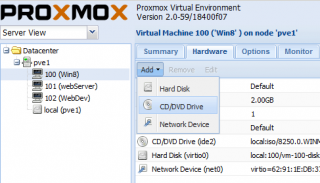
We are almost done with the Virtual machine configuration. In the Web interface, navigate to the newly created virtual machine. Click on it and in the right pane, go to the hardware tab. From this tab, press the Add button and choose the CD/DVD Drive option.
Click on picture for better resolution
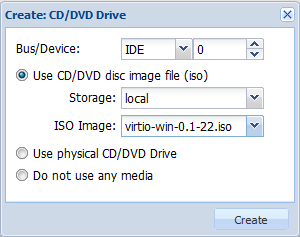
We will indeed configure a second cdrom drive in order to hold the virtio iso image. This will make the installation process easier…
Click on picture for better resolution
Note : Another change you can make is to change Display type in used. You simply select on display and click on the edit button. You will then be able to select from different options. We would recommend to use Standard VGA or vmware compatible mode. We will explain later in this post why..
Install Windows 8 in your KVM virtual Machine
Step 1 – Starting up your Windows 8 Installation
Within the web interface, you navigate to your virtual machine. you right-click on it and you select the option start. Right-click again on it and select the option Console
In the VNC viewer, you will see that the installation process is started…
Click on picture for better resolution
Note :
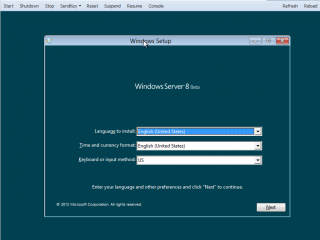
We have encountered a small issue here. The Wizard setup was having a bigger resolution than the VNC Viewer and thus some part of the Wizard were not visible to us. We tried to resize the vncviewer but did not work. We changed the display card in used in our virtual machine and we had a better result but still not the full screen size.
In the Windows Setup dialog box, select your language settings and press Next
Click on picture for better resolution
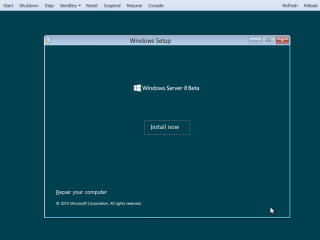
In the next screen, simply press the Install Button
Click on picture for better resolution
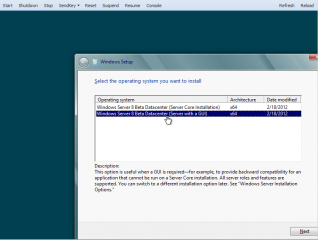
In the Windows Operating system list, select the correct version of Windows 8 you want to install. Here, you can decide to install the full version or the core version. This setting can be changed afterwards if needed or if you make a mistake during the install process. Press Next
Click on picture for better resolution
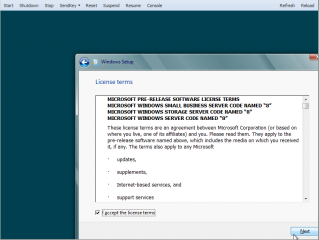
In the License agreement, Tick the box and Press Next
Click on picture for better resolution
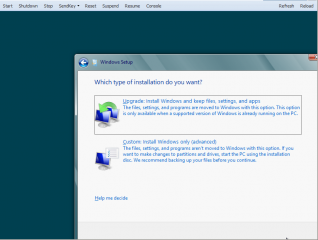
In the installation type page, click on custom.
Click on picture for better resolution
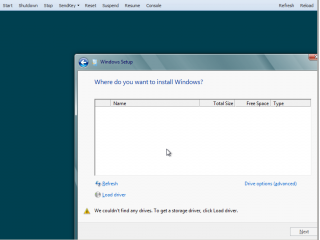
In the disk page, you will see that no disks have been detected. This is an expected behavior given that we have configured our virtual machine to use virtio disks. In this page, click on the link Load Driver
Click on picture for better resolution
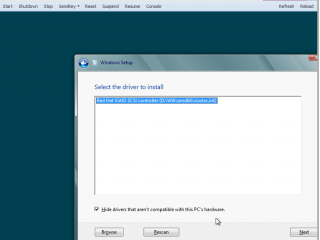
In the select drive to install, you will be able to browse to the CDrom containing the virtio drivers. The Wizard will detect the additional drivers (see screenshot). Press Next
Click on picture for better resolution
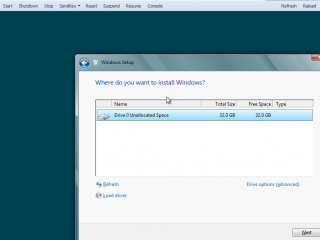
In the next window, you will see that the disk has been detected. Select the disk and Press Next
Click on picture for better resolution
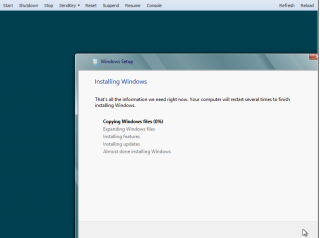
The Setup routine will perform the installation
Click on picture for better resolution
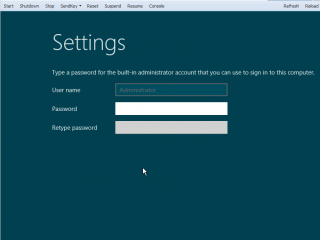
The setup routine will reboot the server. After the reboot, you will be ask to enter the password for the Administrator account. Press Next
Click on picture for better resolution
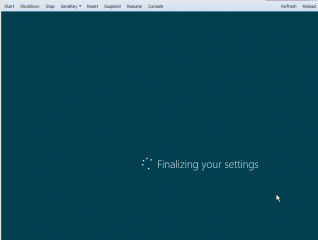
The Setup wizard will finalize the installation procedure.
Click on picture for better resolution
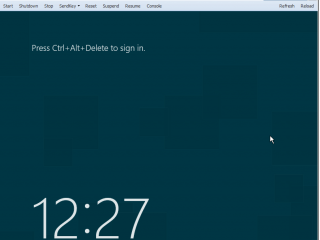
At the end of the setup procedure, you will be invited to press ctrl-Alt-del in order to login into your new system
Click on picture for better resolution
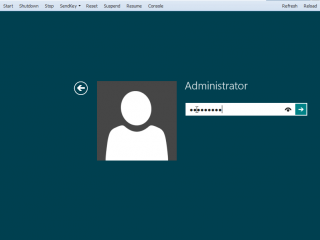
In the Login page, Provide your user account and password and press green arrow
Click on picture for better resolution
Step 2 – Post Setup Installation
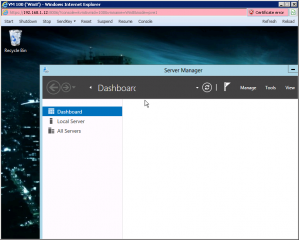
In this step, we need to install and configure the network interface and to enable remote desktop. We have not much choice given that the vncviewer does not display the full desktop on the screen. We couldn’t change the resolution of the screen in Windows 8 (greyed out). The workaround here is to use a remote desktop client to connect to the virtual machine…
Because we didn’t have access to the windows bar, we had to find a way to access the control panel.
Click on picture for better resolution
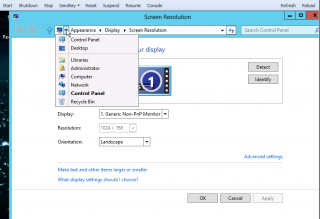
You simply click on desktop tile. When you reach the desktop, right-click on it and select Screen resolution. From there, you can have access to the different applets that can be used to configure your system.(see screenshot)
Click on picture for better resolution
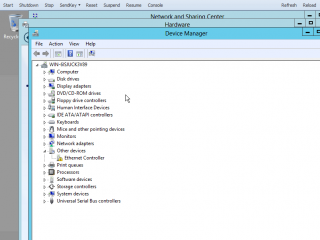
The other option is to type in the address bar the cmd.exe in order to display the command prompt. From this command prompt, type devmgmt.msc in order to display the device manager
In the treeview, you should see that under Other Devices, you have an Ethernet controller that has a exclamation icon. This is our Virtio Network card but windows does not have a driver for it. We will need to install it.
Click on picture for better resolution
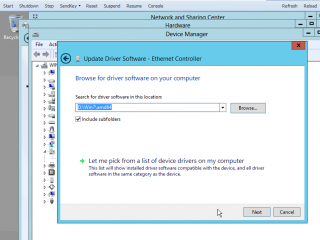
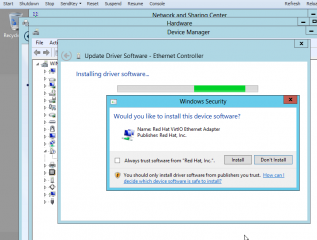
Simply right-click on the Ethernet controller and choose Update Drivers. The Update Drivers wizard starts. Select the option the browse for drivers and when prompted point to the virtio CD drive. (see screenshot). Press Next
Click on picture for better resolution
Windows will start the installation process but you will be prompted with a security notification. ensure that the check box is ticked and press yes to proceed with the installation
Click on picture for better resolution
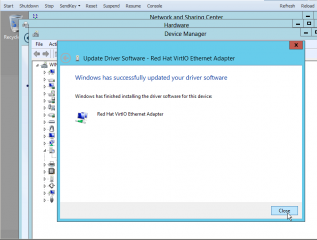
At the end of the process, you should see the succesfully completed message dialog box. Press Close
Click on picture for better resolution
You might need to assign a static ip address to your newly installed network card. To perform this operation, you simply go back to your command prompt and type ncpa.cpl. Select the network card and configure it accordingly
Finally, you will need to configure the Remote Desktop access. again, going back to your command prompt, type sysdm.cpl. This will open the System control applet. Select the Remote settings option and allow remote dekstop access
Final notes
Voila ! We have succesfully installed Windows 8 on a Proxmox VE 2.0 server. The process is quite straight forward. The really anoying point here is the fact that the VNC viewer does not adapt to the windows 8 screen resolution. The vncviewer web page seems to be fixed and cannot be resized.
The workaround here is to configure your virtual machine to accept remote desktop connections. You will then be able to access your virtual machine from a windows machine or a linux machine where a remote client supporting the rdp protocol is installed.
Now that you have Windows 8 installed, you can start testing some of the new features that come with it….We might blog about that in the future….but I’m pretty sure that some other people are already working on that… Well, we will see
Till next time
See ya


Thanks for this.
But, I want to install the Windows Phone 8 SDK, and the Emulator won’t launch because it says it fails to virtualize it.
Has anyone experience about this? Is it possible, at all, to run a Windows Phone Emulator within an emulated Windows 8 in Proxmox KVM?
Thanks!
Hello Grabriel,
I’ve never tried to install Win 8 emulator on a Proxmox VE
If I have time, I can give it a try…. note that hardware requirements have to be met (ex. SLAT,….)
Till next time
see ya