Hello world,
It’s has been quite a long time that I haven’t published anything about Proxmox VE 2.0 (still in Release Candidate phase). As you can imagine,I’m really busy with work and projects. So, today, I’ve managed to free up some time and wanted to have a look at the authentication realms features offered in Proxmox VE 2.0.
Let’s go
Quick Overview
Proxmox VE 2.0 has introduced drastic changes in term of new functionalities and management interface. The Web Interface has been completely redesigned and offers a plethora of new features and concepts (compared to version 1.x). One of these new features is the authentication realms.
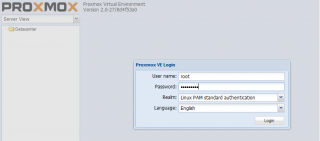
In the previous releases of Proxmox VE, a user was authenticated against the local server. Now, with the version 2.0, when you provide your credentials to login, you also have to specify which realm to use (see screenshot)
Click on picture for better resolution
With Proxmox VE 2.0, you can choose between 4 different realms in order to validate the credentials of a user. More specifically, you can use the following 4 realms in order to validate user’s credentials
- Linux PAM Standard authentication.
- Proxmox VE authentication server
- LDAP server
- Microsoft Active Directory
What’s happening behind the scene ? When you create a user account through the Web interface, user attributes will be stored in the file /etc/pve/user.cfg.
All attributes except the password. Based on the authentication realm you’ve have configured, password will be stored locally on the server or stored on a remote LDAP server that you will be using to authenticate your users.
Note : the /etc/pve/user.cfg file will also store the group information
Linux PAM vs Proxmox VE authentication realms
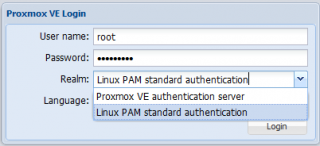
On a freshly installed Proxmox VE 2.0 host, you will be able to use, by default, 2 type of realms
- Linux PAM Standard authentication.
- Proxmox VE authentication server
Click on picture for better resolution
By default, the Proxmox VE host will be using the Linux PAM standard authentication realm. This authentication realm is based on the authentication mechanism used by any debian systems. Users will be authenticated by the local system. When a user logs in, the system will check against its database if the user is granted the request access or not.
Linux PAM standard Authentication realm
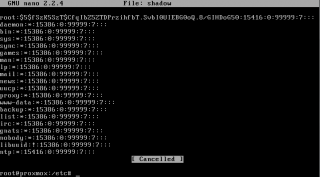
If you use the Linux PAM standard authentication realm, password information will be stored in the default location used by the system (i.e. /etc/passwd and /etc/shadow). The first file contains user attributes (as the user.cfg used by PVE) and the /etc/shadow store in an encrypted form user password. (I think the encryption algorithm used by default is DES – not sure). The following screenshot shows the format of my /etc/shadow file.
Click on picture for better resolution
Proxmox VE Authentication realm
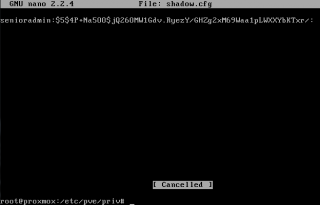
You can also choose to use the Proxmox VE authentication realm which is quite similar to the Linux PAM authentication mechanism. The Proxmox VE team has adpated a unix-like password system where the password will be encrypted using the SHA-256 algorithm in a specific location on the Proxmox VE host file. Using this authentication realm, the system will store the configuration file under /etc/pve/priv location. You can edit the /etc/pve/priv/shadow.cfg file and see that user and password information has been stored there.
Click on picture for better resolution
Active Directory authentication realm
With Version 2.0, you can also use Microsoft Active Directory as an authentication realm. However, before being able to use this realm, you have to define it within your proxmox VE infrastructure. You will also need to create the user account in the Active Directory and create the same user account on the Proxmox VE host. We will quickly demonstrate how to create an Active directory Realm here after..
Step 1 – In your Proxmox VE host, at the datacenter folder node, locate the tab authentication
Click on picture for better resolution
Step 2 – click the add button and select the option Active Directory Server. The Add:Active Directory Server dialog box will popup
Click on picture for better resolution
Fill in the following minimum information :
- realm field: enter a generic name in order to identify your AD domain. Do not use space or dashes or you will receive an error message.
- Domain field. Enter the fully qualified domain name of your Active Directory
- Server : enter the name or ip address of a Domain controller that will be processing the authentication
- Port : accept default
- SSL : It’s seems recommended to check this box.
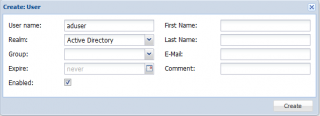
When this is done, you can start creating users on the Proxmox VE host and specify the newly Active directory realm to be used. Notice that you do not have to provide any password because the system expect to receive the information from the Active Directory…
Click on picture for better resolution
In order to have authentication working, you will need to create or ensure that the same user account exists within your Active Directory. When you are ready, you can simply try to login using the AD user account and the password (used to login into the active Directory) in the logon page. Do not forget to select the correct realm i.e. you configured Active directory realm.
LDAP realm
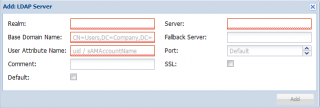
Active Directory is the Microsoft implementation of the LDAP service. Proxmox VE 2.0 can also be configured to authenticate against a “standard” LDAP server. I do not have Open LDAP server configured in my network but I’m assuming that the approach to configure the LDAP realm would be similar to the Active Directory realm.
Click on picture for better resolution
Final Words
In this post, we have seen which authentication realms are supported by Proxmox VE. Wewanted to explain the different authentication mechanism available with this release. Even if Proxmox VE support Active Directory as authentication services, it seems the integration is not complete. You still need to create account in two locations. (Active Directory and Proxmox VE Host). This post was only the start of the journey. In the next post (coming soon, I hope ), we will go a step further and will explain how to create and manage users and groups based on the different realms you want to use…
Till next time
See ya




Dear,
I was added active directory information but is not working
or how can i change content /etc/pve/domains.cfg
Please, Can you help me.?
Thanks
@Mehmet,
You have to be more specific in what’s not working… Do not forget that you need to create AD users on your proxmox ve in order to have a counter part in active directory and be able to authenticate
You might want to read some more info about Proxmox Ve and Active directory… see https://pve.proxmox.com/pve-docs/chapter-pveum.html
Hope this help
Till next time
See ya