Hello World,
A few days ago, Microsoft released the Service Pack 2 for Exchange 2010. I have informed you about that in my previous post. I didn’t explain in much details the new things brought by this service pack because you can find plenty of information on the web. Today, I’ll simply describe how to perform the installation of this service pack. The process is not complex or difficult as you will see. I simply need to describe the procedure somewhere because in a near future, I might need to update some Exchange servers to the latest version. So, let’s do this….
Prepare your update to Service Pack 2
In this post, we assume that you will be upgrading Exchange servers that are not members of a DAG. The next post will get a look at that.
Installation Order based on Server Roles
When you perform the upgrade process, you should respect a certain order. Indeed, Microsoft recommends you to perform the upgrade in this way:
- Client Access
- Hub Transport
- Unified Messaging
- Mailbox
- Edge Server (This server role can be upgraded at any time. we would recommend to perform this as the last step of your upgrade process)
Download the Service pack 2
You can get the service pack 2 from here. You will need to extract the content. I usually placed the files on the Exchange Servers
Schema Updates
The service pack will perform Schema extensions or updates. You have 2 approaches here (depending of the type of organization you are working for).
Option 1 :
- You can decide to first update the schema and then perform (or delegate) the upgrade process to the appropriate team. If you go for this approach, you will first need to run the Setup.exe /PrepareAD command on the Schema master. To perform this operation, you need to have Schema Admins rights and Exchange Organization rights
Option 2 :
- You can also simply run the Service pack 2 through the GUI (or command line) and get the setup routine to perform the Schema update. If you use this approach, the user account who perform the operation needs to have also Schema admin rights and Exchange Organization rights.
At this stage, you have all the necessary information in order to start the real upgrade process
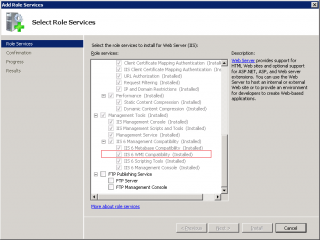
Install the IIS6 Compatibility WMI web service feature
Because Exchange 2010 SP2 re-introduce the OWA MINI functionality, you will need to install an additional component called IIS6 Compatibility WMI. To add this component, you can use the Server Manager GUI, expand the Roles node and select the Web Services Role. In the right pane, locate the option Add Services to the role
Click on the picture for better resolution
or you can use the powershell command line (on a windows 2008 R2)
Import-module ServerManager
Add-WindowsFeature Web-WMI
Update your Exchange Server to Service Pack 2 (using the GUI)
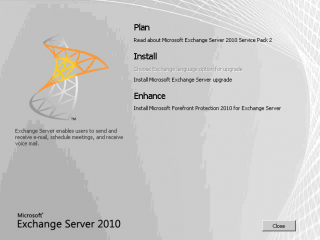
We should be ready to perform the installation of the service pack 2. Navigate to the location where you have stored the Service Pack 2 files. Locate and click on setup.exe. The following Screenshot will be displayed
Under the Install section, click on the link “Install Micrsoft Exchange Service Upgrade”
Click on the picture for better resolution
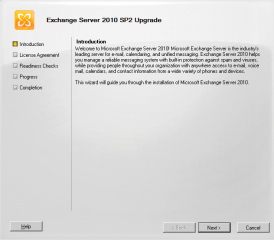
You will then be presented with the Introduction page of the Service pack 2 Installer. Press Next
Click on the picture for better resolution
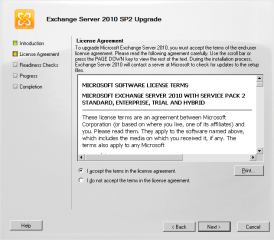
The license agreement page is displayed. Accept the license agreement and Press Next
Click on the picture for better resolution
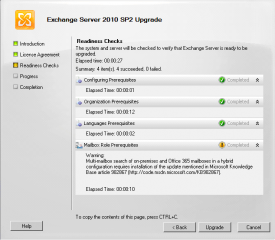
In the readiness check, the setup routine will ensure that everything is OK. If you haven’t installed the IIS 6 compatiblity component, you will be notified here. If you are using an Hybrid configuration, you might need to install an additional hotfix (see my screenshot). When the check is completed (and successful), you can click Upgrade
Click on the picture for better resolution
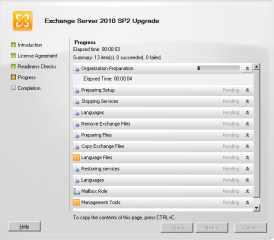
The Progress page will be displayed. You will need to be patient (30 min to 1 hour) to have the installation completed.
Click on the picture for better resolution
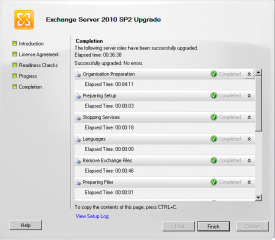
If everything happens correctly, you should see the completion page with green ticks everywhere. You can press Finish. You have performed your upgrade successfully.
Click on the picture for better resolution
Update your Exchange Server to SP2 (using the command line)
To perform the installation from the command line, you can simply run the following command.
Setup.com /M:Upgrade /InstallWindowsComponents
Final Notes
Service pack 2 does not require a reboot after installation. However, I usually perform a reboot after installing a service pack. The choice is yours….
As you have seen installation process is not to complex on non DAG members servers. The next post will have a quick look at the process of upgrading DAG member servers.
Sources :
Most of the information about the update process can be found at http://technet.microsoft.com/en-us/library/bb629560.aspx
