Hello World,
In the previous post, we have seen the process on how installing Exchange Service Pack 2 on a Exchange server not member of a DAG. In this post, we will quickly provide the process to perform such update on DAG members. Most of the information about the update process can be found at http://technet.microsoft.com/en-us/library/bb629560.aspx.
This technet link provides some information about the ugprade process for DAG members. It also mention the use of the maintenance scripts (startDagMaintenance.ps1/stopDagmaintenance.ps1) but their usage is not clearly mentioned. We have used the information found at http://thoughtsofanidlemind.wordpress.com/2011/12/05/installing-exchange-2010-sp2/ in order to write this post. The last link provide a much more simpler upgrade process and it’s working since we have tested this procedure.
So, let’s Go !!
Upgrading DAG members to SP2
Note :
Before running this procedure, read the following post that explain what needs to be prepared in order to perform a successful installation of Service Pack 2
Step 1 – Put the Server in maintenance mode
In my scenario, I have a 2 node DAG infrastructure. We will upgrade the Node 1(called CASN1) and perform the remaining node afterwards. So, from the Exchange Management Shell, locate the startdagMaintenance.ps1 scripts (located in the scripts directory of the Exchange 2010 SP2 sources files). From the Shell, type the following command
- .\StartDagMaintenance.ps1 -serverName <%server where you want to install SP2%>
Click on the picture for better resolution
This script basically prepare the node to be taken down for maintenance. The script stop replication and replay activities, pause the node in the cluster,set the activation policy to block so the servers will not activate database copies during the upgrade process. The script will also move all the active databases to other DAG members.
step 2 – Check that the server is in maintenance mode (optional)
You can quickly check if the script has been running correctly. You can check that the PAM (PrimaryActiveManager) is running on the Exchange server CASN2 (so not the one we are upgrading) by typing the following command
- get-DatabaseAvailabilityGroup -status | fl PrimaryActiveManager
Click on the picture for better resolution
You can also check the ActivationPolicy on the server we are upgrading. The DatabaseCopyAutoActivationPolicy Attribute should be set to Blocked. You can check this by typing the following command
- get-mailboxserver | ft
Click on the picture for better resolution
Step 3 – Install SP2 on the Exchange Server
At this stage, you should be ready to perform the installation of the Service Pack on the Exchange Server. If you have run the maintenance script on the server you are upgrading, you might get a little warning during the Check Readiness. Simply close all the Exchange console or shell that are opened and you should go through.
To perform the installation of the Service pack 2, please refer to this post.
Step 4 – Put the Server back to “active” mode
When the installation is completed, you need to run the StopDAGmaintenance.ps1 script so the server can be used again in production. You will simply type in the Exchange Management Shell the following command
- .\StopDAGMaintenance.ps1 -servername <%server where you have installed SP2%>
Upgrade the other DAG nodes
You need to perform the step 1 to 5 on all other members of your DAG. In my case, because, I have only a 2 nodes DAG implementation, I’ll simply need to perform the exact same operation on the server CASN2 (node 2 of DAG)
Optional Step – Redistribute Database between nodes
This step is optional. You have to know that when you perform a switchover, the databases are not automatically redistributed between the DAG members. Exchange Team has provided a script called RedistributeActiveDatabase.ps1 that we can use in our upgrade process in order to relocate databases between DAG member servers.
Note : This script can be used for day to day administration. If you need to redistribute databases between your DAG servers, you can simply run this script and It will be done…
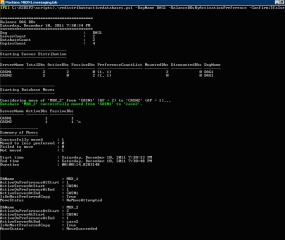
To redistribute you database, you simply type a command similar to the following (replace the DAGName with your name)
- .\RedistributeActiveDatabases.ps1 –DagName DAG1 –BalanceDBsByActivationPreference –Confirm:$false
Click on the picture for better resolution
Check that you have upgraded all your servers SP2
In order to check if you have applied correctly the service pack on all your servers, you can use the command line or the GUI to get the version of the Exchange server you are running
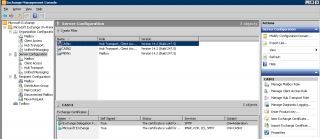
From the GUI
Simply open your Exchange Management Console, locate the Server Configuration Node and click on it. On the mid pane, you can see all your servers. From there, you can check in the column Version, which Exchange version you are running. We have the version 14.2 -> Exchange 2010 Service pack 2
Click on the picture for better resolution
From the command Line
To check the Service pack version from a command line, you simply type the following command
- Get-ExchangeServer
You will see something similar to the screenshot below. If you look at the attribute AdminDisplayVersion, you should see also something similar to 14.2. So, yes, you have the SP2 version installed.
Click on the picture for better resolution
Final Notes
As you can see the process is not always clearly described when you need to upgrade DAG members. Hopefully, googling a little bit, we have found a simple and clean way to perform the upgrade. One of the coming post would be the Address Book Policies features. This is a long awaited feature of one of my customer and he want already to perform some tests with it.
Till next time
See ya


