Hello World,
Today, we will be posting about snap application and more specifically the Gitea software solution. Gitea is basically an alternative solution to Git services on internet. Gitea offers the possibility to setup a self-hosted Git service within your network. The software solution is open source and can be installed on Windows, Linux or MacOs system. The solution is really great for people not willing to move to the cloud mainly for security reasons.
Recently, we had to deploy some Git solution. After some discussions, it has been decided that Gitea would be installed on Ubuntu (and also on a fedora) machine. Reading through the Gitea documentation, we quickly found out that multiple way to install the application could be used going from classical installation or docker passing by the Snap Technology.
In this post, we will show you how to install Gitea using the Snap package
Overview
Snaps are application packaged with all their dependencies and they can run on Linux systems as long as the snap daemon is installed on these machines. The Snap daemon is installed by default on Ubuntu distributions. Snaps Technology has been developed by Canonical and they tend to enforce their usage. Recent Ubuntu distribution releases ship with Snap application and the software center in Ubuntu is directing more and more users into Snap packages. Canonical has also developed a Store where you can find all the packaged application that could be used and installed on your Linux machine.
Since we were using Ubuntu machine and that we needed to setup really quickly a Gitea server, we have performed the installation of the software using the Gitea Snap package. Note that this package is not officially supported by the Gitea team. We still decided to go for this solution
Snap Store instructions for Gitea
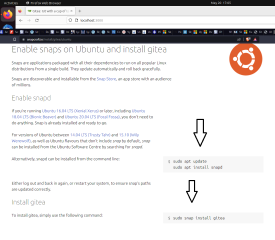
In order to perform the installation of Gitea using Snap technology, we first checked the instructions from Snapcraft.io Web site. As you can see on the screenshot below, the snapcraft web site provides only information about how to install the package.
Click on Picture for Better Resolution
There are no information about how to access the software or how to perform the post-installation configuration activities. Snap technology can ease the installation process but we have the feeling that the documentation or information provided is really basic and it would be nice to see more detailed instructions made available.
Because of the missing information in the Snapcraft.io web site, we have decided to provide a more detailed installation guide of Gitea as a Snap. It’s really easy to perform the installation. The configuration steps are also easy when you know exactly which options you need to use.
So, let’s check the installation & configuration process right now…..
Step by Step Instructions
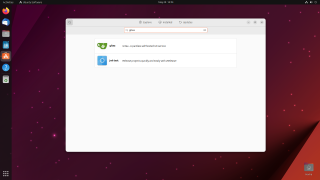
We have performed the installation on Ubuntu 23.04. We have opened the Software center and we have search for the Gitea Software. As you can see in the screenshot below, the software package is available. So, we click on the Gitea option
Click on Picture for Better Resolution
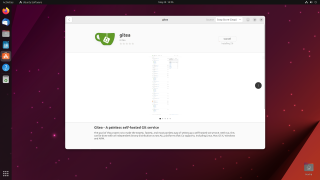
When you are in the Gitea installation page, you can see on the right top corner that the package is indeed a Snap Package. You can click on the Install button. You will be probably prompted for credentials. Provide the credentials and you will see that the installation will proceed
Click on Picture for Better Resolution
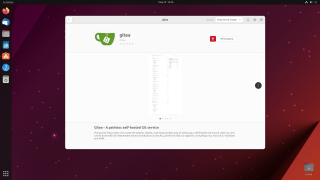
Wait for the installation to be completed. You should see something like this on your screen.
Click on Picture for Better Resolution
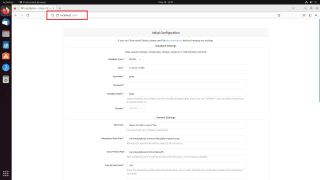
At this stage, the installation is completed. You are ready to perform the basic installation of the application. To perform the configuration steps, you have to open your Firefox browser and use the url
http://localhost:3000
If everything is fine, you should see the following page displayed
Click on Picture for Better Resolution
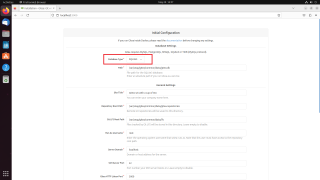
In the database type, you have to select the option SQLite3. The Snap package has been created using this Database type.
Click on Picture for Better Resolution
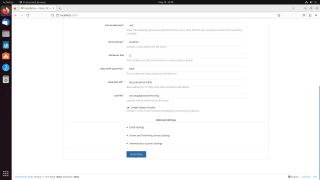
Accept default for the rest of the settings and scroll to the bottom of the page. If you are ready, click on the Install Gitea button
Click on Picture for Better Resolution
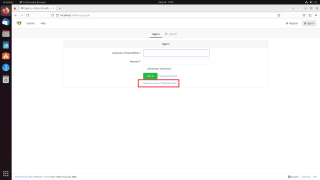
After a few minutes, you should be redirected to the login page. Since we have not created any account yet, we can click on the Register Link as shown below
Click on Picture for Better Resolution
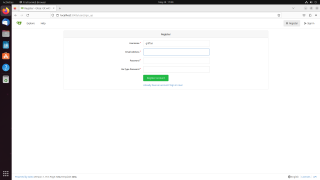
In the Register page, provide username, password and email address.
Click on Picture for Better Resolution
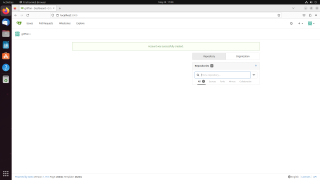
When done, you are again redirected to the home page of the software and you are ready to create your different projects..
Click on Picture for Better Resolution
We are done and you are ready to go with your basic installation.
Final Notes
This is it for this post.
Using Snap technology, we have been able to perform a quick install of the Gitea server. After the installation, there is also a need to perform the configuration. This information is usually missing in the Snap install instructions. This post provides you all the necessary information to quick install and configure your self hosted Git service solution. Obviously, you will need to invest more time if you need to perform some additional configuration such as SSL usage which we would recommend for security reasons.
We are not Snap package specialist and we will need to dig a little bit more about the technology. One question that come quite often is about migration. How do you migrate snap application data and configuration settings from one computer to another. We might start looking into Snap package a little bit more in the future and try to answer this kind of questions
Hope this post will be useful
Till next time
See ya

