Hello World,
Today’s post will be a little bit different than usual. Indeed, today we will look at some web based tool that can be used to manage your Linux computer (server or desktop edition). When we started using Linux (ages ago), the most known web interface that would be used to manage locally or remotely your Linux machine would have been Webmin. The tool still exists and still alive and has evolved with time. The Webmin is probably one of the most complete web interface around.
However, with time, other web based administration tools have been developed and you can basically choose from a plethora of options based on your needs. We have recently installed, deployed and worked with the Cockpit Web console solution (installed on top of RedHat). The tool is clean, intuitive and provide a really good and basic options to remotely manage your machines or if you have installed your Linux without any desktop interface to provide some easy to use GUI Interface for less experienced users.
So, since we tend to work more and more with Ubuntu, we wanted to provide a quick guide on how to install it and use it….Let’s do this right now 🙂
Overview
What’s Cockpit Web Console ?
As mentioned earlier, the Cockpit Web Console is a free and open source web interface allowing to perform administrative tasks on your Linux machines from a simple browser. The Cockpit solution was initially developed and made available to RedHat based systems but nowadays the software has been made available to almost all Linux distribution including Ubuntu. Since we are working extensively with Ubuntu systems, this post will describe how to install Cockpit web console on Ubuntu 20.04 or later system.
Cockpit Backports Version
Ubuntu 20.04 has been released in 2020 and interim releases have been made available since then. Ubuntu 20.04 will ship with an old version of the cockpit Web console software. This is where Backports can help you getting a most recent version of the software. Backports basically is offering a mechanism to provide newer version of software to older Ubuntu releases. However, please note that backports versions are not updated by the Ubuntu Team. Security and bug fixes are performed by the backport package maintainer. Although the backports are tested continuously, it’s always possible that some conflicts could occur with “older” Ubuntu editions. In short, the choice is up to you….
Step by Step Installation Guide
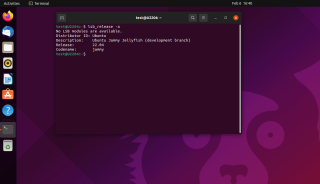
In our scenario, we have installed the cockpit package on Ubuntu 22.04 (still in development). In this scenario, we would assume that there is not yet any backports release available since we are using the most recent version of Ubuntu
Click on Picture for Better Resolution
Installing Cockpit (no backports)
To install Cockpit Web console, the process is really straightforward. Open a Terminal Console and issue the following command
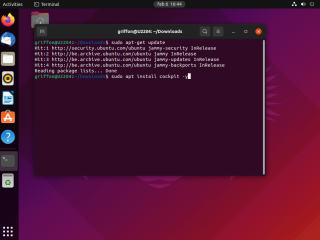
sudo apt update
When the command completes, you can proceed with the installation of the Cockpit software
sudo apt install cockpit -y
Click on Picture for Better Resolution
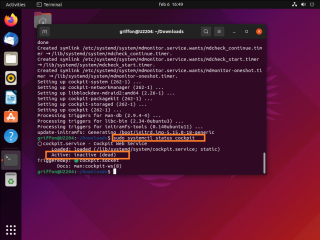
Wait for the process to complete. After successful installation, you can check the status of the service and you will notice that the service is not running yet
sudo systemctl status cockpit
Click on Picture for Better Resolution
To start the cockpit service, you will simply need to execute the following command
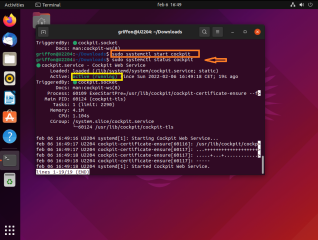
sudo systemctl start cockpit
You can again check that the service is now running
Click on Picture for Better Resolution
You are ready to connect to your web interface by opening a recent browser and go to the following url
https://localhost:9090/ or https://IP_address:9090
Installing Cockpit (with backports)
In this section, we will assume that you are running Ubuntu 20.04 version and you want to install the Cockpit Web Console software. On Ubuntu 20.04.x, you can decide to install the “old” version of the Cockpit version or take advantage of the backports release. In our scenario, we want to install the backports release on our Ubuntu 20.04.
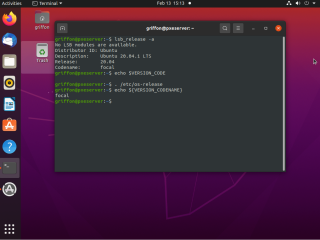
First, you will need to identify the Version to be used. To do that, you open a Terminal Console and issue the following command
. /etc/os-release
echo ${VERSION_CODENAME}
Click on Picture for Better Resolution
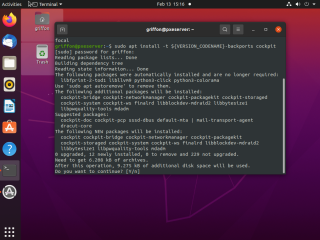
sudo apt install -t ${VERSION_CODENAME}-backports cockpit
Click on Picture for Better Resolution
Wait for the process to complete. Again, if everything went find, you will be able to access the web interface via a browser by accessing the url pointing to the machine where the cockpit has been installed and appending the port :9090.
https://localhost:9090/ or https://IP_address:9090
Accessing Cockpit Web Console
Cockpit is using a light web server and Cockpit web console is listening on port 9090. If you have firewalls on your network and having issue accessing the web interface, you might have to allow port 9090. So, to access your web console, open your favorite browser and type localhost, hostname or ip address of the host running cockpit software. Do not forget to append the port (i.e.:9090)
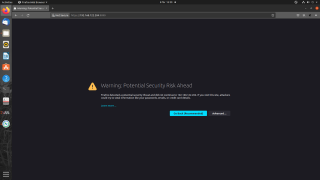
Since we are using self signed certificates, we will receive a warning when we first connect to cockpit web console. Review the warning message and Press Advanced if you trust the system
Click on Picture for Better Resolution
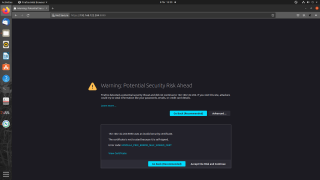
In the next message box, if you trust the system, click on Accept the risk and Continue
Click on Picture for Better Resolution
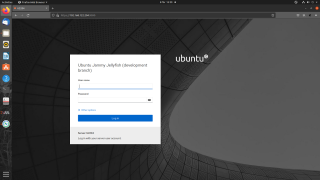
At this stage, you will see the login page for Cockpit web console. You can provide your credentials and press the Log In button
Click on Picture for Better Resolution
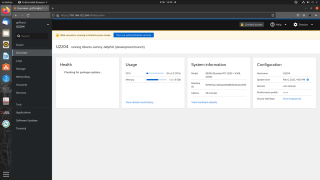
You will reach a summary view and from there you will be able to manage and configure your Linux machine from a Browser…. You can see on the top bar the message that you have limited privileges. If you need to perform tasks where admin rights are needed, you will need to enable the administrative access within the web interface… Click on Turn on Administrative Access
Click on Picture for Better Resolution
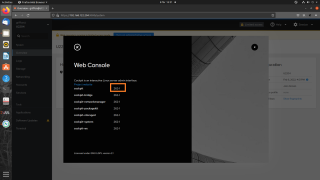
You can also quickly check the version of the Cockpit you are running by clicking on Help > About Cockpit and as you can see we are running one of the latest version (I.e 262-1)
Click on Picture for Better Resolution
Cockpit Web Console Tasks overview
In this section, we will quickly see what we get from Cockpit web console out-of-the-box. We will not explains all the options and screens to go through. This is more to give you a quick tour preview…
Overview page
From the screenshot below, you can see how the web interface is structured. On the left side, you have a menu divided in two sections. You have the System section and Tools section. Under the System Section, click Overview. The page provide a quick summary about your system and more specifically the Updates status, the hardware details, the basic configuration and the usage. You can also have more details by clicking the appropriated links in the page. You can also restart the server if needed by using the dropdown box located on the right top corner of the page.
Click on Picture for Better Resolution
Logs page
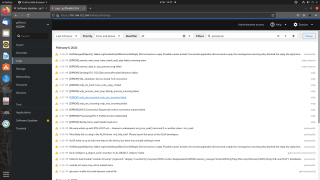
By clicking on the Logs link, you will be able to review logs and search them from your Browser. This can be useful to debug and resolve some issues you might have with your system.
Click on Picture for Better Resolution
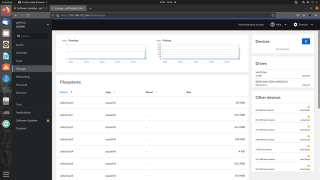
Storage page
In the storage page, you have a lot of information about the storage and partitions that exists on your system. You have also the possibility to create NFS Mounts or create RAID 1 from the Web interface.
Click on Picture for Better Resolution
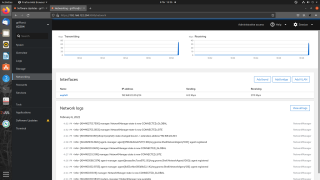
Networking page
In the Networking page, you can see some statistic about network traffic and you can see the ip configuration . You can add bond, bridge or VLAN. You can edit and change ip address configuration if needed.
Click on Picture for Better Resolution
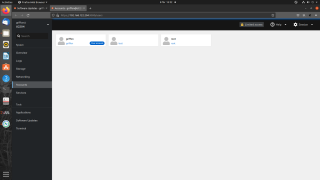
Accounts page
In the Accounts page, you can list existing accounts on your system but you can also create additional accounts if needed. By clicking on a specific user, you can reset password, grant admin rights, lock account…..
Click on Picture for Better Resolution
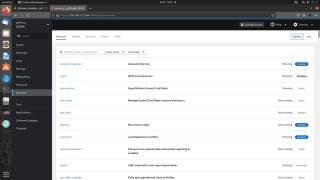
Services page
In the Services page, you have multiple tab presentation. Usually, you will use this page to ensure that all the necessary services are running fine and if needed you can stop start restart your services and try to fix your issues from the web browser….
Click on Picture for Better Resolution
Applications page
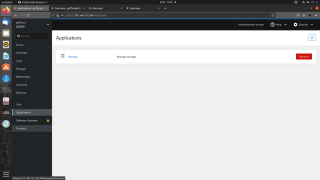
In the Applications page, you will not have a list of the applications installed on your system. The applications page is listing basically add-ons and extensions that can be used by the cockpit software. Storage is for example an additional plugin that is installed by default. Based on your OS version, you can install additional plugins and increase features and functionalities offered by the web interface.
Click on Picture for Better Resolution
Software Updates
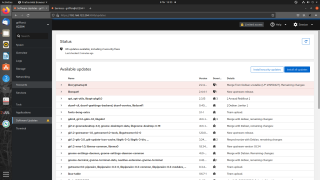
In the software Updates, you can see the missing patches and security fixes that can be installed on your system. To be able to scan and install patches on your system, you need to ensure that you have the administrative rights first and then you can start installing them. This feature is quite useful for people with little Linux knowledge and command line acquaintance. We have seen in small networks that people use this interface to keep up to date their Linux machines
Click on Picture for Better Resolution
Terminal page
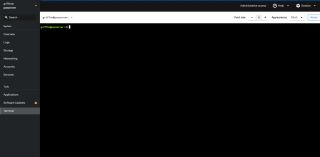
In the Terminal page, you will be able to access a fully functional Terminal console. If you are a guru in command line, you will be able to perform almost all the administrative tasks on your system via the Browser
Click on Picture for Better Resolution
Final Notes
This is it for the post !
Cockpit Web console provides an easy to use interface to manage and configure your Ubuntu system from a Web Browser. You cannot configure all and everything from the web interface but the tool comes with a Terminal console can extend configuration activities and administrative tasks that can be performed on your machine. So far, we have performed a really simple installation on a single host. However, it’s possible to interconnect multiple Ubuntu hosts and manage them from a single web interface… We will cover this configuration later on.
Another interesting point is that, from the cockpit web console, there is a plugin that can be installed which will allow you to manage virtual machines. Since we have not seen much activities on the Kimchi software and no updates to support latest Ubuntu version, Cockpit Web Console software could be a good alternative. If time permit, we will be publishing more information about Cockpit Web Console.
Till next time
See ya

I recommend first checking which packages are present in the backports and what version those contains. Currently if you want to use Cockpit from the backports on Ubuntu Server 20.04 you will have to remove Cockpit Dashboard due to it not being up to date. Also if you have somehow managed to install Cockpit Podman you might end up breaking things since that module is not officially available in 20.04 due to podman also not being available out of the box.
@RedBaron,
Thank you for visiting our blog and providing some feedback. As we have just started playing around with Cockpit software solution, we are not aware of all the possible issues that might arise yet. we are not using podman modules and have not encountered issues described in your comments. We will keep publishing on Cockpit solution and try to cover more scenarios (like the one you are suggesting)
Till next time
See ya
When I’m entering
sudo apt install -t focal-backports cockpit
on an otherwise up-to date 20.04 it doesn’t work, saying (translated)
“The value »focal-backports« is for APT::Default-Release invalid, beacuse such a release is not available in the packet sources”
I have a non-backported version running, currently.
What am I doing wrong?
@Tigura,
Thank you for visiting our blog and providing some feedback.. Sorry for the late answer…
This command should work indeed… based on the cockpit web site. We have tried the command on Ubuntu 20.04.4 and this is working fine
Try again to update & ugprade your system and re-run the command
If I check my console version, I got the version 264…
Hope this help
Till next time
See ya