Hello World,
In our previous post, we have demonstrated how to install and configure Keeweb software on top of Windows Web Server (i.e. IIS). As explained in the previous posts, more users and companies are looking for cheap, easy to use and on-premise password management solution. Keeweb software can be self-hosted on-premise and could provide a good alternative to any cloud-based password management solution.
In the previous post, we have explained how to install and configure IIS in order to provide centralized access to the Keeweb software solution through a simple web browser. However, some additional configuration are still needed to have a fully working solution. So, let ‘s jump into the next configuration settings and let’s finalize our setup…
Overview
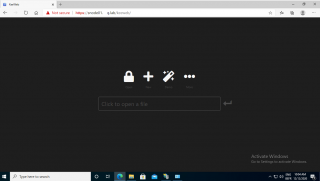
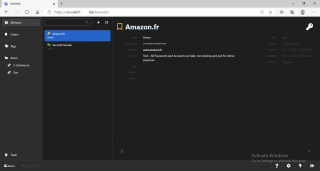
At the end of the previous post, we have been able to access through a secure connection (ssl) the Keeweb interface. As shown in the screenshot below, we are ready to proceed with creating or opening an existing keepass database file
Click on Picture for better Resolution
However, before proceeding, we still need to make some configuration at the web server side. We need to configure some MIME settings in order to have the Keeweb software being capable of opening the Keepass database from the WebDav server….So, let’s configure these settings
Configure MIME Types for Keepass database (.kdbx)
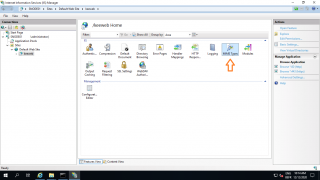
So, we go back to our Windows web server and from the inetmgr mmc console, we click on the virtual directory that we have created in the previous post. On the center pane, we click on the MIME Types option.
Click on Picture for better Resolution
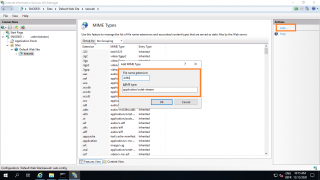
In the MIME Types page, click on the Add button in the right pane. in the dialog box, populate the fields with the information displayed on the screenshot
Click on Picture for better Resolution
Press OK.
You are ready to try your configuration….
Configure Keeweb software via the Web Browser
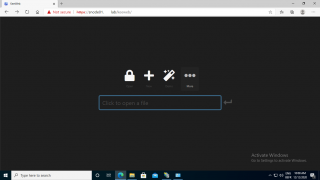
In this example, let’s assume that we have already placed our Keepass database in the virtual directory (i.e. keeweb) on the web server. So, now, when a user will need to access this database, he will need to configure the software to access this file…. So, the user fire up the browser, provide the url to the keeweb software location and the web interface is displayed
Click on Picture for better Resolution
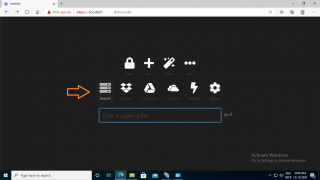
To configure our software, let’s click on the more button option in the interface
Click on Picture for better Resolution
In the more option page view, as we have configured webdav infrastructure, we will click on the webdav option.
Click on Picture for better Resolution
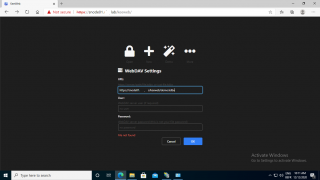
In this page, if you notice the error message file is not found, double-check that MIME Types have been defined and that the keepass database is indeed available on the web server at the location you have specified.
Click on Picture for better Resolution
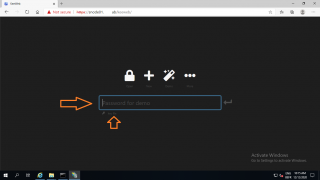
In our example, we will be opening a database called demo.kdbx located on the web server. So, we are populating the url field with the proper information and we leave the user and password field empty. Press OK. If everything is fine, you will be back to the main keeweb page. If you look closely, you will see that in the password field, the application knows that we are opening the demo database (see left arrow in the picture). We assume that you have also created a key file (for additional security) and the application interface is asking it. So, click on the key file link, locate your key file and Press OK
Click on Picture for better Resolution
Enter your password as well and press the enter icon. Again, if everything is configured correctly, you should be able to access your password through your web browser….
Click on Picture for better Resolution
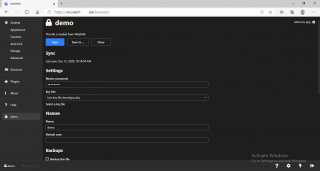
Let’s assume that you need to create a new entry in your database. simply provide the necessary information. When you are ready, you will need to save the information into the database. So, click on the left bottom corner on the locket icon.
You should end up with the following screen. In this screen, you can clearly see that the database file is indeed stored on a webdav server
Click on Picture for better Resolution
Additional Configuration Settings
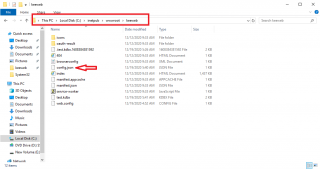
Going quickly through the documentation of Keeweb, we found out that you can use a config.json file that can help you control and pass default configuration settings to the browser. In the screenshot below, you can see that we have created a config.json file and that we are specifying the location where the database (.kdbx file) can be found
Click on Picture for better Resolution
You have to place the file under the keeweb virtual directory.
Click on Picture for better Resolution
The config.json file can be used to standardize and ease configuration for your keeweb implementation.
Final Notes
This is it for this post !
All in all, the implementation and setup of Keeweb software on top of IIS Microsoft Web server is not that difficult. Obviously, you need to know how to configure the web server in order to serve correctly the keeweb pages and get access to the password information you are looking for.
So far, we have been looking on getting access to the password information through the Keeweb application hosted on a webdav server. We have not checked if we can add update or delete entries from the web application and get the database updated so the information would be accessible to all users accessing the database.
We will try to tackle this last part (i.e. creating new database or updating database information) in our next posts
Till next time
See ya

Thanks for this helpful tutorial. It guides me and worked well.
Thank you for visiting our blog and providing good feedback…. Happy to see that this post can be helpful to other
Till next time
See ya