Hello World,
In our previous posts, we have been describing how to perform some customization activities on Windows 10 Operating system. We have been discussing the different ways that exists to customize the Windows background desktop and use a custom image. We have also shown how to customize the Windows Login screen and how to replace the default background image with the one you or your organization wants to use.
To read more about these customization activities, please have a look at the following posts
- Windows 10 – Customize Wallpaper if Windows is not activated…
- Windows 10 – Customize Login Screen Background image if Windows 10 is not Activated
In this post, we will show you another way (probably less known) that can be used to customize the background Desktop and the login screen. This post offers the opportunity to play with the provisioning packages and the Windows Configuration Designer….
Overview
Windows 10 and previous operating systems offers the possibility to customize the look’n feel of your machine and display your favorite images as background Desktop and via the login screen. These customization activities are usually quite common and easy to achieve through “Personalize” GUI Interface of the Windows 10 Operating system. As long as your Windows 10 machine is activated, you can easily customize your Windows 10 machine.
Home users can probably perform the customization operation manually using different methods. Organizations that need to display branding and create a corporate identity through the Desktop infrastructure, centralized and automated solution would be used in order to customize Desktop Background and/or background displayed on the login screen. In Corporate environment, Group policies or scripting would be usually used to control and deploy these customization settings.
While writing these posts, we have found another way that could be use to deploy customization settings through the network. Provisioning packages can be created and installed on target desktops. When the provisioning package is installed, the customization settings should be applied and visible… The following questions might popup in your mind right now
- What’s a provisioning package ?
- How to create a provisioning package ?
- How to deploy a provisioning package ?
Well, this is what we will try to explain in the following sections 🙂
Provision Package
What’s a provisioning package ?
A provisioning package (.ppkg) is basically a container (like a zip file) that includes a collection of configuration settings that can be applied to a Windows operating system. Provisioning package technology has been created in order to quickly customize a Windows 10 device without necessarily installing a brand new image. Provisioning packages basically let you quickly customize one or more device in a consistent way.
How do you create a provisioning package ?
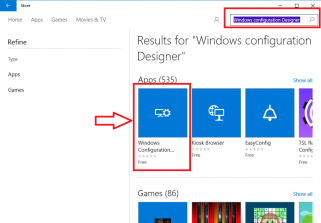
To create these provisioning packages, Microsoft offers you some tools. You can get your hands on the Windows Assessment and Deployment Kit (ADK) which include the Windows Configuration Designer (WCD). The WCD is a graphical tool that will be used to create provisioning packages. If you do not want to download and Install the ADK, you can also get the WindowS configuration Designer through the Microsoft Store
Click on Picture for Better Resolution
Once the tool is installed, you can start creating your Provisioning package…
How do you distribute and deploy a provisioning package ?
When the provisioning package has been created, it can be distributed through removable media, attached to an email or made available through a network share. Actually, you can decide to manually install the provisioning package using again the Settings Apps available in Windows 10. You can also automate the deployment through PowerShell commands.
Please note that provisioning packages can be applied to a device during the first-run experience (out-of-box experience or “OOBE”) and after (“runtime”).
Permissions Needed
Applying a provisioning package to a desktop device requires administrator privileges on the device if you perform the installation manually. If you want to deploy the provisioning package and automate the process, you can try to create a powershell script and get it executed via GPO or Task scheduler….
Limitations
This is a limitation I’ve learned the hard way ! Settings in Provisioning Packages might apply in certain SKU editions and not on other ones. Our provisioning package used to customize the login screen will not be applied or processed by Windows 10 Home Editions but will work fine on Windows 10 Enterprise Editions (and Education Editions). Better be aware of this Editions limitations as you might have a perfectly valid package but the settings won’t be applied accordingly
Note : There might be a way to overcome some of the limitations through registry hacks but we will not look into this as this is not the purpose of this post
Our Provisioning Package to customize background and login screen….
This post offers the perfect opportunity to show how to create a provisioning package that would customize Desktop background and login screen settings….. We will be creating a provisioning package that will set a custom picture to the login screen….
Step 1 – Obtaining the tool
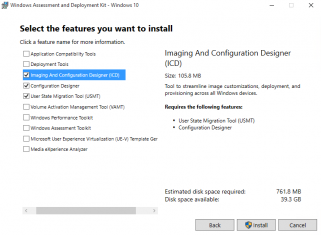
In order to obtain the Windows Configuration Designer, you have two choices…. You can either download the Windows 10 ADK kit or you can download the tool from the Microsoft Store. When the installation is completed, you will be able to launch the tool.
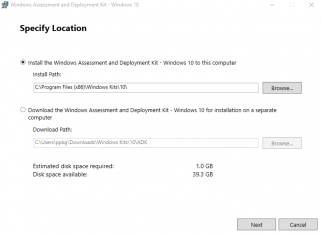
We have performed the ADK installation. When you have downloaded the ADK File and execute it. you will be presented with this screen (we assume that you have internet connection). Select the first option and press Enter
Click on Picture for Better Resolution
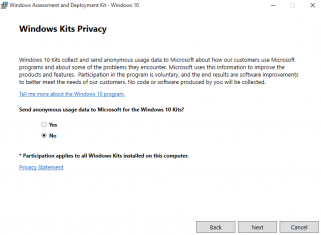
In the privacy page, select your option and press next
Click on Picture for Better Resolution
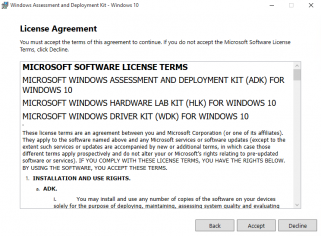
In the License Agreement Page, Press Accept
Click on Picture for Better Resolution
In the Feature page, select the Windows configuration Designer option (as shown in the screenshot below
Click on Picture for Better Resolution
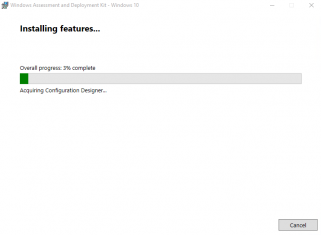
Wait for the installation to complete
Click on Picture for Better Resolution
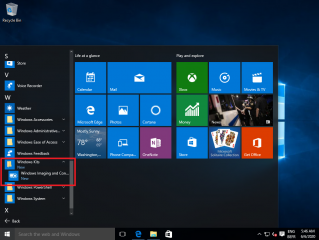
When installation is completed, you will see the Windows Configuration Designer application available in the start menu
Click on Picture for Better Resolution
Step 2 – Creating our Provisioning package
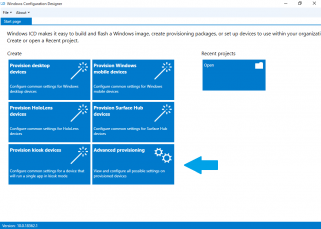
In the Windows Configuration Designer Dashboard page, we will select the option Advanced Provisioning
Click on Picture for Better Resolution
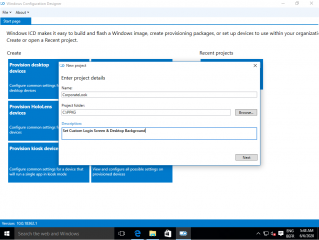
In the new Project Dialog Box, Specify the name of the project and where to store the files
Click on Picture for Better Resolution
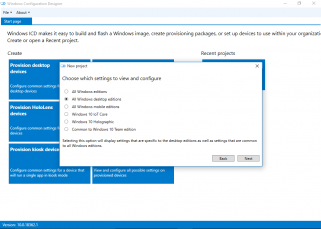
In the parameters pages to display, select the correct Edition in order to see the settings that you need to configure. In our example, we have selected the All Windows 10 Editions
Click on Picture for Better Resolution
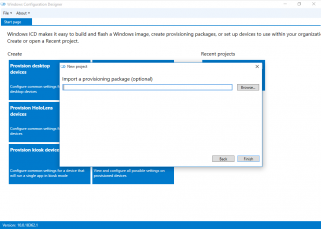
In the import package page, press Finish
Click on Picture for Better Resolution
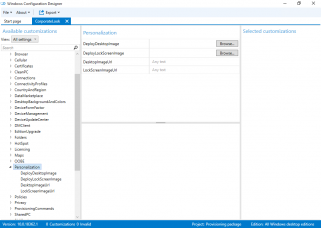
In the Settings Tree on the left side, locate Personalization node and expand it in order to see the available options
Click on Picture for Better Resolution
Note :
Populate the fields as required….Either Desktop or LockScreen….based on your needs….
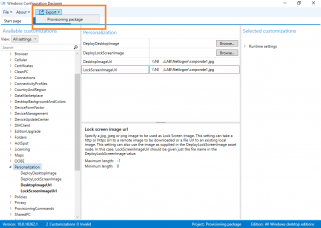
When you have set your configuration options, go to the Export button.
Click on Picture for Better Resolution
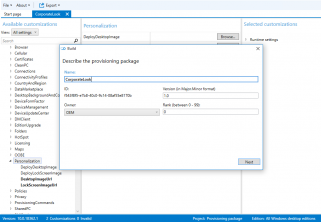
In the Build Dialog Box, provide a name and a version for your package and Press Next
Click on Picture for Better Resolution
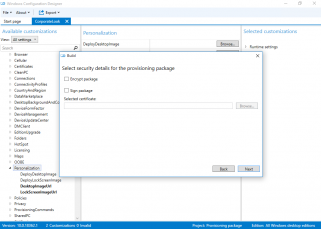
In the next Dialog Box, accept default and Press Next
Click on Picture for Better Resolution
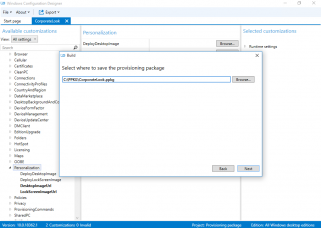
In the Location Dialog Box, specify where to save the provisioning package and settings and Press Next
Click on Picture for Better Resolution
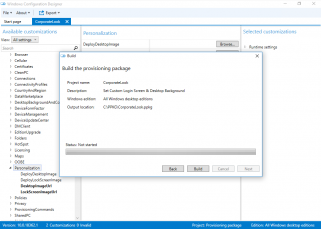
In the Build Dialog Box, review the settings and Press Build to create the provisioning package
Click on Picture for Better Resolution
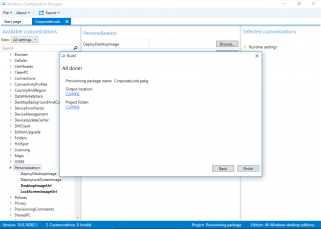
In the Build Dialog Box, click on the link provided to access the provisioning packages
Click on Picture for Better Resolution
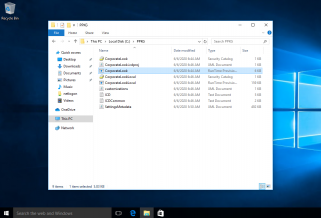
You will see in your Windows Explorer that your provisioning package (*.ppkg file) has been created and can be now deployed to the target machines….
Click on Picture for Better Resolution
Deploying the our Provisioning package
You have multiple ways to deploy a Provisioning package. We will describe some of these methods hereafter. Most of the methods presented here requires a manual intervention. However, if there is a need to automate the process, you can always rely on Windows PowerShell as Provisioning package CmdLet exists as well….
Option 1 – Using the Removable Media…
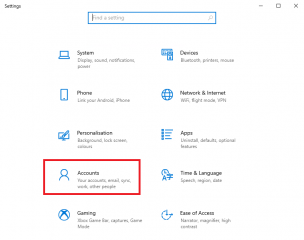
In the Settings App, Click on Accounts
Click on Picture for Better Resolution
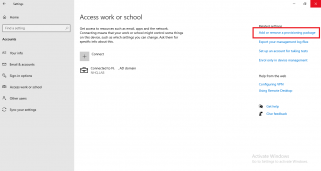
In the Accounts Page, Select the Access Work or School in the left menu. In the Access Work or School Page, Select the Option Add or Remove a Provisioning Package (in the right part of the screen)
Click on Picture for Better Resolution
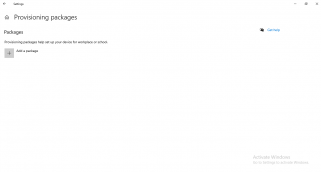
In the Provisioning Packages Page, Click on Add a Package
Click on Picture for Better Resolution
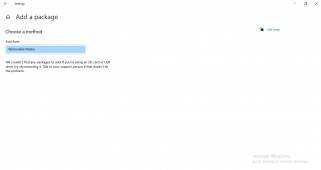
In the Choose a method, you will have only a limited set of choices (Removable Devices)
Click on Picture for Better Resolution
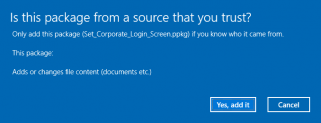
After Locating the *.ppkg file, you will be prompted with a blue warning screen asking you if you trust this package. Press Yes, Add it
Click on Picture for Better Resolution
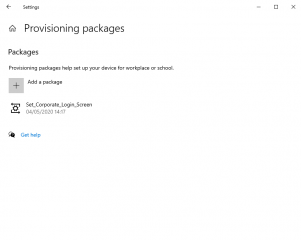
You will not see a popup that will confirm the successful installation of the package. To check that everything went fine, you should see that your provisioning package has been installed successfully and it’s listed in the Provision package page
Click on Picture for Better Resolution
As, you can see this method is a little bit cumbersome (you have to go through a lot of Windows….)
Option 2 – Double-Clicking on the provisioning Package
If the provision package has been stored on a network share or if obtained through email, you can simply double-click on the package and you will get the same warning blue screen about trusting the package. If you trust the package,Press Yes, Add it
Click on Picture for Better Resolution
You package will be installing. Again if everything is fine, you can go back to Settings > Accounts > Access Work or School > Add Provisioning Package > Provisioning Package page, you should see your package in the list
Click on Picture for Better Resolution
Option 3 – Using Powershell to install the Provisioning Package
This is probably the most convenient way to deploy and install provisioning packages through your network. Open a PowerShell Windows and issue the following command
Install-ProvisioningPackage -PackagePath <%Your Location%> -ForceInstall
To check that your Provisioning package got installed, you can also use PowerShell and issue the following command
Get-ProvisioningPackage -PackagePath <%Your Package Path%>
or
Get-ProvisioningPackage -AllInstalledPackages
Note :
If you are playing around with provisioning package, you will need to each time remove the installed package or you would need to increment package versioning in order to be able to install over again the provisioning package. If you do not do that, you might end up with Provisioning Failure – Error Code 0x800700b7
Checking our Configuration for custom login screen…
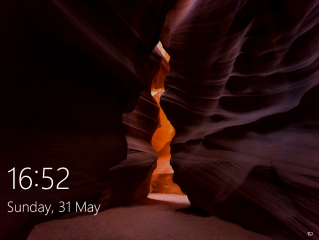
So, let’s assume that you have installed the provisioning package on a supported Windows 10 Edition and that you have received no error message, it’s time to check if the configuration settings we wanted to deploy are effective. Reboot your machine and check your login screen and Desktop look’n feel. On my screenshot, you can see that the settings have been applied correctly
Click on Picture for Better Resolution
If you want to know where the images are stored or the configuration is stored, you can go to registry and locate this key
HKLM:\SOFTWARE\Microsoft\Windows\CurrentVersion\PersonalizationCSP
If you check the registry key; you would recognize the registry key used in the previous post…. The provisioning package is basically using the CSP technology to apply the custom settings on your Windows 10 machine.
Final Notes
Voila ! This is it for this post !
Our goal was to customize the login screen of Windows 10 using a less known approach i.e. Provisioning packages. The process might not straight forward as updating registry keys but this post offers us the possibility to investigate the Provisioning packages technology. We have quickly provided an overview of the Windows configuration Designer tool (that might replace the old system Image manager) and we have demonstrated how to create and deploy Provisioning packages.
At the end, we indeed succeed in customizing our lockscreen in Windows 10 but we have also noticed that the settings applied through the provisioning packages are basically also writing in the registry that we have been already using in this post
Hope you enjoy this post
Till next time
See ya

