Hello World,
We are continuing our journey in the fantastic world of ESU program. If you company needs to still support legacy operating systems like Windows 7 or Windows 2008 R2, you will need to buy and subscribe to the Extended Security Update program from Microsoft. Companies joining the program will be able to obtain critical patches and security hotfixes when released by Microsoft and targeting specifically these legacy operating systems.
We have seen in part I that before being able to obtain these Extended Security updates, organizations needs to deploy first a number of updates on the legacy machines. Then, in order to deploy the ESU MAK key through the network, the recommended approach proposed by Microsoft is to install and use the VAMT tool. In part II, we have described in detail where and how to install the VAMT Tool.
In this post, we will finalize the installation of VAMT. The tool use a SQL database in order to store information about License key and devices that are activated. An organization can choose to install on the VAMT machine the SQL Express database and installation would then be quite straight forward. Some bigger companies have invested in a centralized Database infrastructure would be more keen to use this centralized infrastructure. This post will try to cover and explain both options and possible pitfalls….
Let’s do this !
To obtain more information and follow up with this series about ESU Program, please have a look at
- ESU for Windows 7 and Windows 2008/R2 – Part I – Prepare the Infra
- ESU For Windows 7 and Windows 2008/R2 – Part II – Installing VAMT
Overview
As mentioned above, organizations can decide to install VAMT and use the free SQL Express products to finalize the installation of the software and make it fully functional. However, bigger companies would probably prefer to use a centralized database infrastructure. VAMT supports both configuration and in the next sections we will be describing how to the complete the VAMT installation.
Note : We assume that SQL Express and VAMT will be installed on the same computer…
Option 1 – SQL Express
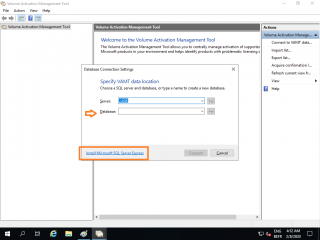
At the end of part II , when starting the VAMT console, a dialog box asking about database back end to be used pops up as shown in the screenshot below
Click on Picture for Better Resolution
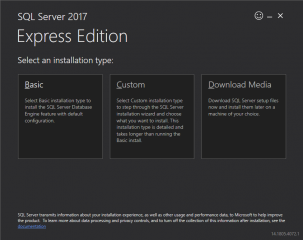
Because we are exploring the option to use the SQL Express, and we assume that the VAMT has access to internet, we can click on the link Install Microsoft SQL Express. The following wizard will then start. As you can see, you have basically three choices : simple install, custom install and download the media.
Click on Picture for Better Resolution
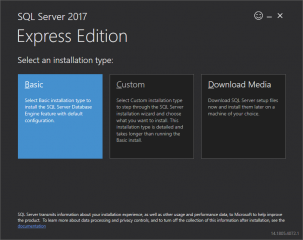
Because we assume that we have internet connection, we will select the Basic install option. If your organization plans to perform Proxy Activation (i.e. Offline activation), you should download the media and transfer it to the target machines that will be hosting the SQL Express instance.
Click on Picture for Better Resolution
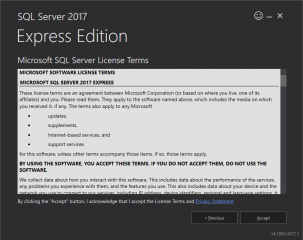
In the License agreement page, read it 🙂 and accept it if you agree.
Click on Picture for Better Resolution
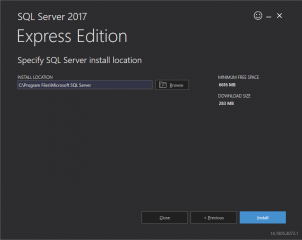
In the Specify location page, specify where the SQL Express files will be copied and Press Install
Click on Picture for Better Resolution
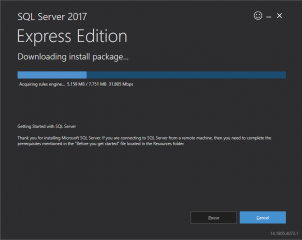
Wait for the installation to complete
Click on Picture for Better Resolution
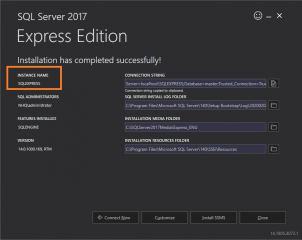
When installation is completed, you can see a quick summary but you can also decide to perform some additional actions. In our scenario, we simply needs to write down the name of the SQL Instance and simply click on close
Click on Picture for Better Resolution
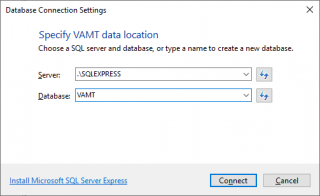
We can go back to the VAMT software, we can open it and now in the database connection settings, you can provide the necessary information
Click on Picture for Better Resolution
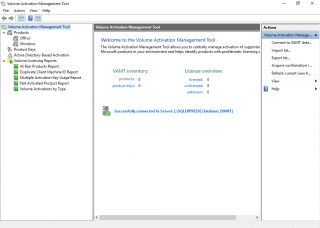
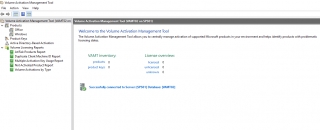
If you have provided the correct information, you should see the VAMT console and you can see also that the VAMT tool is connected to the SQL Express database
Click on Picture for Better Resolution
If you have made a mistake in providing the information, typo or if you inverted database information versus database information, you will get the following error message.
Click on Picture for Better Resolution
Review your settings and ensure they are correctly entered and you should have access to the VAMT tool
Option 2 – Centralized SQL Infrastructure
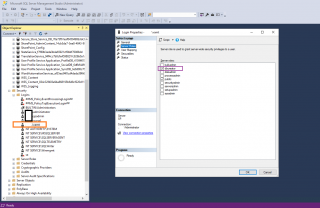
If you need to use the centralized SQL infrastructure available within your organization, you will need to ask some specific SQL rights initially to the DB team. So, the first thing to do is to define a user account that will have enough rights to create the VAMT database in the centralized SQL infrastructure. In our scenario, we have used the following user account C-NERGY\VAMT. This account needs at least temporarily the DB Creator Rights as shown in the following screenshot
Click on Picture for Better Resolution
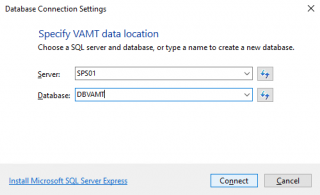
Then you will need to login using this account with DB Creator rights onto the VAMT machine and start the tool. The connection settings dialog box will popup and there you can specify the name of the SQL instance to connect to and the name of the database you want to create
Click on Picture for Better Resolution
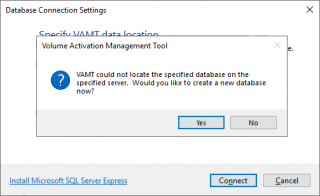
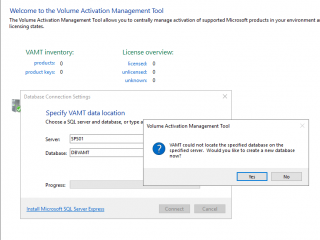
If the account has enough rights to connect to the SQL server, you will be seeing the following information message. The Database does not exists yet and there is a need to create it
Click on Picture for Better Resolution
Press OK and you should see that you have a successful connection to the centralized database infrastructure
Click on Picture for Better Resolution
So About the pitfalls...
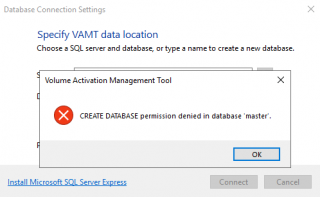
Assuming that you have at least read access to the SQL infrastructure but not DB Creator right, if you try to connect to the database, you will end up with the clear message that you have not enough rights ! So please, ensure that you have all the necessary rights before trying to connect VAMT to the Backend SQL database
Click on Picture for Better Resolution
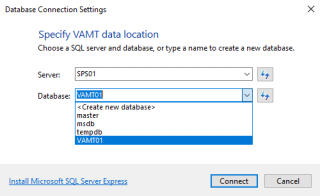
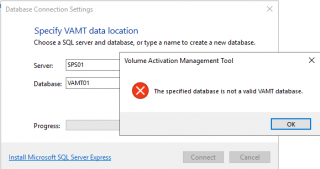
Another classical error that I have seen is when the DB team create the database for VAMT (empty one) and then grant enough rights to the VAMT user to connect. When you do this, you can indeed list the database in the VAMT console.
Click on Picture for Better Resolution
However, because the Database is empty, the VAMT tool will simply try to connect to the database and not try to create the necessary table in the existing database. You will end up with the following error message
Click on Picture for Better Resolution
Final Notes
This is it for this part ! At this stage, our ESU infrastructure is ready to go. We have patched our legacy target machines with the necessary and mandatory patches provided by Microsoft and needed to recognize the Extended Security Updates. We have installed and configured the VAMT Tool and we have now access to the Interface. However, the journey is not over. We will need to scan the network to retrieve the legacy machines needing support and we will need to deploy the ESU MAK provided by Microsoft. Finally, we will need to activate these products Keys…..
So, in the next part, we will have a look on how to identify the Legacy target machines and how to import the ESU key and distributed through the network..
Stay tuned
Till next time
See ya

