Hello World,
On one of our previous posts, we have described how to bring back the Remote Desktops MMC console on Windows 2012 R2 and later. The process is quite easy and this tool can be useful in certain situations. In our previous post , we explained that these customized consoles existed already and were simply re-used on top of Windows 2019 Operating system. However, these MMC consoles were really basic and not easy to use.
The Remote desktops console is quite basic and does not really offers much customization. The tool allow you to basically add under a tree view connection to servers that needs to be remotely administered and that’s it…. We know that other tools exists that would provide exactly the same functionality as the Remote Desktops MMC (i.e. RDCMAN, Terminals, mRemoteNG,…) but in this specific scenario, no other tool would be allowed other than the built-in MMC tool. This would be a temporary situation while the organization was basically evaluating other solutions….
So, in this post, we will quickly describe how the console view can be improved and be more workable….
Overview
Note: We assume that you have already followed the steps described in this post in order to bring back the Remote Desktops MMC console
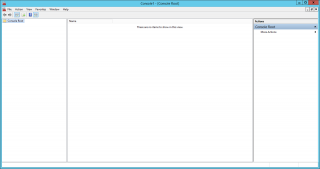
Let’s create an initial Remote Desktops console and let’s see how it looks like by default. To create and customize a MMC snap-ins, you would from a run command, issue the following command
mmc.exe /a
The following windows would open
Click on picture for better resolution
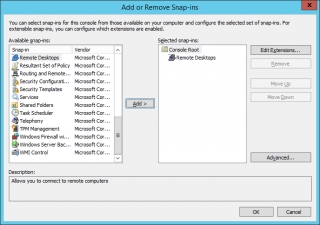
Click on File Menu and select Add/remove Snapins…
Click on picture for better resolution
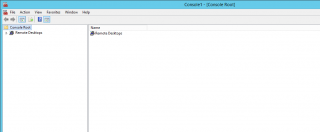
The following dialog box will open…. Locate the Remote Desktops option, Click on Add. You should see something like this on your screen (see screenshot below…). Press OK
Click on picture for better resolution
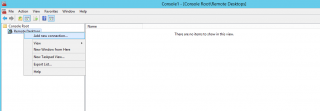
Your MMC console is ready to be populated with the necessary connection to remote servers. Expand the Remote Desktops node and right-click on it. Select the Add connection option
Click on picture for better resolution
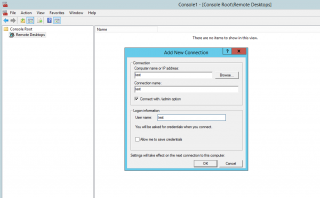
A dialog box will be displayed and you will be able to populate the tree view with the computer name where you need to connect through Remote Desktop protocol
Click on picture for better resolution
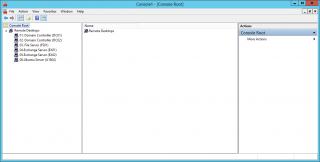
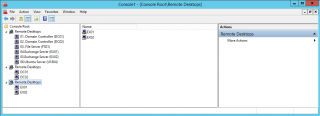
The following screenshot shows a basic Remote Desktops Console where the connection name can be used to identify and organize the view within the console.
Click on picture for better resolution
Most of the admins using this MMC console would use the connection name property in order to organize the view within the console… An example is provided hereafter in the screenshot below
Click on picture for better resolution
Customize MMC using Folder Snapins
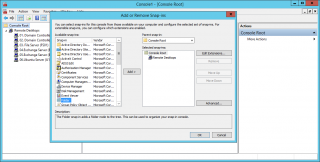
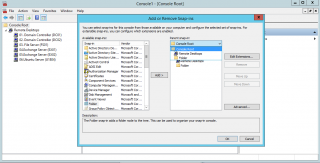
Other admins used to work with MMC consoles will come up with another approach. They would add to the MMC Console the Folder snapin first and add the remote Desktops console just beneath. So, If you select again the add/remove snap in option, in the dialog box, find the Folder option and press Add.
Click on picture for better resolution
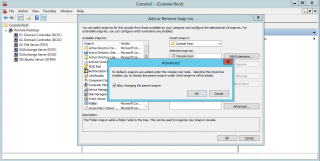
Click also on the Advanced Button and ensure to tick the Check Box
Click on picture for better resolution
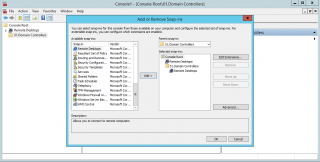
In the Dialog box, you have now the option to place additional snap-ins in a parent child structure…..
Click on picture for better resolution
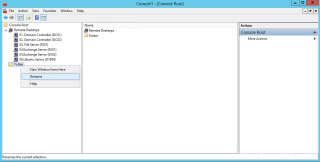
The advantage of using Folder snapin is that you can rename it and group your remote desktop connections per Server Roles or per environments (preprod/prod/test/…)
Click on picture for better resolution
Click on picture for better resolution
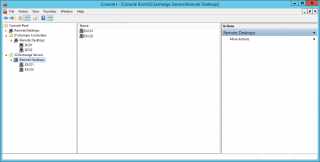
An example of Remote Desktops console using Folder Snapin to group your RDP connections is depicted in the screenshot below
Click on picture for better resolution
This approach is kind of improvement because you can indeed organize your console based on your needs. However, there is a lot of clicks involved. You have to expand the Folder Node, then the Remote Desktop nodes and finally the server where you need to connect to…
Customizing using Remote Desktops Snap-In Only…
Option described above is just fine and would work in most of the case. However, some people complained that they needed to click a lot through the Tree view in order to reach the needed server. So, Another option to customize the tree view would be to use only the Remote Desktops Snap Ins as shown below. The problem here is that all nodes are called Remote Desktops
Click on picture for better resolution
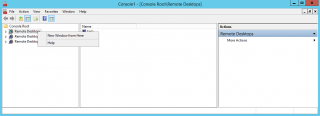
The other problem we have here is that the Remote Desktops node cannot be renamed….within the MMC console.
Click on picture for better resolution
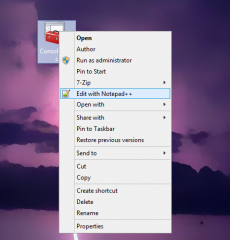
Howerver, we can edit the msc file using any text editor (we are using Notepad++) and within the text file we can changed the names of the different nodes……
Click on picture for better resolution
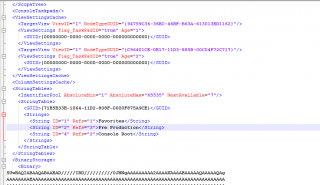
Navigate through the file and located the following entry. You see that the name Remote Desktops is listed here… Replace with anything to see how this change would be reflected in the mmc console.
Click on picture for better resolution
For Demonstration purposes, we have replaced the string Remote Desktops with the value Pre Production as shown in the screenshot below
Click on picture for better resolution
After saving the changes made to the file, if you open again the MMC console, you will see that the name Pre Production is replicated three times. This is not really what we are looking for….
Click on picture for better resolution
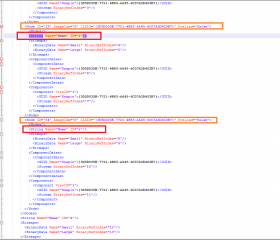
Editing again the console via a text editor, we have noticed that each Node in the treeview (with the name Remote Desktops) is marked with a specific Node ID. Under this node ID, we can see that the line <String Name=”Name” ID=”2″/> is always set to Value 2.
Click on picture for better resolution
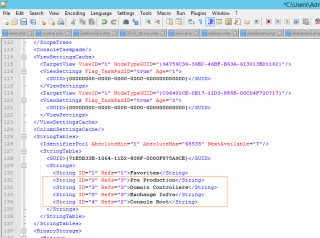
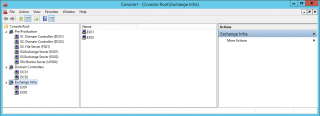
So, to customize our view, we will need first to add ID values in the String section as shown in the screenshot below… In Our example, we want to have three nodes called
- Pre Production
- Domain Controllers
- Exchange Infra
Click on picture for better resolution
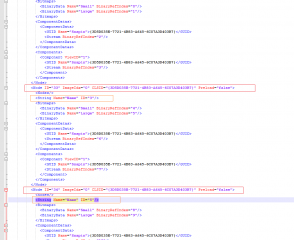
Then we need to update under each Node (representing the Remote Desktops node) the ID value used in the following line <String Name=”Name” ID=”2″/>. In the screenshot below, we can see that we are now using the value 3 and 5 for the second and third node in the treeview
Click on picture for better resolution
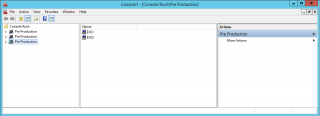
After saving your changes, you could see that indeed the Tree view nodes names have been updated accordingly…
Click on picture for better resolution
Final Notes
As mentioned earlier, we know that numerous tools and solutions exists on the market to provide a central place where an admin can connect to multiple servers using Remote desktop protocol. Products such as Microsoft RDCMan or Terminals or mRemoteNG, Remote Desktop manager….can be the perfect admin companion based on your budget and your organization policy and rules
Some organizations still prefer to use the “good old” MMC console because they know how to work with them, they can be easily distributed and they can be customized and configured in such way that no changes can be saved in the distributed MMC Console. The idea of this post was to basically demonstrate how to revive the legacy MMC Remote Desktops Console and still ensure that a certain level of customization could be achieved. The customization are more related to the creation of an organized view where servers could be grouped by Server Roles, Domain Names, by Environments,….
This post has demonstrated that you can indeed still use the Remote Desktops MMC console. The post also offers two different ways to customize and organize the view within the console. You can either use the Folder Snap-in within the Remote Desktops console to create your structure and group servers together. The other option would consist of adding multiple times the Remote Destkops Snap-in in a blank MMC console and rename the nodes as required. The rename process cannot be done through the MMC console and you will need to open the resulting msc console through a text editor and manually make the rename process change within the file.
Hope you enjoyed this travel in time when you were using MMC console like a pro….. 🙂
Till next Time
See ya
Note :
If you are interested in bringing other TS console back on Windows 2012 R2 and later, have a look at the following posts
