Hello World,
I know it has been some time since I didn’t write any new posts but I had to work (and still working) on a quite heavy project which is taking away all my free time. Lately,I have to travel a lot as well. So this explain my lack of recent posts and short answers to comments.
In this post, we will be talking about RDS and look at the last role about which we didn’t talked about : the Licensing Server. This role can be quite important. Recently, I had a customer that called me telling me that the RDS solution Proof of Concept that was implemented was not working anymore. Each time a user was trying to connect, a message about missing licensing server was displayed.
So we had to explain to our customer how to perform the installation of the RD Licensing Role. So, let’see how easy it is…..
Step by Step Installation
Little Background information and common errors
When you will add the RD Licensing Server role into your RDS infrastructure, you should not use the Add Roles and feature wizard. A collegue of mine try to install the role using the Wizard and it seems that the role was not detected in the RDMS management console.
In 2012 R2, in order to add additional roles (and you should know that if you have been reading my previous posts about this topic), you need to install the RDMS tool.
If you have single RDS Deployment, using the RDMS is quite easy. You open the Server Manager and you locate the RDMS node and you can start working on it.
If you have deployed RDS infrastructure on multiple servers, if you open the RDMS tool, you might get an error stating that there is no connection to the RDS broker.
Click on Picture For Better Resolution
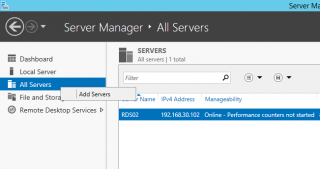
You will get this error because you have to add all servers that are part of your RDS Deployment into your Server Manager Console. To Add them, simply go the the all servers node,right-click and select Add servers. Add all your RDS Server and after that, you should be able to open the RDMS Console with no problem.
Click on Picture For Better Resolution
So, please, ensure that you have updated your server manager accordingly in order to work with a multi-server RDS deployment scenario.
Installation Instructions
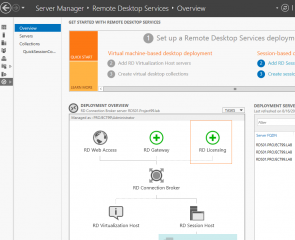
To add the RD Licensing Role in your infrastructure, you will open the RDMS management console tool which will be opening the Overview page. In this page, in the Deployment overview area, click on the plus sign in order to add the RD Licensing server.
Click on Picture For Better Resolution
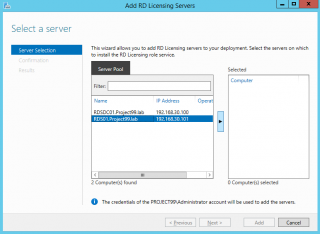
The Add Servers Wizard will start and you can select the server you want to add as a RD licensing server. This role does not need to have a dedicated server. This server could be installed on any existing machine on your network. In the wizard, add the server to be the Licensing server, click on the arrow to move it in the selected server list box and press Next
Click on Picture For Better Resolution
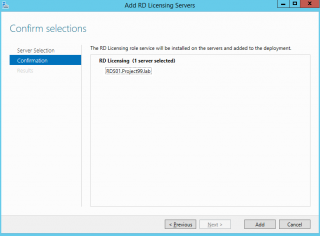
In the confirmation page, ensure that you have selected the correct server and Press Add
Click on Picture For Better Resolution
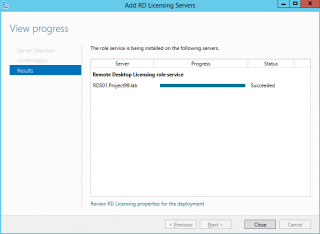
In the View Progress page, review progress. When installation is completed, you can Press the Close Button to quit the Wizard
Click on Picture For Better Resolution
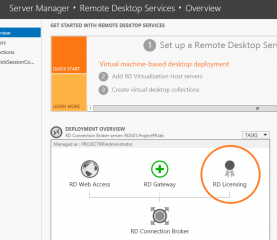
You are done with the installation of the Role. In the RDMS console, in the Deployment Overview pane; you should see that the new role is available and installed
Click on Picture For Better Resolution
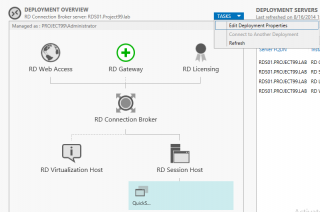
You still need to perform a small configuration step after installing the role. You will have to specify the Licensing Mode (Per User or Per Device). In the RDMS, deployment Overview Pane, click on the Tasks button and click on the Edit Deployment Properties.
Click on Picture For Better Resolution
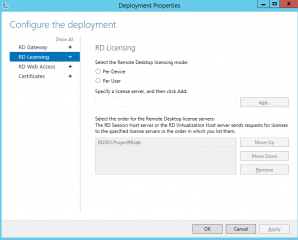
In the Configure Deployment, Click on the RD Licensing Node. You should see that the licensing server is already listed. You need to specify which licensing mode you wanna use.
Click on Picture For Better Resolution
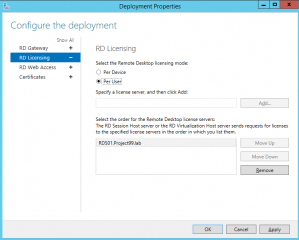
In our scenario, we are using per user mode. Press OK and you are done.
Click on Picture For Better Resolution
Licensing Diagnostic Tool
To manager the RD Licensing server role, you will have multiple management console available to you. A less known one but quite useful is the Licensing Diagnostic Tool.
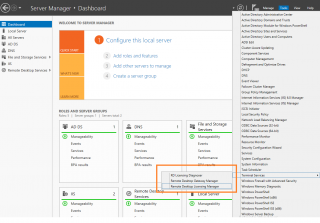
To access the tool, you have multiple ways. In this post, we will open the console via the Server Manager > Tools > Terminal Services > RD Licensing Diagnoser.
Click on Picture For Better Resolution
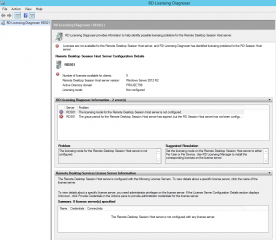
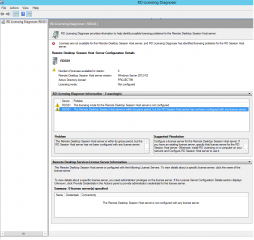
In the screenshot below, you can see the type of error you would get if your RDS server is not activated and that the grace period has been exceeded.
Click on Picture For Better Resolution
The following screenshot on the contrary shows you the information if you are still in the grace period window. In the tool; you could see how many licenses you are using; which mode (per user or per device) and possibly error messages that might occur.
Click on Picture For Better Resolution
Licensing Manager Console
This console will allow you to
- Activate your server
- Install CAL License key
- Generate reports about CAL usage
To access the tool, you have multiple ways. In this post, we will open the console via the Server Manager > Tools > Terminal Services > RD Licensing Manager.
Click on Picture For Better Resolution
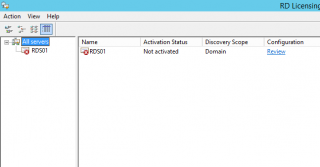
This will open the MMC Console. In the screenshot below, you can see how the console look like.
Click on Picture For Better Resolution
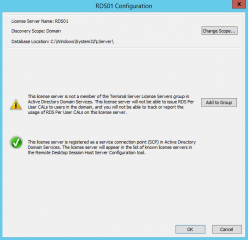
In my configuration, based on the screenshot above, you can see that I need to perform some additional configuration. So, in my management console, I clicked on the review link and the following dialog box will be displayed.
From this dialog box, you can change the scope of the licensing server.
Click on Picture For Better Resolution
Click on Change Scope…
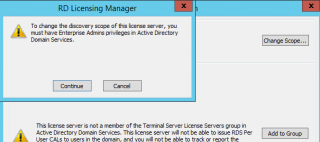
You might get a warning message stating that you need to be member of the Enterprise Admins to perform this operation. Press Continue.
Click on Picture For Better Resolution
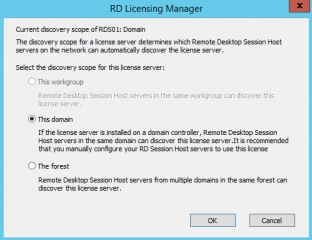
A new dialog box will be displayed where you can see the current scope and you can change the scope to one of the following settings :
- Forest
- Domain
- Workgroup
Click on Picture For Better Resolution
The choice you will make depends of your infrastructure. If you have a forest with multiple domains, the forest scope might make sense if you have RDHS server located in child domains. If you have a single forest single domain, the domain scope would be sufficient.
The workgroup option is greyed out in our case because we are running the RDS in an Active Directory Infrastructure. However, it’s technically possible to install the RDS Role in a workgroup infrastructure. If you did that, you could add your RD licensing server role and configured it in a way the RDS servers role can discover the license server.
Press OK when you have performed your choice and you should be back to the Configuration dialog box.
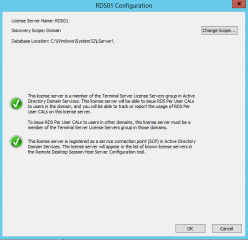
In the Configuration Dialog box, It’s time to click on the Button Add to Group… You might get again the warning about needed group membership. Proceed.
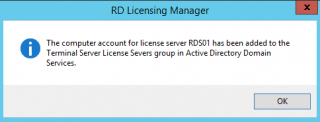
You will get confirmation that the computer has been added to the group
Click on Picture For Better Resolution
You configuration dialog box should display only green tick at this stage. Press OK to close it
Click on Picture For Better Resolution
In the Licensing Management Console, you should see now that the configuration is marked as OK.
Click on Picture For Better Resolution
Activate your RDS Server
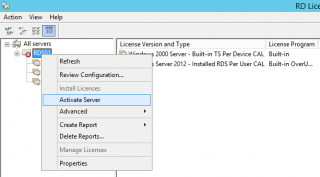
The RD licensing manager console will be used to activate your server and when done, you will be able to install the necessary licenses you need for your infrastructure. To activate your server, You simply open your Licensing Manager console, right-click on the server and select the option Activate Server
Click on Picture For Better Resolution
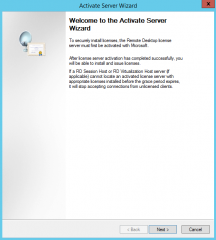
The activation Wizard will be displayed. Press Next
Click on Picture For Better Resolution
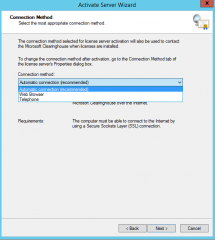
In the connection method, choose your method and press next. In my scenario (because I have no internet access) we have chosen the Web Browser method. Press Next
Click on Picture For Better Resolution
Note
If you have access to an internet connection, choose the automatic option which will guide you through a similar wizard and activation will be done automatically for you.
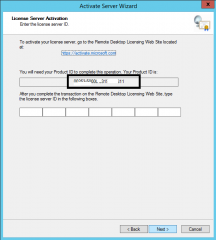
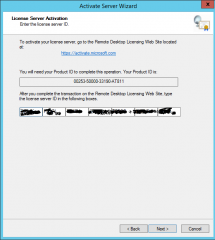
In the License Activation Page, You will see that a link is specified (https://activate.microsot.com) and a product ID.
Click on Picture For Better Resolution
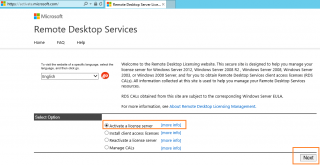
From a machine connected to internet, browse to the https://activate.microsoft.com page and from there you should be able to perform multiple operations (Activate Server, Install Licenses, Reactivate Servers,…). Because I need to Activate my server, I have chosen Activate server option and Press Next
Click on Picture For Better Resolution
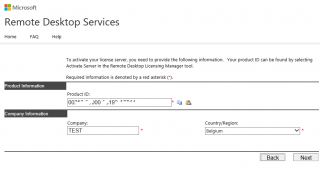
You will be asked for the Product ID (the one generated by the Active Server Wizard), the company name and country. Press Next
Click on Picture For Better Resolution
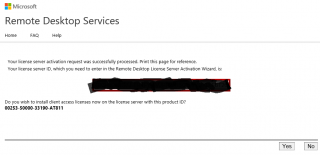
In the next page, you will receive a license Activation ID.
Click on Picture For Better Resolution
Go back to your wizard, copy this license activation key and press next.
Click on Picture For Better Resolution
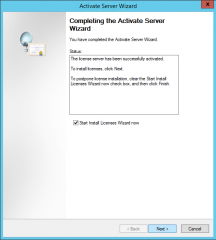
This will activate your server. The Completion Page Wizard will be displayed and you can decide to install right away or later CAL licenses by checking/unchecking the box.
Click on Picture For Better Resolution
At this stage, your server has been activated and you are ready to obtain and install CAL Licenses for your infrastructure.
Install your Licenses
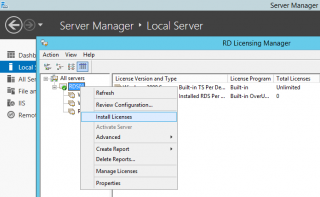
Once your RD License server is activated, you can start installing CAL Licenses as required. Open the RD Licensing manager, right-click the server and select Install Licenses
Click on Picture For Better Resolution
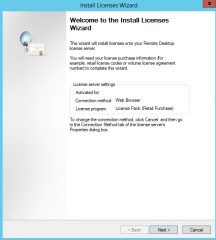
Click Next in the Welcome to Install Licenses Wizard page.
Click on Picture For Better Resolution
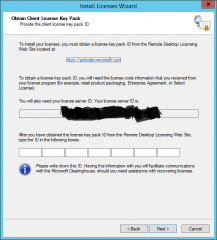
In the obtain license key pack, you will need to go again on the https://activate.microsoft.com page and select option Install Licenses.
Click on Picture For Better Resolution
After completing the request through the MS web interface, you will get again a key that you will need to copy in the wizard.
Once the Install License wizard is completed, your RD Licensing server will be ready to issue licenses to the users.
Final Notes
This post closes the introduction on the RDS 2012 R2 technology (Session host based Scenario). We have explained how you can implement a simple RDS infrastructure which can be used to host your applications and make them available through the Remote Desktop Web Access or to publish them on the start menu using the RemoteApp Desktop and connections.
As soon as I have a little bit of time, we will continue our journey through the RDS Technology. We will continue on how you could customize a little bit further the RD Web Access allowing users to reset their expired password and the look n feel of the page. We will then discuss a more complex deployment scenario where multiple servers will be deployed and where High availability needs to be implemented as well.
We will then see how the VDI solution can be used in the context of RDS technology and what Microsoft has to offer at that level. Finally, we might want to discuss how to perform hardening on the remote host servers so the user cannot tamper the solution. You will need to implement Group polices to control the user experience while using the Remote Desktop Solution.
This is the plan but I cannot guarantee that we will be discussing all these topics in the near future. We will see….
Till Next Time
See ya
