Hello World
In part I and Part II, we have quickly describes the remote Desktop services role available in Windows 2012 R2. We have also seen the different components that can be deployed through your organization based on your requirements.
Overview
In this post, we will assume that we want to deploy the Remote Desktop Services on a single Server. We want to demonstrate the installation. All the needed roles will be installed on a single server. In coming posts, we will have a look at a more complex deployment strategy. The single server installation is to get used to the new installation procedure and the new management tool.
In more advanced scenario/topologies, you might want to use different servers to host different RDS Services roles. I usually spread the roles in the following manner when I have a more complex topology:
- 1 Machine would host the Remote Session Host (or Virtualization Host) or both
- 1 Machine would host the Remote Desktop Gateway and the Remote Web Access
- 1 Machine would host the Remote Connection Broker
- 1 Machine would host the RD Licensing (which could be combined with the RD Connection broker)
If you have only 2 machines, you could spread the roles as follow:
- 1 Machine with the Remote Session host (or virtualization host) or both
- 1 Machine with the remaining roles (RD GW, RD Web, RD Connection broker, RD Licensing)
How to Install the RDS Role
In our scenario, we want to install RDS Roles on a single Server.
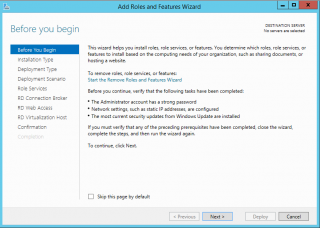
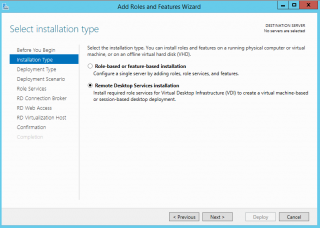
When you start the Add Roles and features Wizard, you will have two ways to install the RDS role. One option is to use the Remote Desktop service installation option (which is the new and best way to install RDS roles) or you can use the role-based installation option (which is the old and not recommended way to install RDS).
Install RDS using the Remote Desktop Services installation (the New Way)
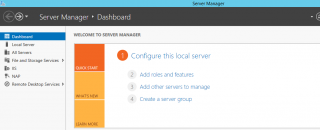
To perform the installation of a basic RDS role, you would start your server Manager console, click on add and remove Roles.
Click on Picture For Better Resolution
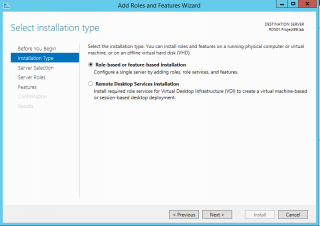
In the Add Roles and Feature Wizard, in the selection installation Type, you will have the option to choose from
- Role-Based installation or,
- Remote Desktop Services Installation
In the Selection installation type page, you should select the option remote Desktop services installation and Press Next
Click on Picture For Better Resolution
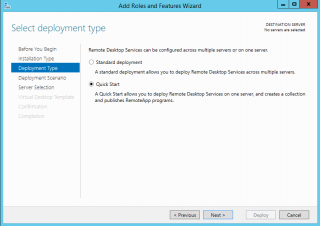
In the Deployment Type page, select the option Quick start and Press
Click on Picture For Better Resolution
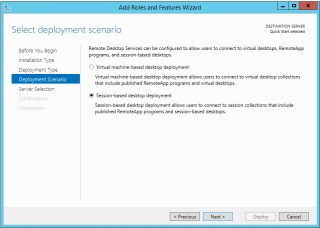
In the Deployment scenario, select the Session-based Desktop Deployment. (We are deploying RDS on Virtual machines so I cannot demonstrate yet the virtual machine based deployment). Press Next
Click on Picture For Better Resolution
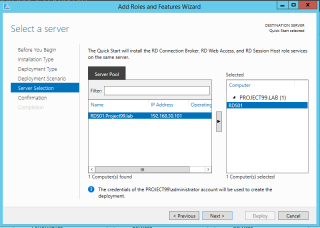
In the Select a server page, select the future RDS Server add it to the right columns and Press Next
Click on Picture For Better Resolution
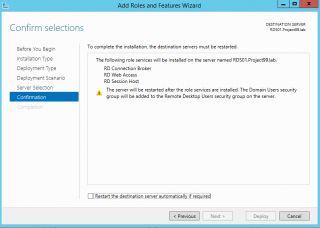
In the confirm page, tick the checkbox Restart Destination server which will make available the deploy button. Press Deploy
Click on Picture For Better Resolution
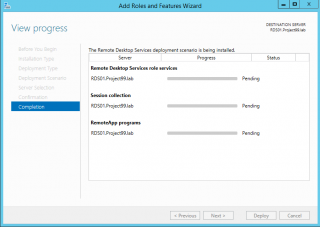
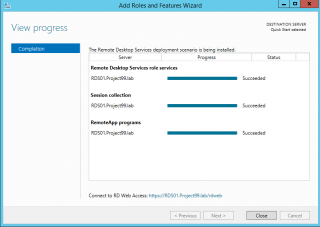
In the View Progress Page, you can see the progress of the installation
Click on Picture For Better Resolution
When completed Press Close.
Click on Picture For Better Resolution
Your server should be restarting
You have completed your installation. As you can see quite straight forward
Installing RDS in the old Fashion Way (Role-Based)
The first time I had to install the RDS in Windows 2012, I thought that the process would be similar to the one in Windows 2008 R2. So, with my first RDS installation in Windows 2012, I have used the Role-based scenario.
Click on Picture for Better Resolution
You can perform the installation in such a way but this does not really make sense. When your installation is complete and you try to open the RDS management console, you will get the following screenshot
Click on Picture for Better Resolution
In a few words, you have to go back to the Add Server roles wizard and select the Remote desktop installation option in order to get the RDS role fully installed and working.
So, yes, you could do the installation using the role based approach but you will still have to use the remote desktop installation approach to finalize the installation. The other option would be to perform the management through PowerShell cmdlet.
Do not loose time and use the new installation process in order to get your RDS ready to go !
Explore the new RDS management console
The management console for RDS in Windows 2012 and later are completely different than the one used in Windows 2008R2. We do not have dedicated MMC console. You have to do your management through the Server Manager Console.
The Quick Installation option in RDS has configured your Server with some default settings. The remote web access is installed and enabled, the wizard has created for your collections and published some remoteApp. Now, you have to become familiar with the new management tools that you can use to manage your RDS infrastructure. When the server has start again, in the server Manager, you will see a new node called Remote Desktop Services.
Click on Picture for Better Resolution
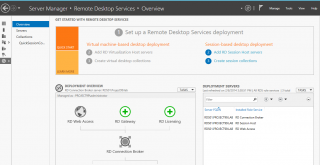
Click on it and you will see the new RDS management console. In the Overview Node, you can see the Deployment overview illustration. There you can see which server roles have been installed by default. As you can see the RD Gateway and the RD licensing server roles are not part of the Quick Install scenario.
Click on Picture for Better Resolution
From this screen, you can add additional RDS server based on their roles (either through the Deployment overview tile or through the Deployed server Role tile)
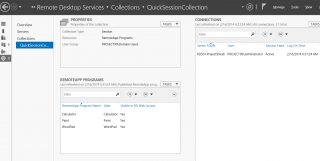
If you click on under the collection node (on the QuickConnectionSession), you can see the tiles that can be used to configure and customize the collection settings
Click on Picture for Better Resolution
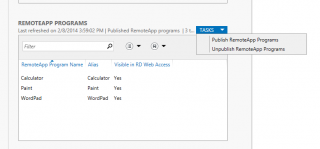
You can use the RemoteApp tile to publish or unpublish RemoteApp as well
Click on Picture for Better Resolution
As you can see the Management console is quite different than the one found in Windows 2008 R2. I like the new management console but you have to get used to it. You will need some time to find the proper wizard to start in order to configure your settings. Indeed, some options are redundant and shown in multiple pages. But with some practice, you will see that this exercise will become easier and easier.
Final Notes
Voila ! This conclude the second post related to RDS in Windows 2012 R2. So far, we have seen described the basic component used by RDS and we have described how to perform a basic installation. In the next post, we might want spent some time in checking the Management console and the configuration wizards available to you.
Till next Time
See ya
