
Hello World,
Today, I’ll speak about MDT again. My MDT 2012 series has received quite some positive feedback as well. I was not expecting this because I thought that a lot of people were already providing a lot of information about MDT. I have to say that one of my customer have provided me really good feedback. The feedback was so good that I’ve implemented the solution in his premise. As a result of this post, I’ve been implementing custom MDT solutions in some places and I’ve been asked to move an MDT infrastructure into SCCM 2012 infrastructure.
As soon as I have some time, I’ll be starting posting about the SCCM 2012 infrastructure and how to use this product to deploy Operating system. But, today, we will continue your journey with MDT 2012
Overview
The idea of this post comes from a request of one of my friends. He was tasked to come up with a pilot solution to quickly deploy Internet Kiosk computers. The current solution was based on Windows XP and the kiosk configuration was using registry tweaks instead of proper gpo settings. No deployment solution was apparently used to automate such deployment. So, within a day, I’ve been working with him to setup,implement and configure the MDT infrastructure that could be used to deploy the solution.
Because we were really short in time, we have decided to use MDT to deploy the Windows 7 Build image. We have then customized the windows 7 installation using mainly Local GPO in order to make the workstation look like an internet kiosk computer. This “Internet Kiosk Computer” would be used to access web based applications and would offer the possibility to read pdf files, and office files using the windows viewer software.
In this post, we will not explain what and how we have applied gpos in order to lock down the computer. Here we will simply explain how you can capture an image of the customized computer. We are basically creating a master build image (thick image).
Creating the Catpure Task
We assume that you have already an up and running MDT infrastructure and you have already imported the OS files, applications and drivers you need to. To sysprep and capture an image, you will need to create a new task.
In the Deployment Workbench,navigate the the task sequence node, right-click on it and select New Task. The New Task wizard starts
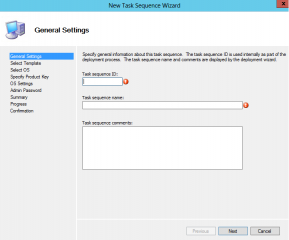
In the General Settings page, provide the requested information and Press Next
Click on Picture for Better Resolution
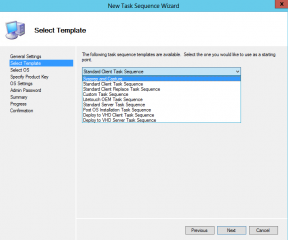
In the Select Template page, select the sysprep and Capture template. Press Next
Click on Picture for Better Resolution
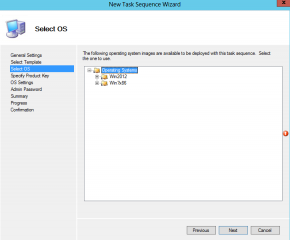
In the Select OS page, select one and press Next
Click on Picture for Better Resolution
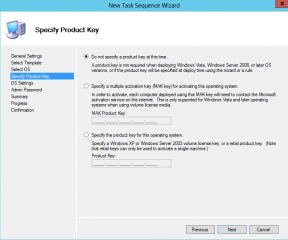
In the Specify product key, make your choice and Press Next
Click on Picture for Better Resolution
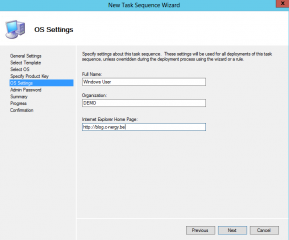
In the OS Settings Page, provide the requested information and press Next
Click on Picture for Better Resolution
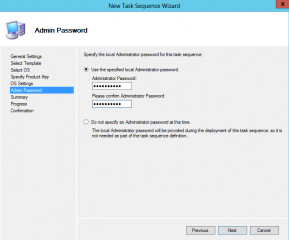
In the Admin Password Page, select your option and Press Next
Click on Picture for Better Resolution
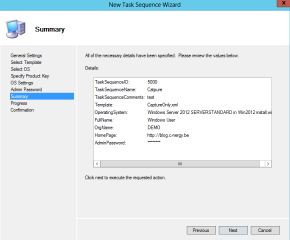
in the Summary Page, review the settings and Press Next
Click on Picture for Better Resolution
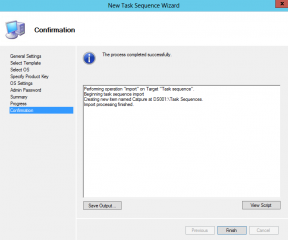
Wait for the process to completed and in the confirmation page, Press Finish
Click on Picture for Better Resolution
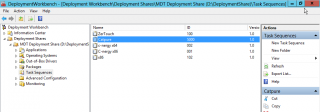
In the Deployment Workbench, after clicking on the Task Sequences node, you should see the newly created task.
Click on Picture for Better Resolution
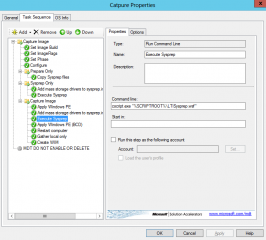
Right-click on it and select Properties. Click on the Task Sequence tab in order to see what the task will be performing.
Click on Picture for Better Resolution
You should notice that the Capture task include the sysprep step in order to generalize the computer image.
At this stage, you almost ready to capture your master build computer.
Note about CustomSettings.ini
If you have heavily customized your Deployment infrastructure, you have probably modified the CustomSettings.ini file. Given that one deployment share will be using only one customsettings.ini file, you might need to update it in order to ensure that the Capture task run successfully.
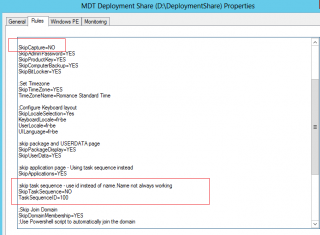
You should ensure that the following options are set in your customsettings.ini file. You can choose to run the capture task sequence hidden or you can decide to have the task sequence dialog box displayed in order to select the correct task.
Click on Picture for Better Resolution
How to run the Capture Task Sequence
I have seen a lot of people try to run the capture task from the WinPE environment. Basically, they restart the target computer, they then boot into the PXE mode, get the WinPE image from the MDT server with the Wizard starting, they then select the capture task and…..the task fails miserably……
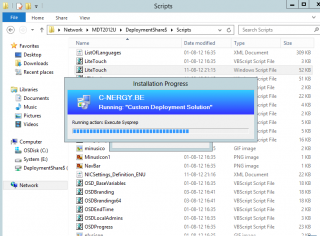
As a matter of fact, the Capture task has to run from the Windows Operating system simply because the task needs to run the sysprep action. When the sysprep is completed, the system will reboot in the WinPE mode and the capture process will begin.
Note :
Just for your information, It’s possible to have the capture task running from the WinPE infrastructure as long as you remove the sysprep actions from the Task sequence and if you manually execute the sysprep tool on the target computer to be captured. I do not like this approach because you have to perform something manual which is already included in the task sequence.
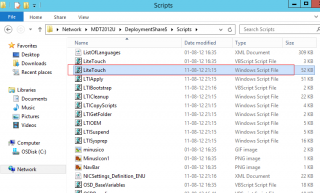
To start the sysprep and the capture process, you will have to start the LiteTouch.wsf script manually from the MDT Deployment Share. In other words,
1. You connect to the MDT Deployment Share and navigate to the Scripts folder (\\MDT_ServerName\Scripts\). Double-click on the LiteTouch.wsf script
Click on Picture for better Resolution
2. You will see the task sequence Wizard displayed (if you have not configured it to run hidden)
Click on Picture for better Resolution
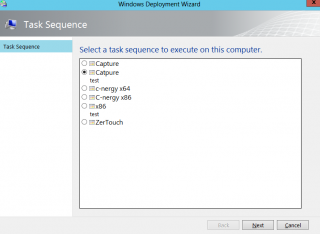
3. In the task sequence selection, select the Capture Task and Press Next
Click on Picture for better Resolution
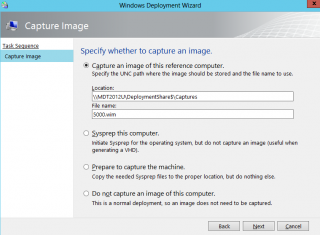
4. You will then get prompted for some additional information (where to store the image and the name)
Click on Picture for better Resolution
5. Press Next and wait for the task to complete.
Click on Picture for better Resolution
Final Notes
And voila ! You are done ! When the capture is complete, you can import this custom OS image into your MDT Server and deploy it through the network as you would do with other operating systems.
Apparently, this process of capturing and deploying OS using MDT really helped my friend who was asking for some support. Because he was developing a prototype, this approach was good enough at that time. Now, he will start develop a full useable solution. This means that instead of simply manually configure the reference computer and capturing the image, he will try to create the perfect task sequence that would install the Operating system, install the file viewers and configure the GPO automatically in order to have the most flexible solution in case of changes.
I hope you enjoyed this post
Till Next Time
See ya
Thanks for the post 🙂
Using LTISuspend.wsf to pause (to do additional tweaking) the automated reference image creation ts is also nice trick to know.
http://www.toddlamothe.com/deployment/pause-task-sequence-mdt-2010.htm
Hello Jouni,
Thank for the insight about the LTISuspend task… We knew about it but no much time to write about it
If we got some time, we might update the post and integrate the script
Thank for the visit and for sharing information and knowledge 🙂
Till next time
see ya