Hello World,
We will start this new year 2013 with an easy post. We will describe how to promote a Domain Controller when using Windows 2012 Operating system. Windows8/windows 2012 are officially out and available for customers. It’s time for us to prepare deployment of new domain controllers within customers premises.
In my current job assignment, we have decided to already prepare the deployment of Windows 2012 within the infrastructure. We have decided to install a completely new infrastructure (Test Lab) based on Windows 2012 server product. This infrastructure will be used to prepare,test and validate features that might be interesting for the customer.
I’m pretty sure that this topic has been discussed a lot around the web. However, I’ll still spend some time on it because it might become handy in future projects where I might need to document the process….
Stop talking…. Time for action…. Let’s go !
How to promote a Domain Controller in Windows 2012 ?
DCPROMO is Deprecated
In previous version of Windows, in order to promote a Domain Controller, you would simply from a command prompt or from the run command, type the following command
- dcpromo (or dcpromo /adv if you need to perform more advanced actions)
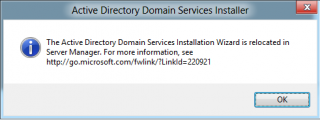
If you try to run the dcpromo command on a Windows 2012, you will be seeing a small warning telling you that the process has been moved to the server manager.
Click on picture for better resolution
In Windows 2012, in order to promote a Domain controller; you will use either the Server Manager interface or the new Powershell cmdlets. DCPROMO has been deprecated and can be used only in conjunction with an answer file. When I promoted my first Windows 2012 domain controller, I found the process quite easy (quite similar to the previous versions) but a little bit long. You have to go through quite a lot of screens before having your domain controller promoted. Hopefully, the powershell cmdlets can streamline the process and provide an good automation solution.
ADPREP Integrated within the AD Installation Wizard
In the past, when adding new Domain controllers with new operating systems, we needed to prepare the forest and domain using the adprep.exe command line tool. In Windows 2012, the adprep is fully integrated in the AD Installation Wizard. This means that you do not need to worry about prepping your infrastructure. It will be done automatically for you.
However, in some situations, where you have separation of roles, you might still want to allow only a specific team to prepare the infrastructure. In Windows 2012, the adprep.exe is still available and can be run from the command line prior running the Wizard. Adprep.exe is located in the \support\adprep folder of the Windows Server 2012 installation disc. To run adprep /forestprep, you can use the following syntax :
- Adprep.exe /forestprep /forest <forest name> /userdomain <user domain name> /user <user name> /password *
Note : The adprep /domainprep /gpprep command is not run as part of AD DS installation. If you need to run it, you can run it from the command line. If you have recent Windows Operating system, the command has been already run and you do not need to run it again.
Promoting the First Win 2012 Domain Controller in the Forest
Adding the Active Directory Domain services Roles
In this post, we are installing the first Domain controller of the first. We are basically creating the Active Directory forest. The new way to start the dcpromo is to install the Active Directory Domain Services role from the server manager. Let’s do this
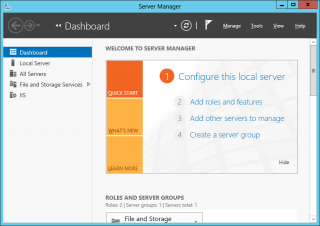
Step 1 – In the server manager interface, click on Add roles and Features
Click on picture for better resolution
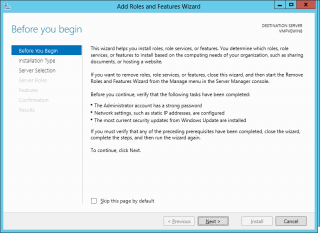
Step 2 – In the Before you begin page, Click Next
Click on picture for better resolution
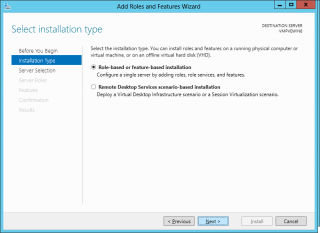
Step 3 – In the Installation Type page, select Role-based scenario and Press Next
Click on picture for better resolution
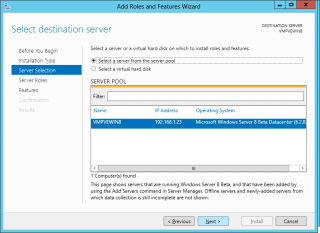
Step 4 – In the Select Destination server page, select the destination server and Press Next
Click on picture for better resolution
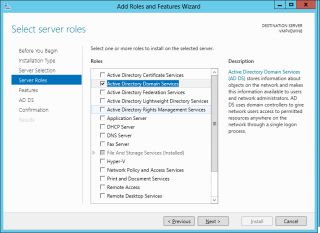
Step 5 – In the Select Server Roles page, Select the Active Directory Domain Services option and Press Next
Click on picture for better resolution
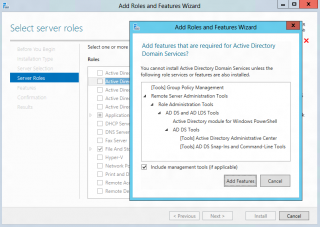
After ticking the role, you will be prompted to install additional features. Simply Accept default and press Add Features
Click on picture for better resolution
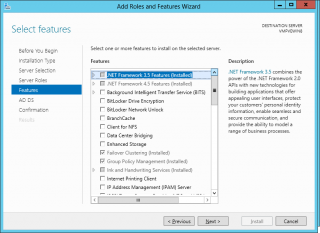
Step 6 – In the Select Feature Page, accept default and Press Next
Click on picture for better resolution
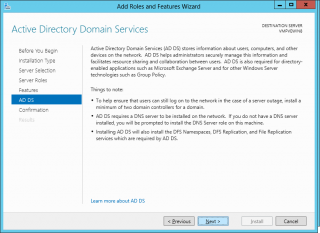
Step 7 – In the Active Directory Domain Services page, simply press Next
Click on picture for better resolution
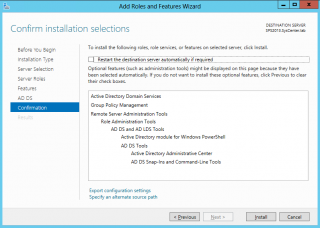
Step 8 – In the confirmation page, Review your settings and Press Install
Click on picture for better resolution
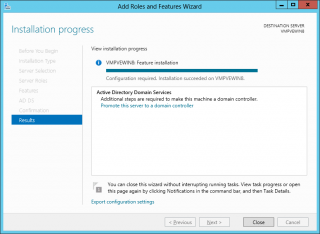
Step 9 – In the Results page, when the installation is complete, you will notice that you need to perform additional actions
Click on picture for better resolution
Indeed, so far, we have simply installed the binaries. Now, we need to create our Active Directory forest. This is the next step
Promoting the server
Step 1 – From the previous screenshot, you will click on the link Promote this server to a domain controller.
Click on picture for better resolution
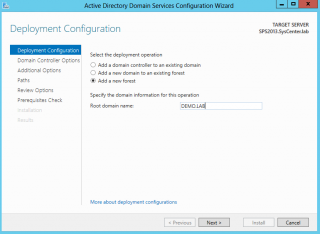
Step 2 – The Deployment configuration page will be displayed. Choose the appropriate option. In our example, we need to create a new forest. You will need to provide the name of the domain you want to create. Press Next
Click on picture for better resolution
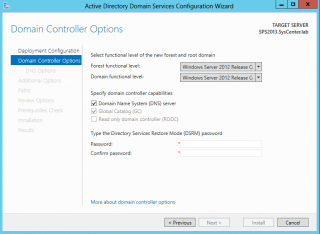
Step 3 – In the Domain Controller Options, select the forest level and domain level you need to have. The first domain controller will be a global catalog by default. You have to specify if the DC will be hosting the DNS infrastructure as well. In my case, I will indeed have DNS installed on my domain controller. Press Next
Click on picture for better resolution
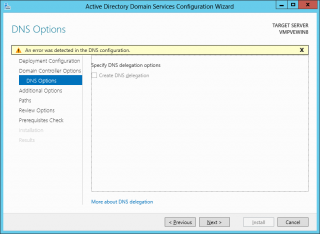
Step 4 – In DNS options Page, accept default and Press Next
Click on picture for better resolution
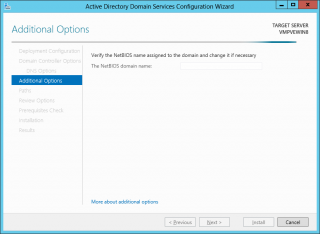
Step 5 – In the Additional options page, you might see that the Wizard is asking for the Netbios Name of the domain
Click on picture for better resolution
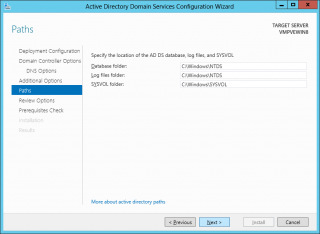
Step 6 – In the Paths page, specify where to store the AD database, SYSVOL and Logs folders. In this scenario, I’ve just accepted the default (which might not be the best practices )
Click on picture for better resolution
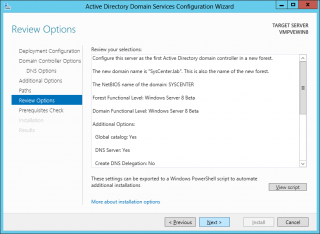
Step 7 – In the review options Page, check your settings. The most interesting feature here is the button view script.
Click on picture for better resolution
Indeed, the wizard has created for you a ready to use powershell script which can help you in no time to automate your domain controller installation
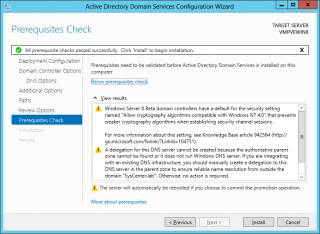
Step 8 – In the prerequisites check page, review the information and if you are ready to go, Press Install
Click on picture for better resolution
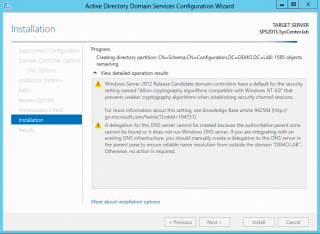
Step 9 – In the installation page, at the top, you can see the actions that the wizard is performing. If you pay attention, you should see when the wizard is performing the forestprep and the domainprep operations. You would see something like Upgrading forest and then Upgrading Domain messages displayed on this windows
Click on picture for better resolution
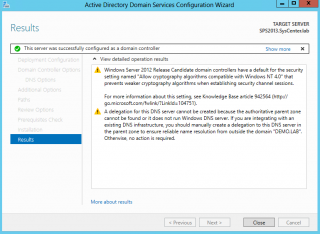
Step 10 – In the result page; you should see a green tick indicating that the installation has been successfully performed
Click on picture for better resolution
Final Notes
As I said, this was an easy post. Windows 2012 has introduced some changes in the way to perform the dcpromo. However, if you are used to perform such operation, the changes will not affect you to much. The cool feature about this new dcpromo way is the powershell cmdlet. You should be able to create a nice script that would automate your process and loose less time in such operations.
In a coming post, I’ll try to describe the DCPROMO process using only Powershell cmdlet. We will see also what has changed when you need to demote a domain controller.
Till next time
See ya
