Hello World,
If you are using Ubuntu within your environment, you will be probably aware that the next iteration of Ubuntu is on its way. Canonical is preparing the Short Term Release (STR) version Ubuntu 23.10, codename Mantic Minotaur which will be released in October 2023. The release might not bring major changes compared to Ubuntu 23.04 but still provide a peak preview of the future LTS Release to come in 2024.
This post will quickly go through the installation of Ubuntu 23.10 using the Modern installer Wizard based on Flutter technology. The Installer has been slightly updated compared to the one released in Ubuntu 23.10. It seems that this Installer is working better, smoother and provide a refreshing installation experience…
So, Let’s do this !
Overview
Ubuntu 23.10 also known as Mantic Minotaur will be made available in October 2023. The Mantic Minotaur release is still in development and we are working with the Beta release. In our previous (see Ubuntu – Quick Look at Ubuntu 23.10),we have already looked at what this release will bring and how this can define the next Long Term Support (LTS) Release to come i.e. 24.04.
In the next section, we will go through the installation process and have a quick look on the updated Installer based on flutter.
Step by Step installation
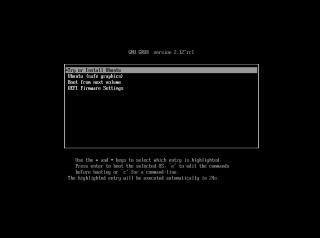
We have download the daily build image of Ubuntu 23.10 (beta version), we have attached the iso to our virtual machine and we have boot the machine up. When booting from the iso file, the Virtual machine will boot from the iso file and you will get presented with the following screen. Press Enter to move to the next phase
Click on Picture for better Resolution
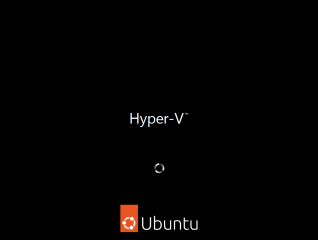
The boot process will start. Since we are installing the Ubuntu 23.10 on Hyper-v machine, you will see the Hyper-v logo when booting to the Ubuntu Installer
Click on Picture for better Resolution
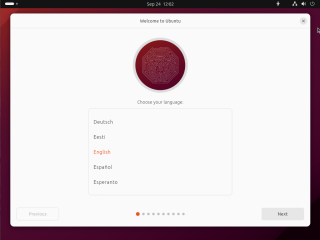
When the starting process is completed, you will reach the Welcome Page of the new Ubuntu Installer. The UI has been slight changed compared to the previous version it seems. We are ready to start.
Click on Picture for better Resolution
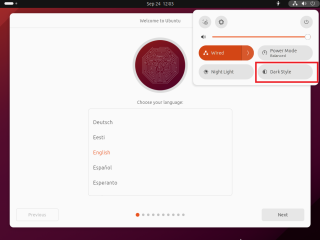
By default, the installer will use the Light Theme (white background). If you want to, you can already change to Dark Theme from the installer by clicking on the Quick Settings and click on the Dark Theme option.
Click on Picture for better Resolution
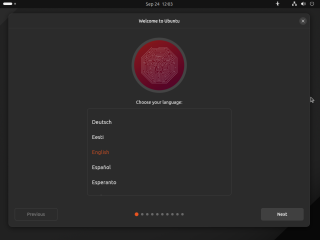
When done, you will see that the Wizard will be using the dark theme and you can start your installation process.
Click on Picture for better Resolution
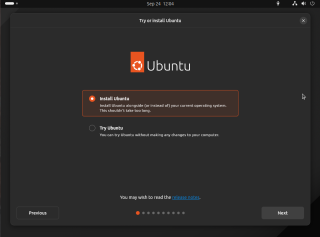
In this screen, you will need to select your option. We want to install Ubuntu on your virtual machine so we select the first option….Install
Click on Picture for better Resolution
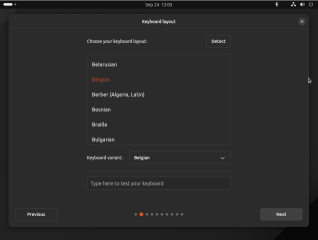
In the keyboard layout page, select the open that match your needs and press Next
Click on Picture for better Resolution
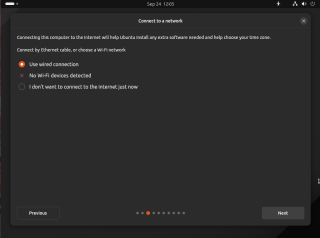
In the connect to network page, select the network you want to connect to and Press Next
Click on Picture for better Resolution
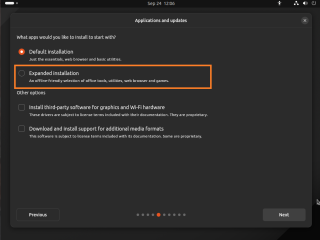
In the Applications and Updates Page, Select the proper option you want to use. We want to install the desktop with all software so we have selected the option Expanded Installation
Click on Picture for better Resolution
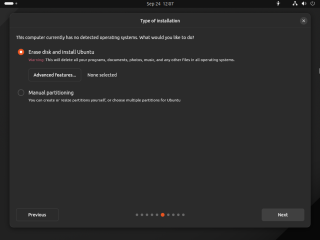
In the type Installation page, select what to do. For us, it’s a brand new installation, so we have selected the option Erase disk and install. Press Next
Click on Picture for better Resolution
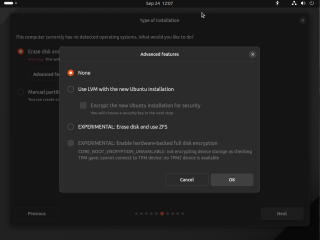
For your information only, you can click on the Advanced features button. You will see more options for your disk configuration. You can use LVM technology and even ZFS filesystem.
Click on Picture for better Resolution
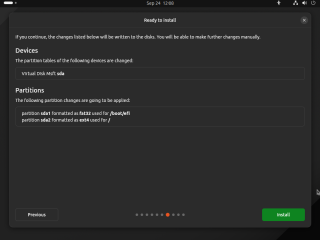
In the Ready to install Page, Review your settings and Press Install
Click on Picture for better Resolution
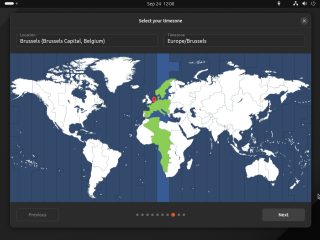
In the Select where you are, Select your location and Press Next
Click on Picture for better Resolution
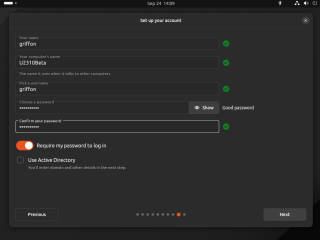
Finally, in the setup your account, create the user account that will be used to login to this machine. Provide name and password and Press Next.
Click on Picture for better Resolution
Note also that you can, from the wizard, join an Active Directory Domain. We touched this topic in a previous post. In this basic installation, we are performing a standalone installation.
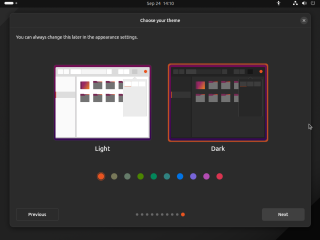
In the Choose your theme, You can select which theme will be used by Ubuntu 23.10. We have from the beginning selected the Dark theme so we will stick to this theme.
Click on Picture for better Resolution
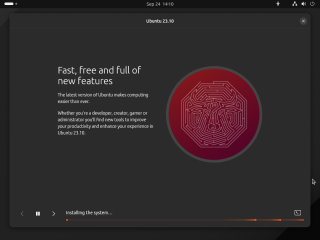
The Installation Process will start… You will need to wait for the actual installation to complete
Click on Picture for better Resolution
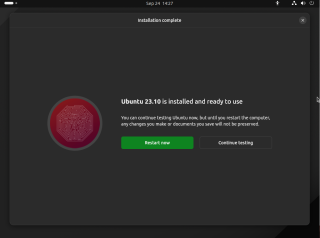
When installation is completed, you will need to reboot your machine.
Click on Picture for better Resolution
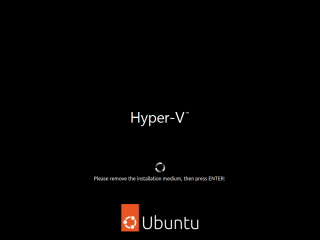
Finally, you will get prompted to remove the device and your system will start rebooting
Click on Picture for better Resolution
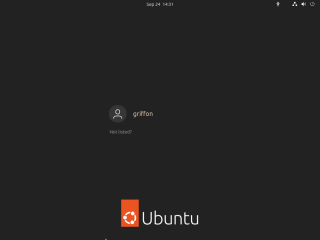
After the reboot, you will presented with the grey GDM login screen. You are ready to login into your newly installed system
Click on picture for better Resolution
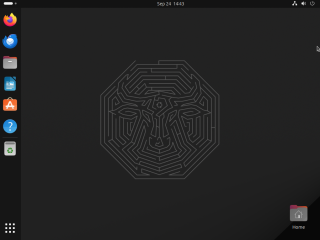
After login, you will see your Ubuntu Desktop (Gnome Based) and you will probably see a small Wizard that will help you perform some basic post configuration actions
Click on Picture for better Resolution
Congrats ! You have just installed Ubuntu 23.10 Operating system on your computer or virtual machine.
Final Notes
Voila ! This is it for this post !
We have done the basic investigation so far related to Ubuntu 23.10. We have seen how the installation can be performed. All in all the process has not changed compared to previous release. However, the installation process feel smoother, more responsive, fluid and easy. Installation is really a pleasant experience. The Ubuntu Desktop heavily based on Gnome 45 also looks (or feel) nicer, more responsive and more refine.
Ubuntu 23.10 is providing a peak preview of the next Long Term Support (LTS) release that’s coming which is Ubuntu 24.04. With each iteration, Canonical seems to deliver a stable and reliable operating system and provide also a refreshing experience. The small improvements here and there makes Ubuntu 23.10 still an interesting release.
The major concern/question people have is the future of applications but also the snap technology. Some people are not enthusiast by Canonical aggressive promotion of the Snap technology. Yes, Debian package are still available for installation but it seems that it’s more difficult to find them in the new software center app. Not all Snaps are working as expected. Remember the Firefox snap issue…. If you plan to stick to Ubuntu as your Operating system, you might need to be prepared to accept snap as default technology in the future…. we will see what the future brings…
Till next time
See ya
I update to ubuntu23.10 in Hyper-V, and still can’t use GUI.
Even modify /etc/default/grub to add ‘nomodeset’, it still do not work.
@fe;
Thank you for visiting our blog and providing some feedback. We have not experience this issue since we have downloaded Ubuntu 23.04.x.. The Ubuntu 23.10 is running fine as VM on top of Hyper-v.. So, basic questions for you
Which Hyper-v Version are you using (Windows 10/11, Windows server 2016 or later…)
Which VM generation are you using Gen 1 or Gen 2
have you performed an upgrade or fresh install ? What happens if you perform a fresh install (to test if the problem is there or not…)
Have you got any errors in your logs ? maybe time to open a bug to Ubuntu
Hope this help
Till next time
see ya
I use win10, Hyper-V version is: 10.0.19041.1. Is this the newest version on win10?
VM generation is Gen2.
I have performed an upgrade from 22.10 to 23.04, then to 23.10.
As some reasons, I can’t perform a fresh install.
@fe,
Thank you for visiting our blog and providing some feedback.. Can you explain a little bit more your issue ? Can you perform the installation if you are using vm Gen 1 ? if you use VM gen2, ensure that you have selected in the settings of the VM > Security > Secure Boot Option > Templates… select the MS UEFI Option…. If all this is good, what the problem with the fresh install, can you start the installation ? are you getting an error ? do you go till the end of the installation and when you need to login, you end up with a console only, no gui ?
waiting for your feedback
Till next time
See ya
I have tried a fresh installation of ubuntu23.10 on Hyper-V, and it works normal now.
I disable Secure Boot Option.
Thank you very much.
@Fe;
Thank you for providing feedback and visiting our blog… happy to see that you can run Ubuntu 23.10 on your Hyper-V Infra
Till next time
See ya