Hello World,
In our previous post (Join Ubuntu 20.10 Desktop in Active Directory Domain during Setup), we have demonstrated how to join an Ubuntu Desktop 20.10 into an Active Directory Domain. As we have been using Ubuntu 20.10, the process to join an Ubuntu machine into an Active Directory domain has been simplified drastically. If you choose the Use Active Directory option during the setup, all the heavy work is done by the installer and at the end of the process, you will be able to authenticate against your Active directory domain while login into your Ubuntu machine.
While writing the previous post, we immediately decided to test and play around with xRDP and Active directory Authentication process. Since some readers have encountered some issues/difficulties in using their AD user account credentials to perform remote desktop connection through xRDP software, we have decided to share our findings about this AD authentication process…
Let’s go !
Overview
For this post, we will assume that the reader has already performed a number of necessary steps and that the infrastructure is ready and deployed. The following prerequisites and assumptions must be met
- An Active Directory Domain infrastructure already exists on the network
- Ubuntu machine is joined to the domain. For this post, we recommend to follow the instructions provided in our previous install guide (Join Ubuntu 20.10 Desktop in Active Directory Domain during Setup) and that your Ubuntu 20.10 machine is joined to your Active Directory.
- xRDP software is installed or about to be installed on the Ubuntu machine that’s joined to the Active Directory Domain (read on)
Let’s provide a quick guidelines ans instructions on how to achieve the described infrastructure…
Join Ubuntu 20.10 to Active Directory
Based on your situation, you might or might not need to perform the task described below. Either you have already any Ubuntu version computer already joined into your Active Directory and you can skip this step.
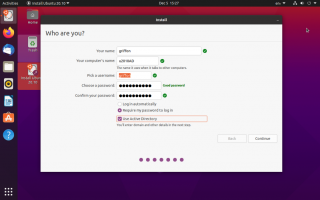
In case, you need to add an Ubuntu machine into Active Directory domain, we recommend you to setup a brand new Ubuntu 20.10 version and take advantage of the new feature “Use Active Directory” during the setup process. This option simplifies drastically the process of having Ubuntu machine joined into Active Directory Domain
Click on Picture for better Resolution
Installing xRDP Software
At this stage, we are assuming that whatever the methods you used, you have an Ubuntu machine joined into an Active directory Domain. You are currently login locally on the machine using either your AD Account or a local user account hosted on your Ubuntu machine. Now, it’s time to perform the xrdp software installation. You can perform a manual installation or you can rely on our latest version of installation script (xrdp-installer-1.2.2.sh) which take care of the post configuration tasks activities.
In this post, we will assume that you will be using our installation script to perform a standard installation. To obtain and run the script, you will need to issue the following command in a Terminal Console
Step 0 - Go to your Download folder

cd ~/Downloads

Step 1 - Download the script wget https://www.c-nergy.be/downloads/xrdp-installer-1.2.2.zip

Step 2 - Unzip the files
unzip xrdp-installer-1.2.2.zip

Step 3 - Make the file Executable
chmod +x  ~/Downloads/xrdp-installer-1.2.2.sh

Step 4 - Execute the script (as standard user) in order to perform the installation and
         Use the parameter -l in order to customize the xrdp login screen.

./xrdp-installer-1.2.2.sh -l
Test your Setup
After the preps works, it time to test you infrastructure.
Authenticate Against Active Directory (not using xRDP yet !!!)
Assuming that your setup is correct, you can go to your Ubuntu machine and login to it using your Active Directory Domain account. If you are new to the process of using an Active Directory account against an Ubuntu machine, you will simply need to follow these steps
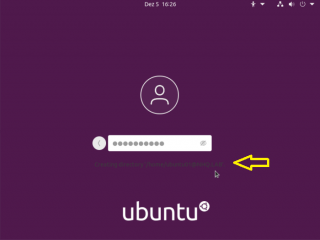
Step 1 – In the login screen, click on Not Listed ?
Click on Picture for better Resolution
Step 2 -In the Username screen, provide your AD User account using the upn structure (something like user01@mydomain.com)
Click on Picture for better Resolution
Step 3 – In the Password screen, provide your AD password…Wait for the login process to complete
Click on Picture for better Resolution
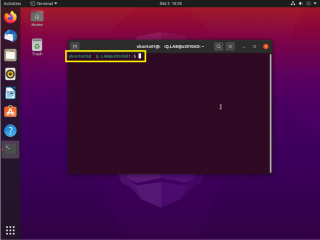
Step 4 – Once you are logged into the Ubuntu machine, you can perform an additional check and assess that you are indeed using an Active Directory user account….
Click on Picture for better Resolution
Perform Remote Connection using Ubuntu local Account
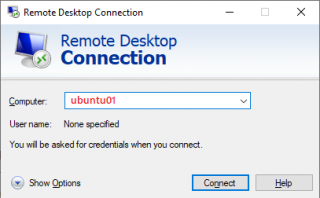
In this step, you will simply open your remote desktop client, enter the hostname or ip address of the target Ubuntu machine where you need to connect to.
Click on Picture for better Resolution
In the xrdp Login screen, you will provide the credentials of a local user account (stored in the Ubuntu machine) in order to ensure that a remote desktop connection can be obtained.
Click on Picture for better Resolution
If the software has been configured correctly, you should be able to access the Ubuntu machine through remote desktop and get presented with the Gnome Desktop interface
Click on Picture for better Resolution
As you can see, we have ensured that xRDP solution is working as expected and that we can indeed authenticate against Active Directory. It’s time to move to the next level : using AD accounts while using xRDP Software solution…..
Active Directory Authentication & XRDP
Initial Tentative & Debugging
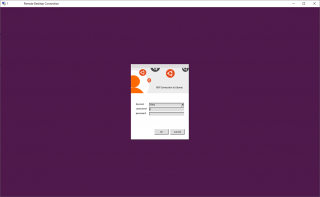
You would expect that since AD authentication is working and XRDP authentication is configured accordingly, you would simply need to pass your AD credentials in the xRDP login screen and get access granted to your remote session. So, let’s try this. Let’s open the remote desktop client and provide hostname/ip address and let’s connect. in the xRDP login screen, you will need to provide your Active Directory (AD) Credentials
Click on Picture for better Resolution
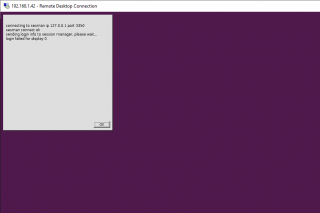
After a few moments, you should receive the following dialog box and no connection to your desktop will be performed when using the AD Credentials
Click on Picture for better Resolution
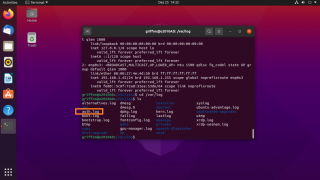
In order to see what was happening, we had to dig in the log files. In the /var/log folder, there is a file called auth.log.
Click on Picture for better Resolution
In the screenshot below, you can see an extract of this log file and you can see that the user has received a permission denied error message.
Click on Picture for better Resolution
This log is interesting because it shows multiple things. First, if you look closer, you will see that the Authentication process was successful. However, the remote connection failed because the user account was not authorized to perform such operation. Looking even closer, we had notice that the process complaining about permission was the pam_sss. This means that the problem is not xRDP but more an issue with the sssd configuration….
Final Notes
This is it for today !
The post is becoming quite long so we will continue our investigation in the coming post. So far, we have seen how easy it was to join an Active directory domain if you take advantage of the new Ubuntu 20.10 feature “Use Active Directory”. We have also seen how easy it is to install and configure the xRDP software solution on your Ubuntu machine using our xrdp-installer script. Finally, when trying to use an AD User account to access the Ubuntu machine through xRDP software, you have noticed indeed that the remote connection is not going through.
However, based on the logs we found, it seems that the Authentication process is working properly (at XRDP level) but the problem seems to be a Authorization issue. In the next post, we will explain how to tweak your Ubuntu machine in order to have a successful remote desktop connection
Stay Tuned
Till Next Time
See ya

