Hello World,
Recently, we have received a request from one of our readers to describe how to secure a little bit more the xRDP connection by using SSH tunnels. In a previous post called “Ubuntu 14.10 – How to secure Xrdp Connection using SSH”, we described the process to achieve such configuration. This post would be still valid as long as you are running a legacy version of xRDP software ( i.e. version 0.6.x).
Newer versions (i.e. version 0.9.x) of the xRDP packages has introduced some major changes and the procedure to create SSH Tunnel and connect through xRDP software needs to be updated. This is the purpose of this post !
So, let’s go through the process….!
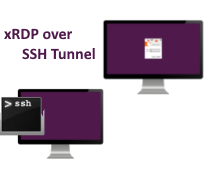
xRDP over SSH Tunnel – Setup Guide
Nowadays, especially with the COVID-19 crisis, more and more people needs to work from home. This makes software solution like RDP or XRDP the perfect way to remote connect to your server and perform the necessary work remotely. However, working remotely means also that you might be more vulnerable to attacks if you simply perform a direct connection to your xRDP server through port 3389. To overcome this situation and improve security posture of your xRDP server, the general approach consist of using SSH protocol to create a tunnel between the client and the host.
This step by step guide will quickly explain how to perform such configuration. So, if you need to have a more secure solution, this approach might be useful to you.
Step 1 – Installing xRDP Software
xRDP package is a piece of software that allow a user to remotely connect to a Linux machine. The xRDP package when installed will be providing remote desktop capabilities to your users. There are different ways to perform the installation of xRDP. You can perform a manual installation or you can decide to use our famous xrdp-installer-1.2.sh script. which can be download at this location.
The post “xRDP – Easy install xRDP on Ubuntu 16.04,18.04,19.10 & 20.04 (Script Version 1.2)” explains quite extensively how to use it. The script really easy the installation of the package and perform some additional post-configuration actions that provide the best user experience you can get with xRDP software on top of Ubuntu 20.04.
If you never used the script or if you are new to xRDP, and you want to quickly have xRDP installed, please perform the following actions from you terminal session as a normal user (no sudo)
cd ~/Downloads
wget http://www.c-nergy.be/downloads/xrdp-installer-1.2.zip
unzip xrdp-installer-1.2.zip
chmod +x xrdp-installer-1.2.sh
./xrdp-installer-1.2.sh
After you have performed your xrdp installation, it’s time to test your connection. Using the remote desktop client, you should be able to connect and reconnect to your Ubuntu machine. If everything is ok, it’s time to move to the next step….
Step 2 – Installing the SSH server on Ubuntu
Since we have installed the xRDP package, we are able to perform remote connections to our Ubuntu machine. However, the connection is a direct connection to the server without ssh tunnels. To create ssh tunnels, the server hosting xRDP software needs to have also the SSH Server package installed. So, we need to install an additional piece of software in order to be able to create our ssh tunnel.
Again, in order to get it quickly installed, open your command prompt on the Ubuntu machine and execute the following commands
sudo apt-get install openssh-server

Click on Picture for Better Resolution
You should be prompted for a password. Provide the password and press enter. You might then be prompted to confirm the installation of the package. Type y and press enter

Click on Picture for Better Resolution
Wait for completion. When done, you will have your openssh server installed and up and running. No need to reboot

Click on Picture for Better Resolution
Note :
If needed, it’s possible to perform additional configuration in order to secure even more your ssh server. As this is not the scope of this post, we will not provide any information about hardening the SSH server. This post is meanly aiming to demonstrate how to access your xRDP through ssh tunnels.
PS: If people have best practices for configuring ssh, please let us know and we will publish them including the credits
Step 3 – Enforce SSH connection
So far, we have installed xRDP software and SSH Server software and that’s it !
The current setup does not prevent a user to perform a direct connection to our xRDP server and ssh tunnel is not necessary in order to remote connect to your Ubuntu machine. Obviously, we want to change this behavior. We want to use SSH tunnels before being allowed to make remote desktop connections. How do we enforce that ? We will tweak the xRDP server configuration and force the service to listen to only from ip address 127.0.0.1.
To do that, perform the following actions
Open your Terminal console and type the following command
sudo gedit /etc/xrdp/xrdp.ini

Click on Picture for Better Resolution
The xrdp.ini file opens. Locate the line
port=3389

Click on Picture for Better Resolution
You have to replace this line (i.e. port=3389) by the following line
port=tcp://.:3389

Click on Picture for Better Resolution
Save the file. To have the change applied, you will also need to restart the xrdp service. To perform this action, you simply issue the following command
sudo systemctl restart xrdp

Click on Picture for Better Resolution
After you have made this change, if you try to perform directly (without ssh tunnel) a remote desktop connection, you will see that your connection will try to initiate the connection

Click on Picture for Better Resolution
But at the end, the connection will fail as the xRDP server is not responding on ip addresses other that 127.0.0.1

Click on Picture for Better Resolution
That’s all you need to enforce ssh connection before remote desktop to your Ubuntu Machine…So, how do you perform xRDP connection now ? Keep reading….
How to connect to xRDP through SSH Tunnel
To perform your xRDP connection when ssh tunnel is enforced, you will need to perform some additional steps. More specifically, you will first need to create the ssh connection. To perform the ssh connection to your Ubuntu machine, you will first need to have a valid ssh client. If you are using Windows Operating system, you have multiple options. The most known ssh client is putty.exe. If Windows 10 is used, there is also a built-in ssh client available as well. So, let’s explain quickly how to perform the ssh tunnel using different solutions….
Perform the SSH Connection to your xRDP Server
In this step, we will first show you to perform the ssh tunnel. Then, when the ssh tunnel is established, we will show you how to perform the rdp connection to xRDP.
Configuring ssh tunnels using Putty.exe
Putty is the most used ssh client. You can download it and install it (if you go for the msi package). You can find putty at this location. When installed, you can start the tool and you will see a screen similar to the following

Click on Picture for Better Resolution
Configuring ssh tunnels
When putty is installed, open it. You will see in the putty client that you have to provide information about the machine you want to connect to. So, in this field, provide hostname/ip address of the ubuntu machine you want to connect to.

Click on Picture for Better Resolution
Then in the left menu, expand the SSH node and go to Tunnels.

Click on Picture for Better Resolution
In the Tunnel page, you will have to provide
- a source port (we have used 5555 but you can use any port available on your windows system)
- a destination (we have used the syntax localhost:3389 where the port 3389 is the default xrdp port )
- Click on the Add button

Click on Picture for Better Resolution
At the end of the configuration, you need to ensure that your configuration is similar as the screenshot below

Click on Picture for Better Resolution
Go back to the Session node, on the left menu, Provide a name for your connection and press Save. This will ensure that you do not need to redo configuration each time you need to connect through SSH Tunnels to your xRDP server.

Click on Picture for Better Resolution
It’s time connect through SSH. Open your putty client, load your saved profile and client open

Click on Picture for Better Resolution
The first time you will make the connection, you will be prompted to accept the connection. Press yes

Click on Picture for Better Resolution
After some time, you will be prompted for a user account and a password. If the information provided is correct, you will be connected to your Ubuntu machine through ssh.

Click on Picture for Better Resolution
Using putty.exe command line
As alternative, you can also use the command line version of putty to perform your ssh tunnel. To connect to your xRDP server through ssh, you can issue the following command
ssh %user%@%servername-or-ip% -L %LocalPort%:127.0.0.1:%RemotePort%

Click on Picture for Better Resolution
In the screenshot, you can see that we are performing a connection using the user test, to the xRDP server with ip 192.168.1.52 using the localport 5555 and connecting remotely to xRDP server on port 3389.
Openssh Client on Windows 10
If you are running a recent version of Windows 10, there is an built-in openssh client available. To use it, you can simply open Powershell console and issue the following command
ssh
If the ssh client is installed on your Windows 10, you will see an output similar to the following….

Click on Picture for Better Resolution
In order to initiate the ssh tunnel, you will have to issue the following command
ssh %user%@%servername-or-ip% -L %LocalPort%:127.0.0.1:%RemotePort%

Click on Picture for Better Resolution
As you can see, this is the same syntax as putty.exe command line version. We thought that it would be interesting to mention that Windows 10 also provide a built-in ssh client tool.
How to Connect to your xRDP Server over ssh connection
After you have made your ssh connection, it’s time to connect to your xRDP server and get access to your Desktop through RDP protocol. So, how do you do this ? Based on our ssh configuration explained above, we will be using the port 5555 on the local machine which will be “redirected” to port 3389 on the xRDP server. Let’s demonstrate this.
So, first ensure that you have you performed your ssh connection. In the screenshot below, we have been using the putty client. When this is done, you can start your remote desktop client and enter the following information : localhost:5555

Click on Picture for Better Resolution
At this stage, you should see that your client is indeed performing the connection to your xRDP server

Click on Picture for Better Resolution
If everything is configured correctly and process has been followed accordingly, the xRDP login page will be displayed and you will be prompted for a username and a password

Click on Picture for Better Resolution
If your credentials are correct, you will be able to access your Ubuntu desktop through Remote Desktop software

Click on Picture for Better Resolution
Important Limitation – Two Accounts needed !!
Because the modern xRDP package does not allow the same user account to be logged concurrently locally and remotely, the same limitation applies for ssh tunnels. More specifically, if a user is logged on locally on Ubuntu, the same user will not be able to perform a remote desktop connection. If the user is remotely connected, the same user account will not be able to login locally on the Ubuntu machine.
Now, if you are performing your ssh connection using user account UserA and you try to connect to your Ubuntu machine through xRDP, using again UserA, the connection will start but you will get disconnected immediately. So, this means that in order to use ssh tunnels, you will need to use two accounts
- one account used to perform the ssh connection and,
- one account used to perform the xRDP connection
In the screenshot below, you can see that we have performed the ssh connection using the account test. Then, when performing the xRDP connection, in the login page, we have used the account griffon which make the remote connection possible !!

Click on Picture for Better Resolution
Final Notes
And Voila ! This is it for this post !
We have (finally) updated the instructions that needs to be followed in order to secure your xRDP connections through ssh tunnels. Initially, we provided the information in the post “Ubuntu 14.10 – How to secure Xrdp Connection using SSH” but this information is a little bit outdated as new version of xRDP package has been released. This post provides all the necessary information that are needed to securely connect to your xRDP server through ssh tunnels.
The configuration steps are not too complicated and this can improve indeed general security. New xRDP packages introduce a new behavior that also impact the ssh tunnels. A user cannot be connected locally and remotely at the same time. It’s either a local connection or a remote connection ! Because of this change in xRDP software, you will need to use two different accounts : one account to perform the ssh connection and one account to perform the xRDP connection through the ssh tunnel.
We hope that our readers will enjoy this updated post about xRDP and ssh tunnels
Till next time
See ya
Do you know if there is some ongoing work to be able to use a single user for remote and local connections, and easily reconnect to the same session, similat to what happens on Windows? The other strange behavior is having to login twice remotely, once in xrdp and once with gnome for instance.
Are the issues within xrdp, X, or the window manager and their login component?
If you know about existing feature requests, could you post the links to them?
Thanks.
@Alban,
To answer your questions
– as far as we know, the fact that you cannot connect to the console session is by design in xRDP. The only alternative would be to use VNC solution if you want to connect using same user.
– Easy reconnection should be available out of the box. If you disconnect a remote session, you should be able to reconnect to the same session
– not sure to understand the login twice remotely….If you perform the xrDP connection, you will be presented the xRDP login page which will give you access to the Gnome Desktop interface (with no other login prompt)
– The way it works seems to be inherited from xrdp and xorgxrdp backend solution + possibly GDM login manager
– About feature requests, you can always have a look at the Github (https://github.com/neutrinolabs/xrdp/pulls) and submit your own requests/questions/comments
Hope this help
Till next time
See ya
I’ve made all by this instruction. But I have some strange problem. If I boot my machine, connect by ssh and try connect to xrdp I see black screen. After this I login to system locally, restart xrdp and try connect to xrdp all things work well. So I have to restart xrdp once after boot OS
@Azat,
the xrdp service should start automatically at boot time. We didn’t encounter this issue… When time permit, we will further investiage
Thank for your visit and for sharing your findings
Till next time
See ya
I followed your instructions and make initial connection to enter login creds in xRDP, howeve after I authenticate. The window just flashes away. Any idea why this is happening? Using Ubuntu Server 20.04
@R0n1n;
Sorry for the delay but had issues with spamming lately and almost deleted your message.
It seems that you are logged on on the system locally and remotely using the same user account. By design, only a single connection per user account is allowed (either local connection or remote connection not both at the same time)
Hope this help
Till next time
See ya
Thank you so much for this. Works nicely and I’m very grateful. I had to use xfce4-session in ~/.xsession for Ubuntu 21.04, at least. The default desktop doesn’t seem to want to start.
@Phil;
thank you for visiting our blog and providing feedback. Much appreciated… We are happy to see that information provided is useful and can help others
Till next time
See ya
Hi!
Pretty good article overall. But I have one question: how do you deal with windows remote desktop connection error to “localhost:port” : “the computer can’t connect to the remote computer”? What windows version have you tested this on? Based on my research newer windows versions don’t let you use localhost as a server to RDP to. There are some hacks of course but I’m just wondering how you made this work.
@Szinkler,
Thank you for visiting our blog and providing some feedback. If you have read the post completely, you would have noticed that we are using Windows 10. At time of writing, the localhost was working as expected. Since we are connecting through ssh tunnel, the localhost should be allowed…..
Hope this help
Till next time
See ya
Hi There
First thank you so much for this detailed instructions.
I am facing an issue that wasn’t able to find a solution for, after connecting to the ssh tunnel I get and error from RDP : “An internal error has occurred” and when I check the auth log it says ” error: connect_to 127.0.0.1 port 3389: failed”
appreciate if you can help
Thanks 🙂
@Edmond,
Sorry for the late reaction… Ok; we would need a little bit more information… which version of Windows are you using, which version of Ubuntu are you using, which ssh client are you using
From the ubuntu machine itself, can you perform the rdp connection ? Have you any info in the Windows logs ?
In the meantime, We will check our setup….
waiting for your feedback
Till next time
See ya
Hey @Griffon
I have the same issue of the immediate disconnection after successful connection Ubuntu 20.04. I have verified that I am using two accounts. The account I use to connect via SSH to the server does not use password based auth. The account I created for RDP connection does have a username/password set. I am able to set up the putty connection with the port tunnel with no issues. When I connect to localhost:5555 with windows remote desktop connection, the XFCE login window is displayed, I enter the username and password of the ubuntu account which is not logged in on the ssh connection and submit. I get a quick connect/disconnect.
In general the server is setup to not accept logins without SSH key authentication, is it possible that the attempted login by username/password in the rdp connection is blocked by authentication rules set on my server?
@Liam,
Thanks for visiting our blog and sharing your findings and questions 🙂
We have not investigated (yet) this specific scenario… We will need to have a look at it. are you sure that no one is connected locally on the Ubuntu machine you are trying to connect to….
You have to be sure that no one is logged on on your ubuntu machine.. We do not think that the ssh config authentication would interfere with xRDP but again not sure never tried this…
if time permit, we will give it a try :p
Hope this help
Till next time
See ya
Marvellous, thanks for this. There is a typo though, under the heading: Using putty.exe command line -> it should say: putty -ssh….. not ssh (I think!)
cheers
@al,
Thank you for visiting our blog and providing feedback… well spotted…. indeed there is a typo. we will update the post in order to correct this
Happy to see that the information provide is helpful
Till next time
See ya
Thanks! This was exactly what i was looking for!
Hi,
When I replace port=3390 with port=tcp://.:3389 in .ini file. I can successfully perform SSH connections but I can not with RDP. Error -> remote desktop cant connect to the remote computer
Host OS: Windows 10
Ubuntu “Ubuntu 22.04.2 LTS” -> running on VMware Workstation
Without replacing port=3390. I can perform successfully RDP but it connects without SSH too.
@Laderis,
Thank you for visiting our blog and sharing your experience.. So, you do not provide enough information here.. You have changed the port in the .ini file. . How do you start your remote desktop session ?
Are you just launching the rdp client and you are trying to connect to the ubuntu machine or you are first performing the ssh tunnel and then you are providing the port you have specified in your ssh client
Waiting for the feedback
Till next time
See ya