Hello World,
In our previous post, we have demonstrated how to configure the x11vnc server component to boot at startup. We usually prefer to use the xRDP solution to perform remote desktop connection to linux machines from Windows Desktop. However, with the release of xrdp 0.9.x package in the Ubuntu Repository for 16.04 and later, there seems to be some difficulties to make it works properly.
If you are looking for a working solution to connect to Unity Desktop through xrdp in Ubuntu 16.04.2, please review this post (XRDP – Custom Install on Ubuntu 16.04.2 to Access Unity Desktop). So far, this is the most workable solution and provides the necessary features needed for remote desktop connection solution
If you are looking for a working solution to connect to Unity Desktop through xrdp in Ubuntu 17.0, please review this post (XRDP – How to install XRDP on Ubuntu 17.04 – Easy Way). This solution works but there some limitations. If you follow thes instructions, it’s possible to perform a remote desktop connection to Ubuntu and automatically load Unity Desktop. However, there is a small limitation. A user cannot be connected to local session and remote session simultaneously. If the user is connected to the local session and then the user tries to perform a remote session, the xrdp solution will keep disconnecting…If the user logoff from the console, then the remote desktop session will be established accordingly.
Because of this limitation, the possibility to make a vncserver starts at boot provide a fallback solution in order to connect remotely to the Ubuntu machine. Till now, we have always been working with X11VNC to achieve this requirement (boot vncserver at startup). Recently, one of my colleague challenged me to perform the same configuration with TigerVNC server.
So, we decided to give it try…..(and it was not that easy I can tell you…)
So let see how far we went with this challenge….
TigerVNC & Ubuntu 17.04
Download & Install the TigerVNC package
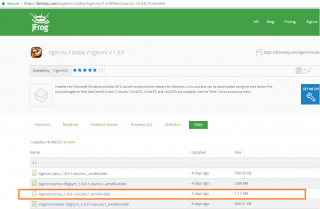
TigerVNC Server package is not available in the Ubuntu repository. Recently, the TigerVNC team has released .deb package of TigerVNC server for Ubuntu 16.04 LTS. The latest version is the 1.8.0 which is available as a download from this location.
Click on Picture for Better Resolution
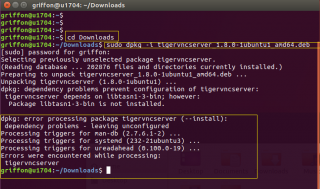
When the download is completed, open a Terminal console, navigate to the Download folders and perform the installation by issuing the following commands
sudo dpkg -i tigervncserver_1.8.0-1ubuntu1_amd64.deb
If requested, provide the password and wait for completion of the installation process. At the end of the process, you should notice some errors and warning messages.
Click on Picture for Better Resolution
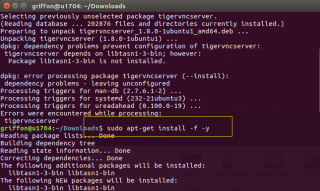
This is normal and we need to fix that by issuing the following command
sudo apt-get install -f -y
Click on Picture for Better Resolution
At this stage, the tigervnc server is installed but you need to start it manually in order to perform your connection through a vnc viewer. To start the vnc server, you would issue the following command
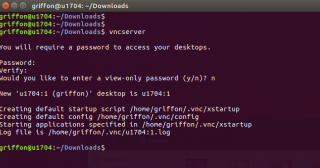
vncserver
Because it’s the first time, you start the vncserver software, you will be prompted for a password (to be used when performing the connection), a read-only password if you want to and at the end, you should see information about which display to connect to
Click on Picture for Better Resolution
Try to connect through TigerVNC
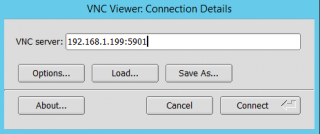
At this stage, we have installed all the necessary software needed to perform a remote connection through a vnc viewer. So, if you open your favorite vnc viewer (in our case tigervnc viewer), and we provide the information of the remote machine using the correct port (in our case :1)
Click on Picture for Better Resolution
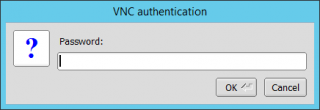
We should be prompted for a password. if this is the case, this means that the vnc service is running and we can perform the connection.
Click on Picture for Better Resolution
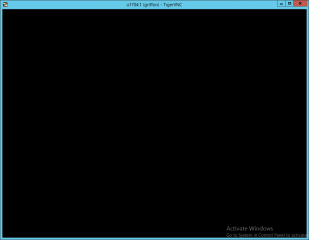
After providing the password, a remote session is established. Howerver, in Ubuntu 17.04, as you can see on the screenshot below, only a black screen is presented to us….
Click on Picture for Better Resolution
So, we first need to fix this issue before making the TigerVNC server boot at startup.
Fixing the Black Screen display
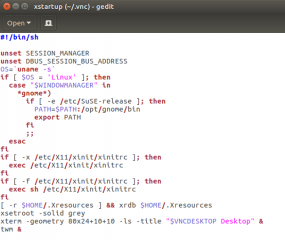
So, it take us some time to find out the most acceptable solution. To fix this issue, we have been updating the ~/.vnc/xstartup.sh file
Click on Picture for Better Resolution
Actually, we have replaced the content of this file with the following content
/usr/lib/gnome-session/gnome-session-binary –session=ubuntu &
/usr/lib/x86_64-linux-gnu/unity/unity-panel-service &
/usr/lib/unity-settings-daemon/unity-settings-daemon &for indicator in /usr/lib/x86_64-linux-gnu/indicator-*;
do
basename=’basename \${indicator}’
dirname=’dirname \${indicator}’
service=\${dirname}/\${basename}/\${basename}-service
\${service} &
done
unity
If you look at the code above, you would see that’s exactly the same used to perform the xrdp connection against Unity Desktop but this time we used for VNC Connection.
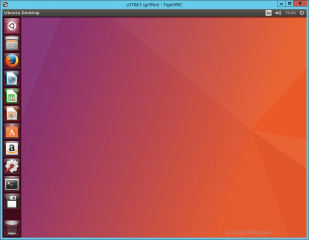
To apply these changes, you have to kill the existing vncserver session (using vncserver -kill :1) and restart again the vnc server by issuing the command vncserver in the Terminal console. After issuing this command, you will notice that you are automatically logged out from the console session. So, now if you try to perform the vnc connection, you should see the familiar Unity Desktop within your favorite vnc viewer
Click on Picture for Better Resolution
Here again, we have the problem that only one connection from the same user is allowed. It’s either locally on the Ubuntu machine or through the remote connection. If you are connected to the VNC Session and you login into the console, the vnc session will look like this one. So, the only way to restore the vnc capabilities is to kill and restart again the vnc service….
Make TigerVNC boot at startup
This procedure will apply to one specify user. If you have multiple users, you might need to create multiple Service Unity Files. As a reminder, this post is more about testing if it’s possible to have the TigerVNC server boot at startup and if we can use TigerVNC in conjuction with the Unity Desktop. So, let’s proceed with our testing……
To have a service boot at startup, we usually need to create a Service Unit file that Systemd process can read and execute accordingly. The necessary information needed to create the service unit was found at this location (https://wiki.archlinux.org/index.php/TigerVNC). We have simply re-used this information to create our own Service Unit file.
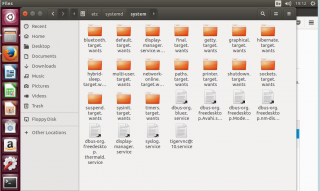
Under the /etc/systemd/system directory, we have created the Service Unit file called tigervnc@:10.service
Click on Picture for Better Resolution
The content of the file is the following. You will need to update the content of the file to reflect your current configuration. The User= value needs to be changed to the user name that will be able to connect to the vnc server at boot. Note also that we want to perform our connection to display :10
[Unit]
Description=Remote desktop service (VNC)
After=syslog.target network.target[Service]
Type=simple
User=griffon
PAMName=griffon
PIDFile=/home/griffon/.vnc/%H%i.pid
ExecStart=/usr/bin/vncserver :10
ExecStop=/usr/bin/vncserver -kill %i[Install]
WantedBy=multi-user.target
It’s time to configure the systemd accordingly as well. So, to have the tigervnc service started and managed by systemd process, the following commands will be issues
sudo systemctl enable tigervnc@\:10.service
sudo systemctl daemon-reload
Click on Picture for Better Resolution
Reboot your machine, do not login locally on it and try to connect via the vnc protocol. If everything is working as expected, you will be able to access your unity desktop immediately (no login greeter will be presented to you).
Click on Picture for Better Resolution
Final Notes
Voila ! In this post, we have seen that it’s possible to first fix the TigerVNC Server software and make it work with Unity and secondly that the TigerVNC server can be configured to start at boot time. This post was more about testing and experimenting and we think that x11vnc is still providing a better option because it works out of the box with Unity and it’s easier to have configured as a start up service when a computer starts.
I hope you enjoyed our little journey into Tigervnc, systemd and Unity connection
Till next time
See ya

Thank you! This is what I was looking for.
Also my main goal was to enable Ubuntu’s local screen. This can be done from a certain user’s console by a command: x0vncserver -display :0 -passwordfile ~/.vnc/passwd
@Brainz;
Thank you for the feedback and the extra info. we know about the x0vncserver option but never got time to publish something about it…maybe at a later time 🙂
happy to see that this post is somewhat useful (was a challenge for us to make it work:…)
Till next time
See ya
Hey,
great post.
I am not using Unity anymore, but moved to latest gnome from 17.04 repo. Also getting black screen issue.
Already changed xstartup making ‘ln -s’ pointing to ‘/etc/X11/xinit/xinitrc’, but still black screen.
There is no log about any errors.
Ideas on how to fix this with gnome?
Thanks
tImo
@tlmo,
Ubuntu gnome seems to work differently indeed. Since the GDM3 implementation, it s more challenging to have vnc working…
We are working on publishing a how to guide and should be ready soon…
Till next time
See ya
I have a Ubuntu 16.04.3 desktop VM. I followed your setup. The desktop
comes up better than my previous attempts but some functionality is missing
or not working.
For example, when the trashcan icon is clicked, it blinks for a bit,
but the trash folder doesn’t appear. The log file reports:
ERROR 2017-10-26 12:31:03 unity.filemanager.gnome GnomeFileManager.cpp:163 Impossible to open the location: Operation not supported
When the “About This Computer” choice under the gear icon is clicked,
nothing happens and no error is reported to the log file.
Also the “up/down arrow” network icon in the top panel is missing. When
I use the side panel to bring up the network settings, the log file reports:
(unity-panel-service:1095): Indicator-Appmenu-CRITICAL **: window_menu_model_new: assertion ‘BAMF_IS_APPLICATION(app)’ failed
(unity-panel-service:1095): Indicator-Appmenu-CRITICAL **: track_menus: assertion ‘IS_WINDOW_MENU(menus)’ failed
(unity-control-center:5090): network-cc-panel-WARNING **: Could not open RFKILL control device, please verify your installation
I was assuming that my problems stemmed from having Ubuntu 16.04 instead of
17.04. Then I noticed in your image of the Ubuntu desktop that the “up/down
arrow” icon to access network settings is also missing.
Was your VNC Ubuntu desktop fully functional? Would you please publish an example
tiger vncserver log file from one of your sessions so that I can compare?
Thanks,
Bill
@Bill
have you checked this post that specific to ubuntu 16.04 (see http://c-nergy.be/blog/?p=8984). In this post we are using x11vnc as vncserver and we always had some good results.
if time permit, we will try to make some tests and provide feedback
Hope this help
Till next time
See ya
Hello Griffon,
I am using 17.04 and tried to following your post to set up TigerVNC. I got different results in Step 2. Essentially, I can not install the two depedent libs. Any idea why?
$ sudo apt-get install -f -y
Reading package lists… Done
Building dependency tree
Reading state information… Done
Correcting dependencies… Done
The following packages were automatically installed and are no longer required:
libfltk-images1.3 libfltk1.3
Use ‘sudo apt autoremove’ to remove them.
The following additional packages will be installed:
libtasn1-3-bin libtasn1-bin
The following NEW packages will be installed:
libtasn1-3-bin libtasn1-bin
0 upgraded, 2 newly installed, 0 to remove and 0 not upgraded.
2 not fully installed or removed.
Need to get 17.9 kB of archives.
After this operation, 112 kB of additional disk space will be used.
Err:1 http://us.archive.ubuntu.com/ubuntu zesty-updates/universe amd64 libtasn1-bin amd64 4.10-1ubuntu0.1
404 Not Found
Err:2 http://us.archive.ubuntu.com/ubuntu zesty-updates/universe amd64 libtasn1-3-bin all 4.10-1ubuntu0.1
404 Not Found
Ign:2 http://us.archive.ubuntu.com/ubuntu zesty-updates/universe i386 libtasn1-3-bin all 4.10-1ubuntu0.1
Err:1 http://security.ubuntu.com/ubuntu zesty-security/universe amd64 libtasn1-bin amd64 4.10-1ubuntu0.1
404 Not Found
Err:2 http://security.ubuntu.com/ubuntu zesty-security/universe amd64 libtasn1-3-bin all 4.10-1ubuntu0.1
404 Not Found
Err:2 http://security.ubuntu.com/ubuntu zesty-security/universe i386 libtasn1-3-bin all 4.10-1ubuntu0.1
404 Not Found
E: Failed to fetch http://security.ubuntu.com/ubuntu/pool/universe/libt/libtasn1-6/libtasn1-bin_4.10-1ubuntu0.1_amd64.deb 404 Not Found
E: Failed to fetch http://security.ubuntu.com/ubuntu/pool/universe/libt/libtasn1-6/libtasn1-3-bin_4.10-1ubuntu0.1_all.deb 404 Not Found
E: Unable to fetch some archives, maybe run apt-get update or try with –fix-missing?
No clue so far as it s a long time we didn t install tigervnc… we would need to check that and see if this is still working
Till next time
See ya