Hello World,
In part I of this post, we have simply performed a basic installation of the Ubuntu 16.04 Server. You will notice immediately that the Ubuntu Server edition is providing really the minimum necessary packages in order to run the Operating System. The Ubuntu 16.04 server binaries are quite small (less than 700 Mb) and does not contains all the software available in the Desktop edition. By default, no desktop environment is installed on a server edition of Ubuntu.
So, if you want to use the xrdp software on a Ubuntu Server you will need to install some additional packages in order to be able to remote desktop into it. This post will try to provide a basic setup guide that have worked for us.
Note : This post has been published in “fast” mode in order to provide answsers to questions about xrdp and Ubuntu Server Edition. We have not tested all the possible combination and have worked in trial/error mode.
Login into your Ubuntu Server
Step 1 – Adding Utils package software
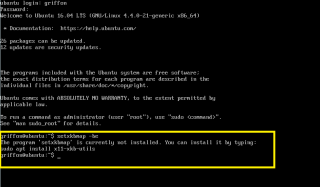
So, the first step is to login into your server. You should be presented with a screen similar to this one below
Click on Picture for better Resolution
The fist package that we installed are related to the keyboard layout. In the screenshot below, you can see that if we try to change the keyboard layout, we have received information that we need to install an additional package called x11-xkb-utils.
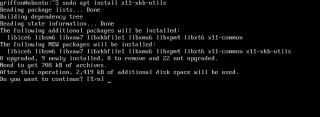
so, from the command prompt, we issue the following command sudo apt-get install x11-xkb-utils
Click on Picture for better Resolution
You will be asked to confirm your selection. Type Y to proceed with the installation.
Click on Picture for better Resolution
We will also install another software package called pkg-config. If you plan to use the xrdp script we have provided, you will need to issue the following command in a terminal session
sudo apt-get install pkg-config
Click yes, If you are asked to confirm the operation. When done, move to the next section.
Step 2 – Install Alternate desktop
This step is similar to the one for the Desktop Edition. xRDP does not support all the desktop environment on Ubuntu. The Unity desktop is not supported so we need to select another desktop solution. If you follow us for a long time now, you know that our preferred desktop alternative is Mate Desktop.
So, again, from the command prompt, we will install the mate desktop package by issuing the following command
sudo apt-get install mate-core mate-desktop-environment mate-notification-daemon
Click on Picture for better Resolution
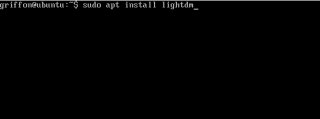
After installing the mate desktop, we have also installed the lightdm package so we can login into our Ubuntu server using a basic graphical interface.
Click on Picture for better Resolution
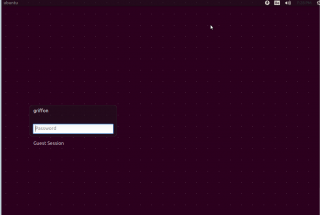
So, after installing these packages and rebooting your system, you should see the following login screen and if you login, you should see the default Mate desktop presented to you.
Click on Picture for better Resolution
Step 3 – Install xrdp package
In this post, we are looking that the easy way install of xrdp. This means that we will install the xrdp package from the ubuntu repository. To perform the installation of xrdp, we will issue the following command
sudo apt-get install xrdp
Technically, because we have only one desktop environment, we should be good to go when connecting to the system via xrdp. So, logically, we should not specify any mate-session information into the /etc/xrdp/startwm.sh file. Actually, it’s not working. You still have to specify which desktop environment you want to use. To do this, you will need to issue the following command
sudo sed -i.bak '/fi/a #xrdp multiple users configuration \n mate-session \n' /etc/xrdp/startwm.sh
Basically, this command add the line mate-session in the file /etc/xrdp/startwm.sh.
To ensure that all changes are applied, you can either reboot your server or restart the xrdp service using the
sudo systemctl restart xrdp
Step 4 – Connect to your system via xrdp
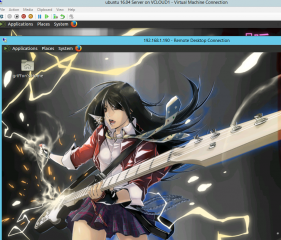
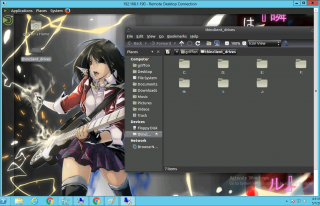
Open your remote desktop client, provide the name or ip of the Ubuntu server you which to connect to, and you should be able to see something like the screen below. As you can see, I have made a remote desktop connection to my ubuntu server.
Click on Picture for better Resolution
Final Notes
Voila ! We have successfully installed xrdp on Ubuntu Server 16.04 and have it working. If you want to have all the features enabled, you can also use the script provided in our previous posts related to xrdp and ubuntu 16.04. You should be able to perform a custom installation and even enable the drive redirection or clipboard feature.
Click on Picture for better Resolution
So, we have seen that’s possible to have xrdp up and running on Ubuntu Server 16.04. Obviously, because the Server Edition does not install much software, you will need to customize a little bit your infrastructure. The first thing you should do is to install a browser…..
I hope this post will be useful to other
Till next time
See ya


Hi & thanks for these instructions …
I tried to connect to openbox or lxsession. But when I start RDP, I get only a xrdp-screen with grey (non-labled) buttons. See Screenshot here …
https://www.dropbox.com/s/x8r7smr6ujma8pv/rdp.jpg?dl=0
Maybe you can help me?
Thanks,
Tom
@Thomas Esche,
I never experience that issue…..
have you tried connecting locally on the server ? do you see the login screen with LXDE ? can you login locally and see your desktop environment….?
Can you try to follow the post and see if this is working… then we can try to move forward and test with LXDE
Hope this help
Till next time
See ya
I am using Wireshark v2.0.2, Everything works great on the locally on the server.
But using Windows 7 RDP I have a problem opening Wireshark. Starting wireshark fails with QXcbConnection: Failed to initialize XRandr QT: XKEYBOARD extension not present on the X server. And the message goes on.
I am not able to attach the screenshots that were captured.
@Lewis Litchfield,
just a guess, the vnc server might not support the extensions…Could you try to remove the vnc server you are using and install the tigervnc instead
Can you tell us if this solved your issue if you have time to implement this change ?
Have a look at the following location for the tigervnc package (http://c-nergy.be/blog/?p=9962)
Hope this help
Till next time
See ya
Excellent post, thanks!
@Paul,
Thank you for the positive feedback and sharing your experience with us
till next time
See ya
Thanks so much for this tutorial. This is exactly what I needed. I started from step 2, because I don’t really need the things in step 1, and it works!
@Goran,
thank you for the visit and the positive feedback. It’s always great to see that our hard work is some how helpful and useful..
Till next time
See ya
Great post thanks 🙂
I was able to rdp just fine.
Then i tried using Guacamole, and i get a black screen. Authentication is fine, no errors shown
on both guacamole server or the ubuntu box.
Have you ever had a issue like this one?
thank in advance.
Sigfrido
@Sigfrido,
we never used guacamole so we do not know what could be the problem.. When time permit, we would love to work with Guaca as it seems to be a really workable solution
till next time
see ya
I got this error:
sudo sed -i.bak ‘/fi/a #xrdp multiple users configuration \n mate-session \n’ /etc/xrdp/startwm.sh
sed: -e expression #1, char 1: unknown command: `▒’
Any Idea to fix it?
Mate Desktop also doesnt start but ist not importent when i can Access over rdp
@Schaub,
Looks like a copy/paste error
Try to type in the command and check if this fix your issue
Till next time
See ya
@Schaub and @Griffon, I encountered the same error. It is a copy and paste error. You have to replace the slanted single quote ” ` ” with a straight single quote ” ‘ “
@SSector;
Thank for the info… but we have mentioned multiple times that formatting issue might occur if you simply copy/paste from the web site…We are improving slowly but we still have some posts where formatting can be an issue
We will try to update this post….
Till next time
See ya
Hey Griffon,
The instructions are perfect. Thanks.
I have one question. When using RDP from a Windows box, I need to execute the logout sequence in Mate twice before logging out. Have you experienced that? If so, how did you resolve it?
Thanks again.
I found cause of the aforementioned problem of having to logout twice. In Step 3, after modifying startwm.sh, the following needs to be commented out:
. /etc/X11/Xsession
Since the . /etc/X11/Xsession AND mate-sessions were running, I had to log out twice.
Again, good tutorial. Mate is much better than Xfce4.
Thanks