Hello World,
Today, again, we will speak a little bit about MDT 2012. The idea of this post came because of a discussion we had with one of our customers. This customer was not able to automate the deployment process because by default MDT generates a random computer name. The customer had first to rename the computer before joining it into the domain makin impossible for him to fully automate the deployment process.
This post will quickly show you can use the CustomSettings.in (or equivalent rules GUI editor) to automatically set a computer name based on your naming convention. You will see that MDT 2012 can be tweaked in order to fit your situation.
Let’s go !
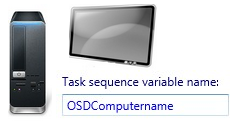
Set computer Name using OSDComputerName variable
Common Scenarios
By default, MDT 2012 allows you to define some rules in order to set the correct computer name during the deployment process. In order to set computer name during the deployment process, you can use the variable OSDComputername. In order to define the rule that will be used to set the proper computer name, you have to understand the naming conventions used within your customer organization. In our situation, a naming convention was available (sweet) and the computer name to be generated would be the combination of a prefix text and the serial number of the machine. In other words, the computer naming convention was something like
WS-%SerialNumber%
Based on this naming convention, it’s easy to automate the process with MDT 2012. Open the Deployment workbench > right-click on your deployment share and select properties.

Click on picture for better resolution
In the properties page, click on the rules tab. In this tab, add the following line
OSDComputerName=WS-%SerialNumber%

Click on picture for better resolution
By adding this line, you simply tell MDT to set the computername to the value you’ve just defined. Where MDT will find the %SerialNumber% value ? Basically, MDT will run a series of scripts that will be performing wmi queries and store the results into variables. %SerialNumber% is one of the variable. MDT has more than 100 pre-defined variables that you can use. You can see the list of available variables by running the script ZTIGather.wsf and by having a look at the file ZTIGather.xml. Both files are located under %DriveLetter%\DeploymentShare\Scripts\. You can use other variable as well such as
- %Architecture% (ex: x86 or x64)
- %Model% (ex: Vaio xxxx or Inspiron,..)
- %Make% (Dell,HP,Sony…)
- %IsLaptop% or %IsDesktop% or %IsServer% or %IsVM% (to detect if the client is a laptop or a desktop or Server or a VM)
Using multiple variables within the Customsettings.ini file (or the rules tab via the GUI), we can accommodate quite some situations. As an example, some organizations in their naming convention might require to make a distinction between desktop and laptop (or even server). Another common scenario is to make the distinction between virtual machine and physical machines. If you encounter such situation, you can configure your rules as shown in the following screenshot

Click on picture for better resolution
Another common scenario for naming convention is to use a site code in the computer name. Depending on your network infrastructure and your MDT setup, you might be able to automatically set the name of the computer. For this one, I have to say that I had to google a little bit in order to find the variable that I could use. All the posts I’ve found are using the variable %DefaultGateway%
So, if you need to make a distinction between two locations, you could edit your CustomSettings.ini file (see screenshot below) and append this kind of information as long as you are using default gateway information. In my case, we generally perform the deployment in a staging area where the default gateway is always the same whatever the location the computer will be send to.

Click on picture for better resolution
Advanced tweaks on OSDComputerName variable
So far, we have seen that there are a bunch of possibilities in the process of automatically set the computer name. You can use variables, type of computers….whatever. Since, a lot of us are working with virtualization solution; there will be a situation were we will encounter a small issue when trying to automatically set the computername using the serial number variable.
Indeed, there is a technical limitation in the number of characters you can use in a computer name. a computername cannot exceed 15 characters. Serial numbers generated by hypervisor are generally longer than 15 characters. I had the same issue (computer name length) with physical laptop. Some manufacturer might have longer serial numbers than other. When combining the prefix and the serial number, the number of characters were exceding the limit of 15.
You have two options to solve this issue. The first one is quite simple and consist of using again the Customsettings.ini files (or rules via the GUI). Yes, you read it correctly, you can perform some string manipulation directly in the GUI. The other option would be to create your own script and perform the modification that you need in order to generate a valid computer name.
In the screenshot below, I’ve defined a rule that would take the last 8 digit of the serial number.

Click on picture for better resolution
You can check that during the deployment process, the computer name will be generated based on the rule you have defined.

Click on picture for better resolution
As mentioned, the other option would be to use a script. In MDT 2012 Update 1, you should know that you can use PowerShell Script. Below, you can see a screenshot of a powershell script that perform a rename operation. In a future post, we will briefly describe how to have this script running within your MDT infrastucture.

Click on picture for better resolution
Final notes
As you can see, out-of-the-box, MDT 2012 offers you already a large set of options when you need to automate the computer name part of your deployment process. By working with the MDT rules (the Customsettings.ini file), you can have a complete control of your deployment process. By tweaking this file, you should be able to achieve a zero touch installation using only MDT.
In the coming posts, we will see how to use PowerShell script and we will finally focus on how to achieve the zero touch installation
Till Next Time
See ya
@unknown231,
Thank you for visiting our blog and providing some feedback… We have not much time to test and validate the approach but the instructions/options found in this post (https://scriptimus.wordpress.com/2011/06/17/mdt-2010-automating-computernames-using-task-sequence-conditions/) looks to us as a good starting point …
Hope this help
Till next time
See ya