Hello World,
In a previous post, we already mentioned that there was a convergence effort between these 2 open source project. I want to come back on this topic because it seems that a stronger integration has been reached. Indeed, some months ago, there was an initiative taken in order to make the turnkey appliance available to Proxmox VE solution. It was possible by tweaking the Proxmox VE configuration to download and use these turnkey OpenVz appliance.
Recently, Proxmox VE team has officially announced that these turnkey appliance would be made available to Proxmox VE infrastructure and that the way to obtain them would be integrated within the Proxmox VE update/upgrade progress.
Configure Proxmox VE to obtain Turnkey Templates
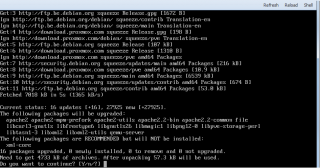
As mentioned above, Proxmox VE team has made the process to get these templates really easy and fully integrated with the Proxmox VE update/Upgrade process. To take advantage of these new appliance templates, you will need to update your Proxmox VE server. You will need to run the following command (from a command line) :
- aptitude update && aptitude full-upgrade
Click on picture for better resolution
You will be asked to confirm the operation. Press Y
Click on picture for better resolution
In order to visualize the new turnkey openvz template, you will need to update your appliance list by typing the following command
- pveam update
Click on picture for better resolution
Note :
If you do not perform this last operation, you will not be able to see the turnkey templates listed in the template page.
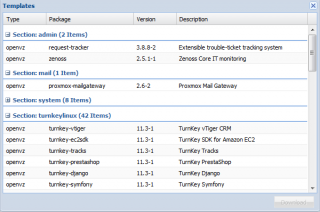
At the end of the process, you should have a template page similar to the screenshot below
Click on picture for better resolution
Deploying Turnkey Templates
Now that we have these additional templates available, it’s time to test them. I have tested some of them. I simply selected random templates and tried to install them on my Proxmox VE infrastructure.
Step 1 – Download the appliance to your Proxmox VE server
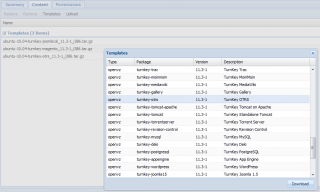
In the web interface, expand the Datacenter folder >Proxmox VE host and select the local storage icon. In the right pane, click on content tab and click on the Templates button. The appliance list popup box will be displayed. Select the template you want to download (in our example OTRS) and click on the Download button
Click on picture for better resolution
Step 2 – Create your virtual machine
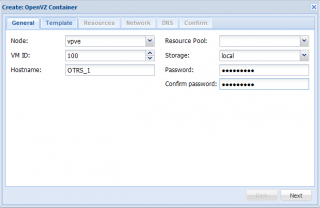
When the download is complete, you can start creating you OpenVz virtual machine. On the right top of the PVE web interface, click on the button Create CT. The creation:OpenVz container will start.
In the general tab, Provide the name of the virtual machine and provide password information. Press Next
Click on picture for better resolution
Note :
The password you have entered here is mainly used to access the webmin interface but not the application interface
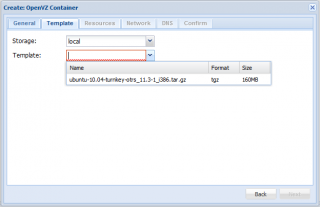
In the template page, select the appropriate template and press Next
Click on picture for better resolution
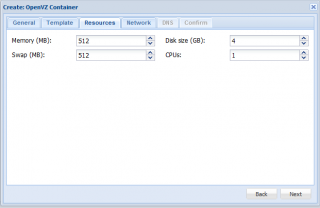
In the resource tab, adjust the configuration of the virtual machien as required and press Next
Click on picture for better resolution
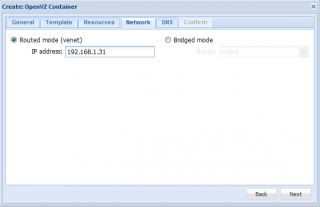
In the Network tab, select the routed network and provide an IP address. Press Next
Click on picture for better resolution
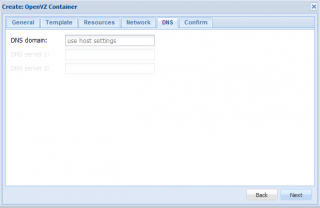
In the DNS configuration, select the option that best suits your needs. Press Next
Click on picture for better resolution
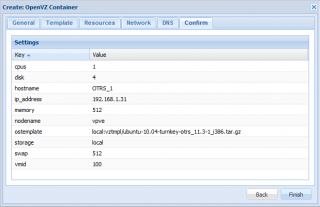
In the confirm tab, review your settings and Press Finish in order to start the creation process
Click on picture for better resolution
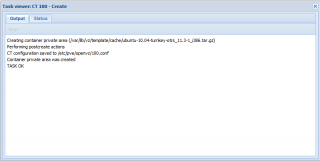
A dialog box will be displayed and you will be able to monitor the creation progress.
Click on picture for better resolution
Step 3 – Start your virtual machine and test it
Within your web interface, locate the newly created virtual machine and right-click on it (yes, you have a contextual menu- cool isn’t it ! ). Select the option start
Click on picture for better resolution
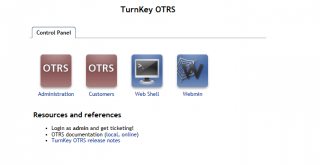
When the OpenVz is fully initialized, you can point your browser to the ip address and you will be presented with the following interface
Click on picture for better resolution
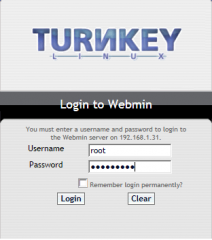
If you click on the Webmin button, you will be redirected to the following login page. In order to login here, you have to use the password you have defined during the OpenVZ creation process (see step 2)
Click on picture for better resolution
If you click on the OTRS administration button, you will be presented with the following login page.
Click on picture for better resolution
In this login page, you will have to use the following login information
- username : admin
- Password : turnkey
Important Note :
All the turnkey appliance seems to use the same user account/password (i.e admin/turnkey) in order to access the application. The webmin interface will be using the password you will provide during the creation process of your OpenVz container.
Final notes
As you can see, the process has been streamlined and we can have more OpenVz appliance avaiable within the Proxmox VE infrastructure. I really think that the initiative is cool and useful. On the other hand, I was a little bit disappointed when i started the OTRS appliance. The version available of 2.4.x and there is a newer version availabe (3.0.1). Yes, I can upgrade my appliance but I would have been better to have a more up to date version.
I have tried some other appliance (such as Joomla, WordPress, Drupal) and they were all working fine. I just had a problem with the Magento appliance. I was not able to login into the interface using the admin/turnkey info. I’ll have to test that again.
So, all in all, I think it’s a welcome effort.
I do not have much time left lately but I would like to try building up my own OpenVz template. If I do that, I’ll share my findings
Till next time
See ya





You need to type the following console command to configure turnkey Appliances (passwords, etc…): turnkey-init
Hello LeMOGO
Yes you are correct; You can indeed change configuration appliance using the turnkey-init command.
Thank you for sharing the info.
See ya