Hello World,
This mulitpart article will continue to explore integration possibilities between open source software (Zen Load Balancer) and proprietary software such as Microsoft Exchange 2010 software. The previous posts ( based on the current stable release V1.) have been useful to present and get some hands on experience with the Zen load balancer software.
The Team behind Zen load Balancer project has been working hard since then. They have updated their Web site (new look’n feel) and offer you the possibility to download their latest version of the software (V2 release candidate 1). This article will be based on this release because it make it possible to import SSL Certificates and create more specific application profiles (i.e. http/https profiles in addition to the classic TCP/UDP configuration).
This multipart article will describe how you could implement an SSL Offloading scenario within your Exchange 2010 infrastructure in conjunction with the Zen Load Balancer Open source software.
- install the certifcate Authority
- work with certificates with Exchange 2010
- Configure the Zen Load Balancer software virtual appliance
- Configure Exchange 2010 to use SSL offloading
Let’s start our journey !
What’s SSL Offloading
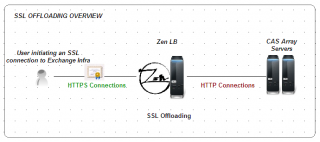
Exchange 2010 can be configured in order to offload SSL traffic. What does that means ? In a few words, this simply means that the incoming SSL connections will be terminating at the load balancer leveland not anymore at the CAS Server level (as you would in a normal situation). The following picture illustrates the concept.
Without the SSL offloading, CAS servers have to perform additional encryption/decryption operations and are using more CPU. By enabling Offloading, you will simply move this operation to the load balancer and thus freeing up some resources on the CAS Servers. SSL Offloading scenario requires a little bit more configuration and planning. However, the benefit of such configuration is better CAS Server performance and possibility to configure affinity using IP address or cookie-based mechanism.
Note : It’s important to note that when enabling SSL offloading traffic between the load balancer and your Exchange servers will be sent in clear. You can decide to use reverse SSL technology to have end to end encryption but then loosing the performance gain expected by the SSL offloading.
Zen load balancer does not support (yet ?) the reverse ssl feature.
Setup the Infrastructure
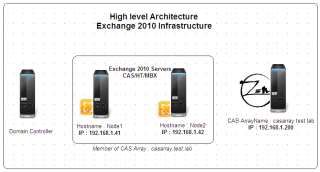
A. The Exchange infrastructure
Click on image for better resolution
B. Download and Install the Zen Load Balancer Software
This setup is based on the latest version of the Zen Load Balancer software (V2 Release Candidate 1). We have downloaded the software and installed it as a virtual machine (in our Proxmox VE infrastructure).
The installation procedure has not changed since the version 1. You can follow the instructions on how to install the software by following the steps described in this post “How to Install Zen Load Balancer”. At this stage, simply perform the installation, the configuration of the different farms will be performed later on
C. Installing the MS Certificate Authority
Exchange 2010 relies heavily on certificates in order to protect Exchange traffic and connections. When you perform the installation of the Exchange infrastructure, Self-Signed certificates are issued to your servers. In our scenario, we want to use “valid” certificates issued by a Certificate Authority. Because it’s a test lab, we will use a Private Certificate Authority and we have installed the Microsoft Certificate Authority Server Role. We have installed it on a Windows 2008 R2 server because it can issue SAN (Subject Alternate Names) Certificates out of the box. On a Windows 2003 box, you have to perform some additional actions
In our scenario, we have decided to install the CA on the Domain controller. To perform the installation of the CA, you can perform the following actions :
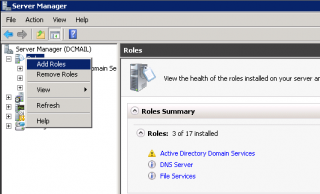
Step 1 : In the Sever Manager, Right-click on the Roles and select Add Roles
Click on image for better resolution
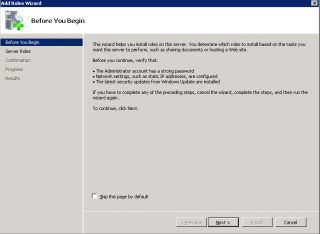
Step 2 : In the Before you begin Page; Press Next
Click on image for better resolution
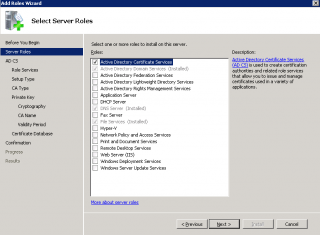
Step 3 : In the Select Server Roles, Select the Active Directory Certificates Services
Click on image for better resolution
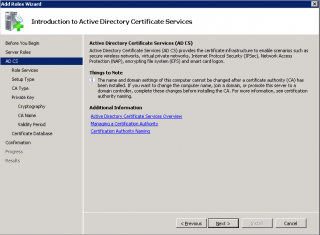
Step 4 : In the introduction page, Press Next
Click on image for better resolution
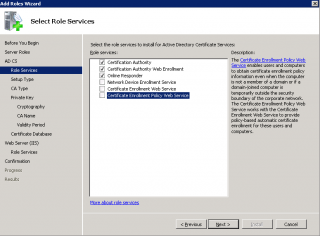
Step 5 : In the Select Role Service Page, select the 3 first options. You might be prompted to install additional components if Web server roles was not installed. Press Next
Click on image for better resolution
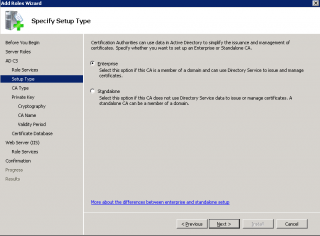
Step 6 : In the Specify Setup Type Page, choose your CA Type. In this scenario, we have selected the option Enterprise CA. Press Next
Click on image for better resolution
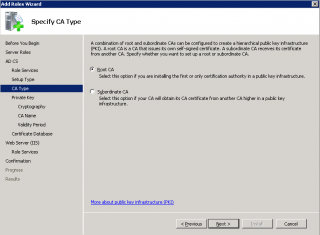
Step 7 : In the Specify CA Type Page, select the Root CA if this is the first CA Server you are installing on your network. Press Next
Click on image for better resolution
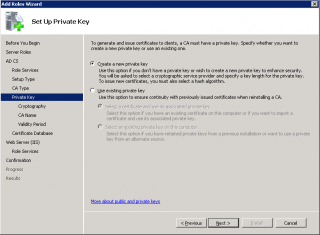
Step 8 : In the Create a Private Key Page, Select create a new Key. Press Next
Click on image for better resolution
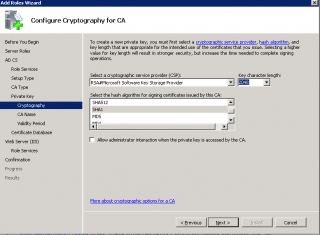
Step 9 : In the Configure Cryptography Page, accept defaults and press Next
Click on image for better resolution
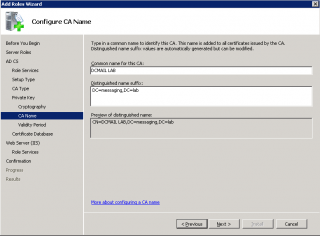
Step 10 : In the Configure the CA Name, fill the form with the appropriate information and press Next
Click on image for better resolution
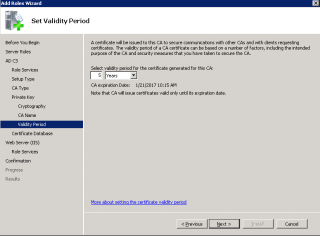
Step 11 : In the Set Validity Period Page, accepts defaults and Press Next
Click on image for better resolution
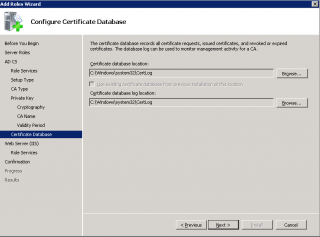
Step 12 : In the Configure Certificate Database Page, accept defaults and Press Next
Click on image for better resolution
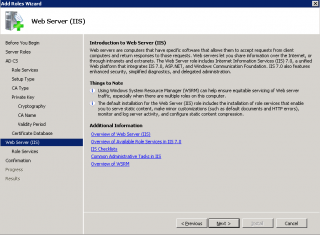
Step 13 :You might be prompted to Add Web Server Role. Accept Default and proceed
Click on image for better resolution
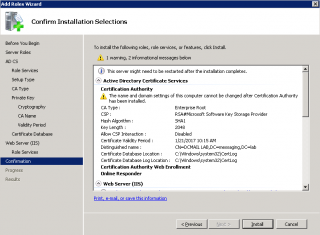
Step 14 : In the Confirmation Page, review you settings and Press Install.
Click on image for better resolution
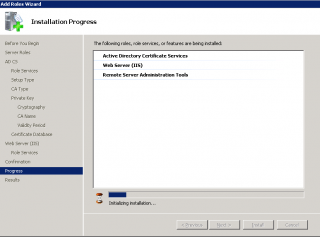
Step 15 : Wait for the Operation to Complete
Click on image for better
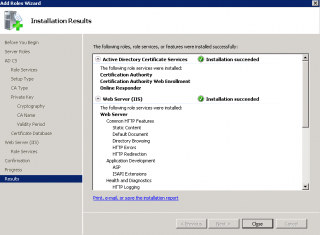
Step 16 : In the Operation Results, Check that everything went through and Press Close
Click on image for better
This is it. You have a CA server installed. You might receive a warning message in the event viewer similar to this screenshot. Perform the operations described in the event to ensure that installation completed successfully
Final Words
This conclude the first part of this serie. At this stage, you should have your exchange infrastructure ready. You have installed your CAS servers and create your CAS Array. You should have also a ready to use Certificate Authority. Finally, you should have the Zen load balancer installed and waiting for you to perform the configuration.
In the next part, we will issue certificates to the Exchange servers and assign them.
Till next time
See ya
Article in this series :
- Part I : Exchange 2010 SSL Offloading using Zen Load Balancer – 1
- Part II : Exchange 2010 SSL Offloading using Zen Load Balancer – 2
- Part III : Exchange 2010 SSL Offloading using Zen load Balancer – 3
- Part IV : Exchange 2010 SSL Offloaduing using Zen load Balancer – 4
Sources :
Configuring SSL Offloading in Exchange 2010

Great series of articles. They are very informative and are handy when trying to choose the best LB solution for our infrastructure.
Regarding the network architecture of this example. I am assuming that HTTPS & SMTP requests are NAT’d from a public IP address to the Zen LB and then forwarded onto the appropriate CAS.
What is the best scenario for the return traffic. In the event of a network with a routed subnet of multiple public IP addresses, the outbound IP address for returned packets will be different to that of the inbound traffic. One would assume that this will either not work or is far from ideal. What is the best network architecture for Zen knowing that Zen cannot be setup with both a public and private VIP with NAT’ing for outbound traffic?
Thanks
Paul