Hello World,
Load balancer are more and more in use within the enterprise. Companies needs to provide high availability and load balancing capabilities. Most of the projects I’ve been working on lately , there was always a request to have load balancing. Moreover, more and more software might requires the use of a Load balancer (i.e Lync 2010, Shareponit, Webs …)
I was wondering if there would be a free/opensource load balancer project out there. And Guess what ? Yes, there is. ZenLoadbalancer project aims to provide a load balancer software solution. On their web site, we can see that partnership with some companies offer you the possibility to have an hardware load balancer solution.
It’s really a new product for me. I’ll be testing the software and see in which situation this solution might fit. This post might be the first of a series as well. We shall see ! But for the moment, let’s perform a simple and basic installation.
1.Installing Zen Load balancer
To perform the installation of the software, I’ve created a virtual machine on my Proxmox VE test server. For this test, I have created a simple virtual machine with only 1 network card. The installation is rather straightforward and similar to a Debian installation
To perform the installation,you will need to grab the software from here. Download it (and choose to burn it or to install it as a virtual machine using whatever virtualization platform you want)
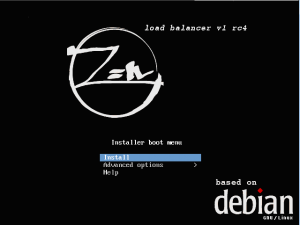
Boot your virtual machine from the iso file or cdrom and you will be presented with the zen Load Balancer Installer. Select the Option Install to start the process.
Click To Enlarge
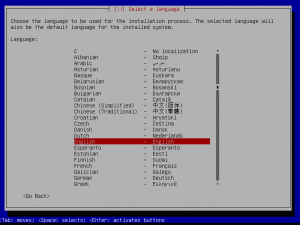
In the Language Page, select the appropriate and press enter
Click To Enlarge
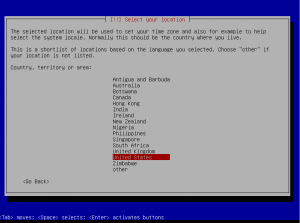
In the location page, select the appropriate location and press Enter
Click To Enlarge
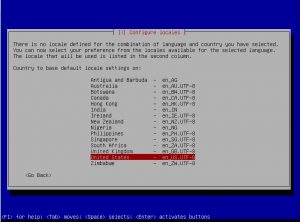
In the configure Locale Page, select your local and press enter
Click To Enlarge
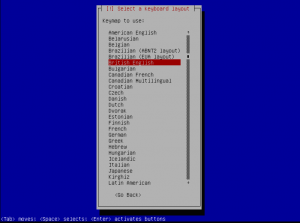
In the keyboard page, select the appropriate settings and press Enter
Click To Enlarge
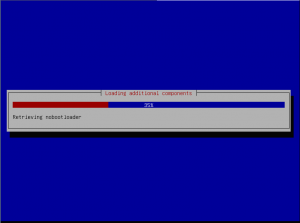
The Installer will load some components. Wait until you see the configure your network screen
Click To Enlarge
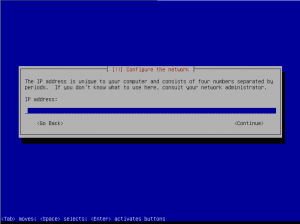
In the Configure the network, you will have to provide the IP address that you will be assigning to the Load Balancer. Move to continue and press Enter
Click To Enlarge
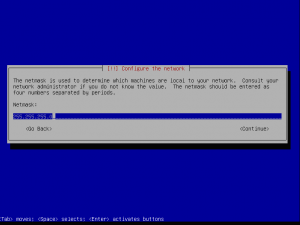
You will then have to provide the subnet mask to be used. Put the information and press continue
Click To Enlarge
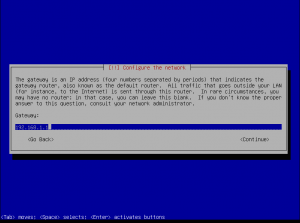
You will then need to specify a Default Gateway. Again, provide the appropriate information for you network and press the continue option
Click To Enlarge
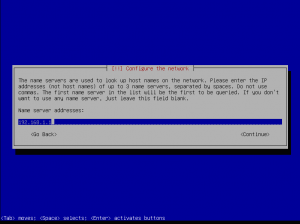
You can then specify Names Servers to be used. Press Continue
Click To Enlarge
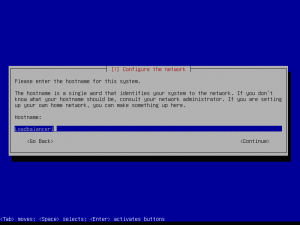
You have to provide the hostname that will be used by the load Balancer. Provide the appropriate info and press on continue
Click To Enlarge
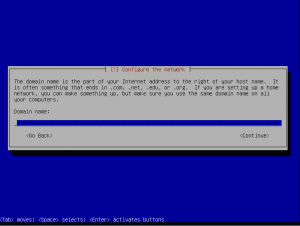
Final step in the configure the network settings, you can specify the DNS suffix that you want to use. Press Continue when done
Click To Enlarge
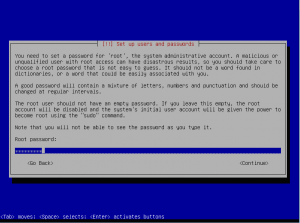
You will then need to provide password for the root account on the system. When this is done, Press Continue.
Click To Enlarge
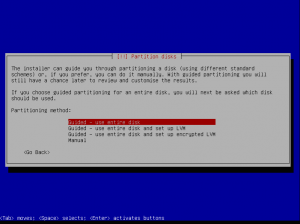
In the Partitioning disk, because we are new to the product, we have selected Guided – Use entire disk. Press Enter
Click To Enlarge
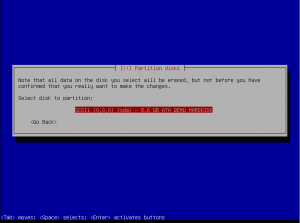
Select the disk/partition where you want to install the software and press next
Click To Enlarge
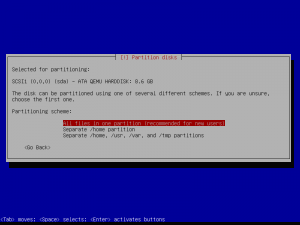
Accept defaults in this screen and simply create one big partition where the software will stores the files. press Enter
Click To Enlarge
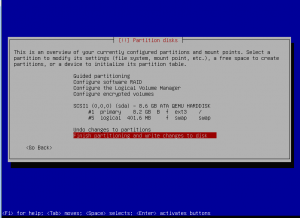
Accept the configuration you have performed by select Finish partitioning and Write changes. Press Enter
Click To Enlarge
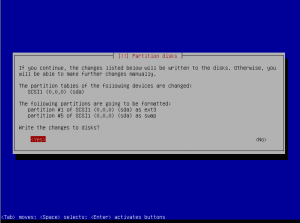
In the following screen, be sure to move to the yes “button” and press Enter.
Click To Enlarge
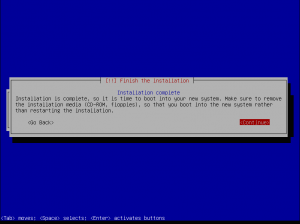
The Installer will start and you will see a progress bar. The installation process should be quite fast. At the end of the process, if you didn’t encountered any issues, you will get the Finish Installation screen. Press on the Continue and the system will reboot. Remember to remove the cd/iso or ensure you are booting from the hard disk
Click To Enlarge
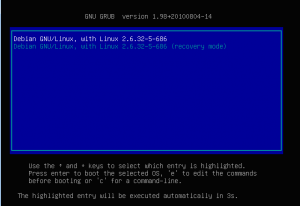
At the reboot, you should see that a Grub boot manager is available. The system will boot automatically
Click To Enlarge
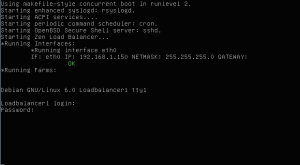
At this stage, you could login at the console using the root account and the password you have provided earlier but for the moment we are not really interested in that. We wanna see the Web Interface gui of the thing.
Click To Enlarge
2.Login to Zen Load balancer Web Interface
To login to the web interface, you have to open a browser and point to the following url
https://ip_address_of_load_balancer :444
You will then be prompted to provide some credentials, you have to use the following ones :
- User Account : admin
- Password : admin
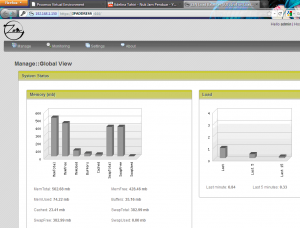
If you have provided the correct information, you will access the dashboard of the load balancer software
Click To Enlarge
As a quick example, you can create a “farm”. In Zen load balancer terminology, a farm is the virtual server (or ip address) where user will be connecting to and where zen load Balancer will be able to redirect the traffic to the most appropriate host. If you have 2 web servers that you want to load balance, you will create a Farm called for example LB_Web_Server. This Farm will be assigned a IP address to represent the load balanced service. This IP address will be then mapped to the “real” IP addresses of the web servers. Zen load balancer will then be able to redirect the traffic to the appropriate web server.
To create such a simple farm, you can perform the following actions.
On the dashboard page, you can see a menu bar. On this menu bar, click on Manage and then from the drop down box select Farms.
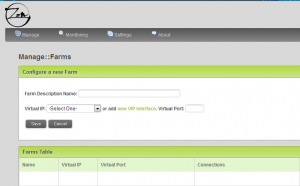
You will this page (or similar) that will open. Provide a Farm description and then click on the link “New VIP Interface”. For your first farm, you could probably use the default one.
Click To Enlarge
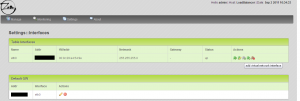
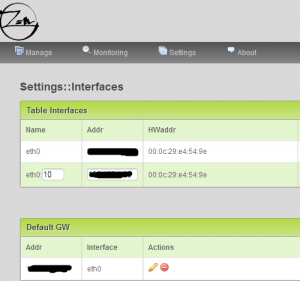
You will be redirected to the Settings>Interface page. In the table interface, in the action menu; click on the 3 icon in order to create an additional virtual network Interface
Click To Enlarge
You will be asked to provide a Name for the interface and an IP address. Save you settings. You can go back to your Manage Farms view
Click To Enlarge
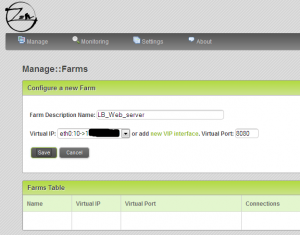
In the Manage Farm page, you select the correct virtual IP and you set the virtual port to be used. You can press save when you are happy with the information you’ve provided
Click To Enlarge
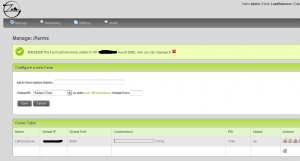
You will get a success message that will be displayed. In the farm table, you have to click on the edit icon.
Click To Enlarge
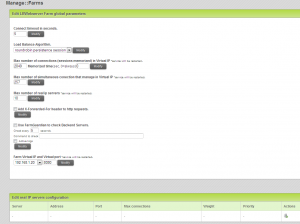
You will be redirected to another page, where you can configure some settings regarding the load balancer. And just below that, you will see a table where you can add the real IP addresses of the servers that needs to be load balanced.
Click To Enlarge
3. Final Words
I’ve just started playing with it and didn’t really use it in specific scenarios. We haven’t done much and we do not have enough experience yet with the software. The web interface is pleasant simply and quite easy to use. The load balancing process is working as expected for simple services such HTTP. We will need to work a little bit more with the software and see how it can be used in a more complex scenario (i.e. clustering the Zen Load Balancer)
If you think that the Zen Load balancer can fit your needs, you might want visit their web site and read the existing documentation available. I will probably follow up this software and play a little bit more with it in order to see if this might be a valid solution for some our projects
The next post related to the Zen load balancer (you will have to wait a bit), we will to go more in details regarding the configuration and which kind of services you could load balanced
Till next time
See ya

Good post, there is other new version, v2rc1 with a lot of additions like http, http or udp profiles, more interesting and complete than v1rc4.
Regards!
Thank you Emilio,
the post is indeed based on an “old” verion bu as soon as I have some time, I’ll install the newer version. I really like the software solution, very intuitive… After finishing the 2 coming posts, I’ll try to take some time to install the latest release and review the improvements.
Thank to Zenload balancer team for this really nice product
Till next time see ya
Good post,
Does this works for Microsoft Lync 2010.
Hello There,
I have not tested it yet with Lync but I’m assuming that Zen LB will be able to load balance traffic… Zen LB is an application layer load balancer..
If I have time, I might want to give it a try and publish the results…. but can take some weeks
Thank for passing by
See ya
hello there,,
greatt application..
now i have to install zen load balancer, but i can’t login for first boot ? how do you think ?
thank you for attention
see ya
Have you try useraccount :admin and password : admin
these are the default ones.
Hope this help
see ya
hi, griffon..
I’ve tried it. but did not enter..
the zen load balancer can installed offline ? or must connecting internet ?
thanks..
Hello Andi;
Are you trying to log into the Zen load balancer via the linux console ? – > if this is the case, you use account root and the password you’ve assigned during the setup of the Zen
Are you trying to login via the Web Browser by using the url https://IP_Of_Zen_Balancer:444 -> Then you should see a prompt asking you for username and password – > there you use admin for the account and admin for the password – > this is the default
Let me know what you are trying to do exactly
hello Griff..
Yes, i’ve to trying login to Zen load balancer via the linux console, and i use my account & password root.
i mean, after that, can i get into the GUI mode ? or, just setting via linux console ?
and whether the zen load balancer can be installed without the hardware?
thank you Griffon.
Hello Andi,
I did not understand your question about hardware part…but….
You can install the Zen Load Balancer as a Virtual Machine – > this is not a problem. You can use any virtualization software around to do this (Proxmox VE, VirtualBox, Hyper-V, VMware, Linux KVM, Xen,….)
Zen load balancer works like an appliance, you install the software and that’s it. You do not have any gui installed on the Zen load balancer box itself. This is to minimize the footprint of the appliance.
To work with the Zen load balancer, you do not need to login through the linux console, You login to the Web Interface only from a remote computer. This means that the Zen load balancer has to be connected to your network and that you can indeed have an access via the network to the zen load balancer box.
If you really want to have access to the web interface from the Zen load balancer, It’s probably possible to install a GUI package (gnome,kde,xfce,E17,…) and where you can then configure it locally…
But again this is not the philosophy of the appliance approach.
Hope this answer your questions…
Hello Griffon,
So, to gain access to the web, do I need to connect to remote desktop from another computer to a computer that has installed the zen load balancer ?
Thank you Griffon
Griff, I finally get into the web, thanks for your suggestion, maybe next time I’ll ask again slightly once again, thank you..
Hello Andi,
Good news ! So, to summarize (for other people out there), in order to connect to the web interface, you go on another computer and you simply open a web browser where you type the url of the zen load balancer https://IP_of_Zen_Load_Balancer:444.
This is as simple as that !
See ya around : -)
Hi. Please post the configuration for Microsoft Lync Server 2010. I’m working around this but some of the services is not functionality ( such as conferencing services and e.t..c.)
Hello rufat,
I’m currently on Holidays.. And I’m already working on the new Microsoft software releases. I cannot promise anything but If I have some free time, I’ll try to rebuild my Lync test lab and see if I can post some guidelines about load balancing…
Again, NO GUARANTEE – I have higher priority for the moment –
I’ll might contact you “offline” to get more info about your current setup and where you are encountering problems
Till Next time
See ya 🙂
What are they basic hardware requirements for this appliance? Minimum and recommend for RAM, CPU, Hard drive space?
Thanks,
Hello Corey,
Given that the Zen load balancer is based on the debian distribution, if you check the HW requirements for Debian, you should be good…
For a simple/basic configuration, I go with the following settings
512 MB of RAM and
8 GB for the Hard disk
However, when I use it in my virtual infrastructure, I tend to use at minimum 1024 MB of RAM and 8 GB of Hard disk.
Hope this help
See ya
Hi, Griffon, what’s up ?
i want to ask you, i have 2 mail servers
and i want to apply the load balancing use zen load balancer,
in this case, server A as a master and server B as a back up, how can i do it ?
thanks Griffon
have a nice day
Hello Andi,
How are you doing ?
First comment, If you go for this setup (Active/passive confiugration), you are not really balance traffic between you CAS servers. Connection will always go to one server. With this setup, you are trying to provide fault tolerance instead of load balancing capabilities
To answer you question, I would check the load balance algorithm option within the FARM object in the Zen load balancer software. In the load algorithm drop down box, you should select the option Priority.
When adding the real server into the farm, you will see that you have an option to specify the priority value. The server with highest priority will be receiving the connections
Hope this help
Till next time
See ya
thanks Griffon,
and actually, i was still learning bout this.,
how to add real servers to zen load balancer ?
thanks,
hello Andi,
you can follow the instructions found at http://c-nergy.be/blog/?p=2207
or you could have a look on the zen load balancer web site, section documentation
http://www.zenloadbalancer.com/web/index.php?page=documentation
see ya
Hi grif, how are you?
can I have your email address?
I want to send a topology server load balancing what I’m learning, but I’m having trouble,
please help
thank you ,
Hi Griffon. Any news about Lync Server 2010 configuration?)
Hello Rufat,
I never had the time to publish something related to Lync 2010 and how to use it with zen load balancer. I will not have a lot of time in the coming weeks. We are working quite a lot (end of year is coming). Possibly, if you provide me a clear illustration of what you want to achieve, I might try to help you out with the Zen load balancer configuration…
Again, no guarantee that I will be able to help you or that I might have time to provide useful tips
Note : provide me a high level drawing of your architecture and what you want to achieve
See ya
Hello,
nice review, nice software, have it working, great, but i was hoping for a reverse proxy option (using 5 servers from 1 ip), dit some testing, but no go.
you have a advice?
or i go back to try pound.
tnx
gorgo
Hello Gorgo,
I’m not sure I understand what you wanna do. With Zen load balancer, you can create a Virtual IP (VIP) for the service you want to load balance and then associate this VIP to one or multiple servers. With Zen load balancer, you have indeed a small limitation for the moment. you can only load balance one port per farm. so, if you want to load balance http and https traffic, you will have to create 2 Farms : one for port 80 and one for port 443. You can use the same VIP for both farms and the traffic will be load balanced. So, normally (if this is what you wanna do); you can use only one virtual IP address and load balance the traffic to the 5 back-end server…
you might want to have a look at this post (http://c-nergy.be/blog/?p=2207) to see how the farm could be configured.
Hope this help
Till next time
See ya
Just a note to ZLB. It does not work well with certain nic’s. I have two HP DL 360 G5 servers with built in Broadcom cards in them. ZLB loads up and works fine til you reboot it and then it stops passing traffic. I have intel nics on order to try and work around the problem, but I’m not sure it will work. Just a warning for those of you trying to make it work.
Thx….
Hello Jeff;
thank you for the info….
See ya
I don’t think you’ll be able to configure it with Lync. You will need to setup a lab that at least consists of a pool with 3 front end servers.
I have successfully tested Kemp which is well known Load balancer with Lync and even though still some services were not functioning properly with Lync 2013 e.g. (Mobility and conferencing) …
ZenLB is a good load balancer but still lack lot of options which are very necessary for corporation software which require Load balancer.
Still I think it’s a great piece of software.
I’m working on it now trying to get the Internal web services up through it and when i’m done i’ll publish that on my website.
cheers
M
Hi guys,
I’m running ZLB version 3.03, unfortunately I forgot the web admin intercface password. I still have the VM root password though, is there any way I could reset the web admin interface password?
Cheers,
Roger
Ok I found out how:
just go to /usr/local/zenloadbalancer/www/config and reset it in .htpasswd file using htpasswd 🙂
Hey Roger,
I didn’t have time to answer… you are to fast for me.
Glad you have found a way to reset your password
Till next time
See ya
I would like to upgrade the version from 32b to 64 bit. anyone have any idea.
Hello there,
I think this would not be possible. Better approach would be a migration. Backup the config of the 32-bit load balancer, install the 64-bit and restore you configuration
Hope this help
Till Next time
See ya
Hello, i am testing the ZenLoadBalancer. I have a Problem in HyperV 2012r2, the Installation is very slow… 40minutes. I think there this is a Problem, anyone have any Idea.
Can i Download the 64Bit Version?
Hello
I never tried indeed to install Zen Load Balancer on Hyper-V
Hyper-v does not support all the Linux versions but still you should be able to perform the installation accordingly
Zen load balancer 64-bit might not yet available but I have seen in some forums that this should come with a release 3.xx.
Hope this help
Hi, when i reduce the vhdx file to 9GB, the installation is with HyperV in 10 minutes ready. With a 30GB vhdx file the installation is slow… 40minutes. There is a problem with big hard disks….
i search the best configuration, I search a LoadBalancer for 300concurrent Citrix user….
Hey Sacha,
good to know…for performance i do not think that the disk size would matter.
thank for the tip
till next time
see ya
Hi Griffon,
the ZenLoadBalancer Installation work only with HyperV LegacyNetwork Card 100Mbit, do you have an Idea to use normal Networkcard in HyperV with 1GB?
Greets
Sascha
Hello Bitter,
Hyper-v provide limited support for Linux Operating System. Only a few distributions are considered to be supported.
The standard virtual network cards requires you to install the integrated services components in your Virtual machine. Based on the zen load balancer version you are using, you might need to either get an iso of the Linux integrated services component or they are already included in the newer debian os kernel. (see http://technet.microsoft.com/en-us/library/dn531030.aspx
To get your synthetic network card working with Zen load balancer, you should try something like this
Create a virtual machine and attach 2 network cards : 1 synthetic type and one Legacy type
Perform the Zenload balancer installation (and you should see that only the legacy network card is detected at this time.
Check your install (by login into the Web Admin interface)
You need now to upgrade/update the Zen Load Balancer OS. To do that, you login into the console
and type the following commands
aptitude install debian-archive-keyring
aptitude update
aptitude upgrade
Here; you are basically getting/installing the latest version of Linux Integration Services :-p
At this stage; reboot the Zen load balancer. After the reboot; you should see in your Web interface that the synthetic card is visible and can be used
GIVE IT A TRY and let us know if this is working for you
Hope this help
Till next time
See ya
5.After rebooting log into the admin interface again, you should now see your synthetic NIC and you will be able to configure it.
6.Shut down the VM from the console: shutdown -h now .
7.Remove the legacy NIC from the Hyper-V settings.
8.Boot your VM, you should now just see your Hyper-V synthetic NIC.
Hi Griffon!
first of all congratulations for your work that you share with passion!
I’m testing the good software Zen, as load balancer for lync 2013 front end server but the configuration is not clear and I did not find documentation about.
For your experience Zen is usable for this application?
Thanks so much!
Ivan
Hello IVan,
It’s long time that I’vnt worked with Lync 2013. As far as know, Zen load balancer can be used also for load balancing Lync infrastructure as the Zen load balancer is a Layer 7 device.
I’m currently abroad and have no infra to test….
I would recommend you to check documentation /setup guide from big player in the load balacing solution ( F5..) and use this document as a base to start with and adapt the ocnfiguration to match the Zen Balancer
Hope this help
Till next time
See ya
Hi Griifon
thanks for your suggestion!
bye!
Ivan
Ciao Ivan,
Sorry for not providing more info on this but as I said I’m really busy and abroad…
If you come up with a solution for Lync, I would be more than happy to redirect users to your web site
If you stuck somewhere while digging, let me know and I’ll try to have a look (in the near future)
Ci vediamo
Till next time
See ya
Hi Griffon,
how do you install or update CA root and intermediate certificates on V3.05?
Thanks,
R
HEllo Roger,
We are not yet using 3.05 but the concept should be the same as previous version… I copy/paste one of the comment we provided in the past
Based on the zen load balancer documentation, You can see the following information “The uploaded certificate file must contain a PEM-encoded certificate, optionally a certificate chain from a known Certificate Authority to your server certificate and a PEM-encoded private key (not password protected).”
I’m assuming that you can concatenate the certificates into a single file…The best example (and explanation) I’ve found can be found at http://www.digicert.com/ssl-support/pem-ssl-creation.htm
Check the second option, you pem file should contain these sections
—–BEGIN CERTIFICATE—–
(Your Primary SSL certificate: your_domain_name.crt)
—–END CERTIFICATE—–
—–BEGIN CERTIFICATE—–
(Your Intermediate certificate: Cert_CA.crt)
—–END CERTIFICATE—–
Hope this help
Till next time
See ya
Oh I didn’t know it was that simple… I have tried adding the intermediate certificate as a separate certificate, but that didn’t work…
Thanks for taking the time to reply to my question…
Rogers
Works like a charm… thanks again
Hi Griffon,
Do you have any idea how to mitigate Poodle on ZLB community edition?
Thanks,
R
Hello Roger,
The team behind the ZLB product were working on a fix about the security issue related to poodle.
I have not seen yet a fix I have to say…
I would need to have a look on it
Hope this help
Till next time
See ya