|
|
The script hereafter is outdated and has been replaced by a newer version. Please Check the Download page for latest version.
|
Hello World,
Recently, we have released the latest version of our famous xrdp installation script (i.e. xrdp-installer-1.0.sh). The latest version of the script is merging and consolidating the standard installation script and the custom installation script. The xrdp-installer-1.0.sh script is basically replacing any previous versions of the script that has been released so far. The script has been made available with the release of Ubuntu 19.10. We have received positive feedback on the script. However, some minor issues have been detected and we have decided to update already the script and release a new version of the script…
So, let’s go !
Overview
Initially, this script should have been released with the next LTS Ubuntu release (i.e. Ubuntu 20.04). However, we have decided to release it with Ubuntu 19.10 which offers us the opportunity to detect possible bugs and issues and fix them before the next LTS release. This seems to be the good strategy as we have indeed detected some minor issues that have been fixed in this version of the script (version 1.1).
Note : This version of the script is stable but need to still go through some more validation process…..
Script version & Supported Ubuntu Version
The script version will be set to 1.1. So, the xrdp-installer-1.1.sh script will support the following Ubuntu operating system version
- Ubuntu 16.04.x
- Ubuntu 18.04.x
- Ubuntu 19.04
- Ubuntu 19.10
Prerequisites and assumptions
The following conditions should be met in order to have the best results while using the script
- We assume that your machine is connected to internet while performing the installation. This is needed as additional packages and software needs to be downloaded and installed on your Ubuntu machine
- The script runs against a supported Operating system (Ubuntu 16.04.x, Ubuntu 18.04.x,Ubuntu 19.04, Ubuntu 19.10)
- The Official Ubuntu distribution needs to be used (we do not support other Ubuntu flavors – so far !!)
- No additional Desktop interface is used ( xRDP session will be showing Ubuntu Gnome Desktop with the Dock menu or Unity if running Ubuntu 16.04)
- Sound functionality is present on the computers if you sound feature is available as well
The Script
The script has been modified slightly and try to improve the script usage. The following modifications have been included in the script
- the script is not using hard coded folder ~/Downloads anymore. We are using a variable to detect the Downloads folders on the system. This ensure that the script could theoretically run on non english configured systems. (Thanks to Olivier for the Suggestion :-))
- the script check if group membership ssl-cert contains or not the xrdp user. This action ensure that no warning message is thrown if the user is already member of the group
- checkinstall run with additional parameters (i.e. package version for xrdp). This is to avoid that possible ubuntu xrdp updates breaks the custom install performed ((Thanks to Olivier for the detecting the issue :-))
- additional check that detect if the script has been run more than once on the system.
Important Note :
If you copy/paste the script, you might encounter some issues because font formatting might be not maintained during the copy/paste operation. Please ensure that format is accurate before launching the script. A downloadable version of the script is available at the bottom of the post
Disclaimer : As usual, use this at your own risk !!
#!/bin/bash
#####################################################################################################
# Script_Name : xrdp-installer-1.1.sh
# Description : Perform xRDP installation on Ubuntu 16.04,18.04,19.04,19.10 and perform
# additional post configuration to improve end user experience
# Date : November 2019
# written by : Griffon
# WebSite :http://www.c-nergy.be - http://www.c-nergy.be/blog
# Version : 1.1
# History : 1.1 - Tackling multiple run of the script
#               - Improved checkinstall method/check ssl group memberhsip
#               - Replaced ~/Downloads by a variable
# : 1.0 - Added remove option + Final optimization
# : 0.9 - updated compile section to use checkinstall
# : 0.8 - Updated the fix_theme function to add support for Ubuntu 16.04
# : 0.7 - Updated prereqs function to add support for Ubuntu 16.04
# : 0.6 - Adding logic to detect Ubuntu version for U16.04
# : 0.5 - Adding env variable Fix
# : 0.4 - Adding SSL Fix
# : 0.3 - Adding custom login screen option
# : 0.2 - Adding new code for passing parameters
# : 0.1 - Initial Script (merging custom & Std)
# Disclaimer : Script provided AS IS. Use it at your own risk....
# You can use this script and distribute it as long as credits are kept
# in place and unchanged
####################################################################################################

#--------------------------------------------------------------------------#
# -----------------------Function Section - DO NOT MODIFY -----------------#
#--------------------------------------------------------------------------#

############################################################################
# DEFAULT INSTALLATION MODE : STANDARD INSTALLATION
############################################################################

#---------------------------------------------------#
# Function 1 - check xserver-xorg-core package....
#---------------------------------------------------#

check_hwe()
{
echo
/bin/echo -e "\e[1;33m |-| Detecting xserver-xorg-core package installed \e[0m"
xorgver=$(dpkg-query -W -f ='${Status}\n' xserver-xorg-core | awk {'print $3'})

if [[ "$xorgver" = *not-installed* ]];
then
# - hwe version is installed on the system
/bin/echo -e "\e[1;32m |-| xorg package version: xserver-xorg-core-hwe \e[0m"
HWE="yes"
else
/bin/echo -e "\e[1;32m |-| xorg package version: xserver-xorg-core \e[0m"
HWE="no"
fi
}

#---------------------------------------------------#
# Function 2 - Install xRDP Software....
#---------------------------------------------------#

install_xrdp()
{
echo
/bin/echo -e "\e[1;33m !---------------------------------------------!\e[0m"
/bin/echo -e "\e[1;33m ! Installing XRDP Packages...Proceeding... !\e[0m"
/bin/echo -e "\e[1;33m !---------------------------------------------!\e[0m"
echo
if [[ $HWE = "yes" ]] && [[ "$version" = *"Ubuntu 18.04"* ]];
then
sudo apt-get install xrdp -y
sudo apt-get install xorgxrdp-hwe-18.04
else
sudo apt-get install xrdp -y
fi
}

############################################################################
# ADVANCED INSTALLATION MODE : CUSTOM INSTALLATION
############################################################################

#---------------------------------------------------#
# Function 0 - Install Prereqs...
#---------------------------------------------------#

install_prereqs() {
echo
Release=$(lsb_release -sr)
/bin/echo -e "\e[1;33m !---------------------------------------------!\e[0m"
/bin/echo -e "\e[1;33m ! Installing PreReqs packages..Proceeding. ! \e[0m"
/bin/echo -e "\e[1;33m !---------------------------------------------!\e[0m"
echo
sudo apt-get -y install libx11-dev libxfixes-dev libssl-dev libpam0g-dev libtool libjpeg-dev flex bison gettext autoconf libxml-parser-perl libfuse-dev xsltproc libxrandr-dev python-libxml2 nasm fuse pkg-config git intltool checkinstall
echo
if [ $HWE = "yes" ];
then
# - xorg-hwe-* to be installed
/bin/echo -e "\e[1;32m |-| xorg package version: xserver-xorg-core-hwe-$Release \e[0m"
sudo apt-get install -y xserver-xorg-dev-hwe-$Release xserver-xorg-core-hwe-$Release
else
#-no-hwe
/bin/echo -e "\e[1;32m |-| xorg package version: xserver-xorg-core \e[0m"
echo
sudo apt-get install -y xserver-xorg-dev xserver-xorg-core
fi
}

#---------------------------------------------------#
# Function 1 - Download XRDP Binaries...
#---------------------------------------------------#
get_binaries() {
echo
/bin/echo -e "\e[1;33m !---------------------------------------------!\e[0m"
/bin/echo -e "\e[1;33m ! Download xRDP Binaries.......Proceeding. ! \e[0m"
/bin/echo -e "\e[1;33m !---------------------------------------------!\e[0m"
echo

#cd ~/Downloads
Dwnload=$(xdg-user-dir DOWNLOAD)
cd $Dwnload


## -- Download the xrdp latest files
echo
/bin/echo -e "\e[1;32m !---------------------------------------------!\e[0m"
/bin/echo -e "\e[1;32m ! Preparing download xrdp package !\e[0m"
/bin/echo -e "\e[1;32m !---------------------------------------------!\e[0m"
echo
git clone https://github.com/neutrinolabs/xrdp.git
echo
/bin/echo -e "\e[1;32m !---------------------------------------------!\e[0m"
/bin/echo -e "\e[1;32m ! Preparing download xorgxrdp package !\e[0m"
/bin/echo -e "\e[1;32m !---------------------------------------------!\e[0m"
echo
git clone https://github.com/neutrinolabs/xorgxrdp.git
}

#---------------------------------------------------#
# Function 2 - compiling xrdp...
#---------------------------------------------------#
compile_source() {
echo
/bin/echo -e "\e[1;33m !---------------------------------------------!\e[0m"
/bin/echo -e "\e[1;33m ! Compile xRDP packages .......Proceeding. ! \e[0m"
/bin/echo -e "\e[1;33m !---------------------------------------------!\e[0m"
echo

#cd ~/Downloads/xrdp
cd $Dwnload/xrdp

sudo ./bootstrap
sudo ./configure --enable-fuse --enable-jpeg --enable-rfxcodec
sudo make

#-- check if no error during compilation
if [ $? -eq 0 ]
then
/bin/echo -e "\e[1;33m |-| Make Operation Completed successfully \e[0m"
else
echo
echo
/bin/echo -e "\e[1;31m !---------------------------------------------!\e[0m"
/bin/echo -e "\e[1;31m ! Error while Executing make !\e[0m"
/bin/echo -e "\e[1;31m ! The Script is exiting.... !\e[0m"
/bin/echo -e "\e[1;31m !---------------------------------------------!\e[0m"
exit
fi
sudo checkinstall --pkgname=xrdp --pkgversion=0.9.11 --pkgrelease=1 --default

#xorgxrdp package compilation
echo
/bin/echo -e "\e[1;33m !---------------------------------------------!\e[0m"
/bin/echo -e "\e[1;33m ! Compile xorgxrdp packages....Proceeding. ! \e[0m"
/bin/echo -e "\e[1;33m !---------------------------------------------!\e[0m"
echo

#cd ~/Downloads/xorgxrdp
cd $Dwnload/xorgxrdp

sudo ./bootstrap
sudo ./configure
sudo make

# check if no error during compilation
if [ $? -eq 0 ]
then
echo
/bin/echo -e "\e[1;33m |-| Make Operation Completed successfully \e[0m"
echo
else
echo
/bin/echo -e "\e[1;31m !---------------------------------------------!\e[0m"
/bin/echo -e "\e[1;31m ! Error while Executing make !\e[0m"
/bin/echo -e "\e[1;31m ! The Script is exiting.... !\e[0m"
/bin/echo -e "\e[1;31m !---------------------------------------------!\e[0m"
exit
fi
sudo checkinstall --pkgname=xorgxrdp --pkgversion=0.2.11 --pkgrelease=1 --default
}

#---------------------------------------------------#
# Function 3 - create services ....
#---------------------------------------------------#
enable_service() {
echo
/bin/echo -e "\e[1;33m !---------------------------------------------!\e[0m"
/bin/echo -e "\e[1;33m ! Creating xRDP services.......Proceeding. ! \e[0m"
/bin/echo -e "\e[1;33m !---------------------------------------------!\e[0m"
echo
sudo systemctl daemon-reload
sudo systemctl enable xrdp.service
sudo systemctl enable xrdp-sesman.service
sudo systemctl start xrdp

}

############################################################################
# COMMON FUNCTIONS - WHATEVER INSTALLATION MODE
############################################################################

#---------------------------------------------------#
# Function 0 - Install Gnome Tweak Tool....
#---------------------------------------------------#
install_tweak()
{
echo
/bin/echo -e "\e[1;33m !---------------------------------------------!\e[0m"
/bin/echo -e "\e[1;33m ! Installing Gnome Tweak...Proceeding... !\e[0m"
/bin/echo -e "\e[1;33m !---------------------------------------------!\e[0m"
echo
sudo apt-get install gnome-tweak-tool -y
}

#--------------------------------------------------------------------#
# Fucntion 1 - Allow console Access ....(seems optional in u18.04)
#--------------------------------------------------------------------#
allow_console()
{
echo
/bin/echo -e "\e[1;33m !---------------------------------------------!\e[0m"
/bin/echo -e "\e[1;33m ! Granting Console Access...Proceeding... !\e[0m"
/bin/echo -e "\e[1;33m !---------------------------------------------!\e[0m"
echo
sudo sed -i 's/allowed_users=console/allowed_users=anybody/' /etc/X11/Xwrapper.config
}

#---------------------------------------------------#
# Function 2 - create policies exceptions ....
#---------------------------------------------------#
create_polkit()
{
echo
/bin/echo -e "\e[1;33m !---------------------------------------------!\e[0m"
/bin/echo -e "\e[1;33m ! Creating Polkit File...Proceeding... !\e[0m"
/bin/echo -e "\e[1;33m !---------------------------------------------!\e[0m"
echo

#All Ubuntu version
sudo bash -c "cat >/etc/polkit-1/localauthority/50-local.d/45-allow.colord.pkla" <<EOF
[Allow Colord all Users]
Identity=unix-user:*
Action=org.freedesktop.color-manager.create-device;org.freedesktop.color-manager.create-profile;org.freedesktop.color-manager.delete-device;org.freedesktop.color-manager.delete-profile;org.freedesktop.color-manager.modify-device;org.freedesktop.color-manager.modify-profile
ResultAny=no
ResultInactive=no
ResultActive=yes
EOF

#Specific Versions
if [[ "$version" = *"Ubuntu 19.04"* ]] || [[ "$version" = *"Ubuntu 19.10"* ]] ;
then
sudo bash -c "cat >/etc/polkit-1/localauthority/50-local.d/46-allow-update-repo.pkla" <<EOF
[Allow Package Management all Users]
Identity=unix-user:*
Action=org.freedesktop.packagekit.system-sources-refresh
ResultAny=yes
ResultInactive=yes
ResultActive=yes
EOF
fi
}

#---------------------------------------------------#
# Function 3 - Fixing Theme and Extensions ....
#---------------------------------------------------#
fix_theme()
{
echo
/bin/echo -e "\e[1;33m !---------------------------------------------!\e[0m"
/bin/echo -e "\e[1;33m ! Fix Theme and extensions...Proceeding... !\e[0m"
/bin/echo -e "\e[1;33m !---------------------------------------------!\e[0m"

# Checking if script has run already
if [ -f /etc/xrdp/startwm.sh.griffon ]
then
sudo rm /etc/xrdp/startwm.sh
sudo mv /etc/xrdp/startwm.sh.griffon /etc/xrdp/startwm.sh
fi

#Backup the file before modifying it
sudo cp /etc/xrdp/startwm.sh /etc/xrdp/startwm.sh.griffon

if [[ "$version" = *"Ubuntu 16.04"* ]];
then
echo
sudo sed -i "/# auth /a cat >~/.xsession << EOF\n#Unity Xrdp multi-users \n/usr/lib/gnome-session/gnome-session-binary --session=ubuntu &\n/usr/lib/x86_64-linux-gnu/unity/unity-panel-service &\n/usr/lib/unity-settings-daemon/unity-settings-daemon &\nfor indicator in /usr/lib/x86_64-linux-gnu/indicator-*;\ndo\nbasename='basename \\\\\${indicator}'\ndirname='dirname \\\\\${indicator}'\nservice=\\\\\${dirname}/\\\\\${basename}/\\\\\${basename}-service\n\\\\\${service} &\ndone\nunity\nEOF" /etc/xrdp/startwm.sh
echo
else
echo
sudo sed -i "4 a #Improved Look n Feel Method\ncat <<EOF > ~/.xsessionrc\nexport GNOME_SHELL_SESSION_MODE=ubuntu\nexport XDG_CURRENT_DESKTOP=ubuntu:GNOME\nexport XDG_CONFIG_DIRS=/etc/xdg/xdg-ubuntu:/etc/xdg\nEOF\n" /etc/xrdp/startwm.sh
echo
fi
}

#---------------------------------------------------#
# Function 4 - Enable Sound Redirection ....
#---------------------------------------------------#
enable_sound()
{
echo
/bin/echo -e "\e[1;33m !---------------------------------------------!\e[0m"
/bin/echo -e "\e[1;33m ! Enabling Sound Redirection... !\e[0m"
/bin/echo -e "\e[1;33m !---------------------------------------------!\e[0m"
echo

# Step 1 - Enable Source Code Repository
sudo apt-add-repository -s 'deb http://be.archive.ubuntu.com/ubuntu/ '$codename' main restricted'
sudo apt-add-repository -s 'deb http://be.archive.ubuntu.com/ubuntu/ '$codename' restricted universe main multiverse'
sudo apt-add-repository -s 'deb http://be.archive.ubuntu.com/ubuntu/ '$codename'-updates restricted universe main multiverse'
sudo apt-add-repository -s 'deb http://be.archive.ubuntu.com/ubuntu/ '$codename'-backports main restricted universe multiverse'
sudo apt-add-repository -s 'deb http://be.archive.ubuntu.com/ubuntu/ '$codename'-security main restricted universe main multiverse'
sudo apt-get update

# Step 2 - Install Some PreReqs
sudo apt-get install git libpulse-dev autoconf m4 intltool build-essential dpkg-dev libtool libsndfile-dev libcap-dev -y
sudo apt build-dep pulseaudio -y

# Step 3 - Download pulseaudio source in /tmp directory - Do not forget to enable source repositories
cd /tmp
sudo apt source pulseaudio

# Step 4 - Compile
pulsever=$(pulseaudio --version | awk '{print $2}')
cd /tmp/pulseaudio-$pulsever
sudo ./configure

# step 5 - Create xrdp sound modules
sudo git clone https://github.com/neutrinolabs/pulseaudio-module-xrdp.git
cd pulseaudio-module-xrdp
sudo ./bootstrap
sudo ./configure PULSE_DIR="/tmp/pulseaudio-$pulsever"
sudo make

#Step 6 copy files to correct location (as defined in /etc/xrdp/pulse/default.pa)
cd /tmp/pulseaudio-$pulsever/pulseaudio-module-xrdp/src/.libs
sudo install -t "/var/lib/xrdp-pulseaudio-installer" -D -m 644 *.so
sudo install -t "/usr/lib/pulse-$pulsever/modules" -D -m 644 *.so
echo

}

#---------------------------------------------------#
# Function 5 - Custom xRDP Login Screen ....
#---------------------------------------------------#
custom_login()
{
echo
/bin/echo -e "\e[1;33m !---------------------------------------------!\e[0m"
/bin/echo -e "\e[1;33m ! Customizing xRDP login screen !\e[0m"
/bin/echo -e "\e[1;33m !---------------------------------------------!\e[0m"
echo

#cd ~/Downloads
cd $Dwnload
wget http://www.c-nergy.be/downloads/griffon_logo_xrdp.bmp

#Check if script has run once...
if [ -f /etc/xrdp/xrdp.ini.griffon ]
then
sudo rm /etc/xrdp/xrdp.ini
sudo mv /etc/xrdp/xrdp.ini.griffon /etc/xrdp/xrdp.ini
fi

#Backup file
sudo cp /etc/xrdp/xrdp.ini /etc/xrdp/xrdp.ini.griffon

if [[ "$adv" = "yes" ]] || [[ "$version" = *"Ubuntu 16.04"* ]];
then
sudo cp griffon_logo_xrdp.bmp /usr/local/share/xrdp
sudo sed -i 's/ls_logo_filename=/ls_logo_filename=\/usr\/local\/share\/xrdp\/griffon_logo_xrdp.bmp/g' /etc/xrdp/xrdp.ini
else
sudo cp griffon_logo_xrdp.bmp /usr/share/xrdp
sudo sed -i 's/ls_logo_filename=/ls_logo_filename=\/usr\/share\/xrdp\/griffon_logo_xrdp.bmp/g' /etc/xrdp/xrdp.ini
fi

sudo sed -i 's/blue=009cb5/blue=dedede/' /etc/xrdp/xrdp.ini
sudo sed -i 's/#white=ffffff/white=dedede/' /etc/xrdp/xrdp.ini
sudo sed -i 's/#ls_title=My Login Title/ls_title=Remote Desktop for Linux/' /etc/xrdp/xrdp.ini
sudo sed -i 's/ls_top_window_bg_color=009cb5/ls_top_window_bg_color=2c001e/' /etc/xrdp/xrdp.ini
sudo sed -i 's/ls_bg_color=dedede/ls_bg_color=ffffff/' /etc/xrdp/xrdp.ini
sudo sed -i 's/ls_logo_x_pos=55/ls_logo_x_pos=0/' /etc/xrdp/xrdp.ini
sudo sed -i 's/ls_logo_y_pos=50/ls_logo_y_pos=5/' /etc/xrdp/xrdp.ini
}

#---------------------------------------------------#
# Function 6 - Fix SSL Minor Issue ....
#---------------------------------------------------#
fix_ssl()
{
echo
/bin/echo -e "\e[1;33m !---------------------------------------------!\e[0m"
/bin/echo -e "\e[1;33m ! Fixing SSL Cert Issue ... !\e[0m"
/bin/echo -e "\e[1;33m !---------------------------------------------!\e[0m"
echo
if [[ "id -Gn xrdp | grep ssl-cert" ]]
then
/bin/echo -e "\e[1;32m !--xrdp already member ssl-cert...Skipping ---!\e[0m"
else
sudo adduser xrdp ssl-cert
fi
}

#---------------------------------------------------#
# Function 7 - Fixing env variables in XRDP ....
#---------------------------------------------------#
fix_env()
{
#Add this line to /etc/pam.d/xrdp-sesman if not present
if grep -Fxq "session required pam_env.so readenv=1 user_readenv=0" /etc/pam.d/xrdp-sesman
then
echo "Env settings already set"
else
sudo sed -i '1 a session required pam_env.so readenv=1 user_readenv=0' /etc/pam.d/xrdp-sesman
fi
}

#---------------------------------------------------#
# Function 8 - Removing XRDP Packages ....
#---------------------------------------------------#
remove_xrdp()
{
echo
/bin/echo -e "\e[1;33m !---------------------------------------------!\e[0m"
/bin/echo -e "\e[1;33m ! Removing xRDP Packages... !\e[0m"
/bin/echo -e "\e[1;33m !---------------------------------------------!\e[0m"
echo
#remove xrdp package
sudo systemctl stop xrdp
sudo systemctl disable xrdp
sudo apt-get autoremove xrdp -y
sudo apt-get purge xrdp -y
#remove xorgxrdp
sudo systemctl stop xorgxrdp
sudo systemctl disable xorgxrdp
sudo apt-get autoremove xorgxrdp -y
sudo apt-get purge xorgxrdp -y
}

sh_credits()
{
echo
/bin/echo -e "\e[1;36m !----------------------------------------------------------------!\e[0m"
/bin/echo -e "\e[1;36m ! Installation Completed...Please test your xRDP configuration !\e[0m"
/bin/echo -e "\e[1;36m ! If Sound option selected, shutdown your machine completely !\e[0m"
/bin/echo -e "\e[1;36m ! start it again to have sound working as expected !\e[0m"
/bin/echo -e "\e[1;36m ! !\e[0m"
/bin/echo -e "\e[1;36m ! Credits : Written by Griffon - November 2019 !\e[0m"
/bin/echo -e "\e[1;36m ! www.c-nergy.be -xrdp-installer-v1.1.sh - ver 1.1 !\e[0m"
/bin/echo -e "\e[1;36m !----------------------------------------------------------------!\e[0m"
echo
}

#---------------------------------------------------#
# SECTION FOR OPTIMIZING CODE USAGE... #
#---------------------------------------------------#

install_common()
{
allow_console
create_polkit
fix_theme
fix_ssl
fix_env
}

install_custom()
{
install_prereqs
get_binaries
compile_source
enable_service

}

#--------------------------------------------------------------------------#
# -----------------------END Function Section -----------------#
#--------------------------------------------------------------------------#

#--------------------------------------------------------------------------#
#------------ MAIN SCRIPT SECTION -------------------#
#--------------------------------------------------------------------------#

#---------------------------------------------------#
# Script Version information Displayed #
#---------------------------------------------------#

echo
/bin/echo -e "\e[1;36m !-------------------------------------------------------------!\e[0m"
/bin/echo -e "\e[1;36m ! xrdp-installer-1.1 Script !\e[0m"
/bin/echo -e "\e[1;36m ! Support U16.04/18.04/19.04/19.10 !\e[0m"
/bin/echo -e "\e[1;36m ! Written by Griffon - November 2019 - www.c-nergy.be !\e[0m"
/bin/echo -e "\e[1;36m ! !\e[0m"
/bin/echo -e "\e[1;36m ! For Help and Syntax, type ./xrdp-installer-1.1.sh -h !\e[0m"
/bin/echo -e "\e[1;36m ! !\e[0m"
/bin/echo -e "\e[1;36m !-------------------------------------------------------------!\e[0m"
echo

#----------------------------------------------------------#
# Step 0 -Detecting if Parameters passed to script .... #
#----------------------------------------------------------#
for arg in "$@"
do
#Help Menu Requested
if [ "$arg" == "--help" ] || [ "$arg" == "-h" ]
then
echo "Usage Syntax and Examples"
echo
echo " --custom or -c custom xRDP install (compilation from sources)"
echo " --loginscreen or -l customize xRDP login screen"
echo " --remove or -r removing xRDP packages"
echo " --sound or -s enable sound redirection in xRDP"
echo
echo "example "
echo
echo " ./xrdp-installer-1.0.sh -c -s custom install with sound redirection"
echo " ./xrdp-installer-1.0.sh -l standard install with custom login screen"
echo " ./xrdp-installer-1.0.sh standard install no additional features"
echo
exit
fi

if [ "$arg" == "--sound" ] || [ "$arg" == "-s" ]
then
fixSound="yes"
fi

if [ "$arg" == "--loginscreen" ] || [ "$arg" == "-l" ]
then
fixlogin="yes"
fi

if [ "$arg" == "--custom" ] || [ "$arg" == "-c" ]
then
adv="yes"
fi

if [ "$arg" == "--remove" ] || [ "$arg" == "-r" ]
then
removal="yes"
fi
done

#--------------------------------------------------------------------------------#
#-- Step 0 - Check that the script is run as normal user and not as root....
#-------------------------------------------------------------------------------#

if [[ $EUID -ne 0 ]]; then
/bin/echo -e "\e[1;36m !-------------------------------------------------------------!\e[0m"
/bin/echo -e "\e[1;36m ! Standard user detected....Proceeding.... !\e[0m"
/bin/echo -e "\e[1;36m !-------------------------------------------------------------!\e[0m"
else
echo
/bin/echo -e "\e[1;31m !-------------------------------------------------------------!\e[0m"
/bin/echo -e "\e[1;31m ! Script running with admin priveleges. The script should be !\e[0m"
/bin/echo -e "\e[1;31m ! run under a standard user account. sudo privileges will be !\e[0m"
/bin/echo -e "\e[1;31m ! prompted during execution !\e[0m"
/bin/echo -e "\e[1;31m !-------------------------------------------------------------!\e[0m"
echo
sh_credits
exit
fi

#-----------------------------------------------------------------------
#Step 2 - checking for additional Settings - xorg-xserver-core version
#----------------------------------------------------------------------

check_hwe

#---------------------------------------------------#
#-- Step 1 - Try to Detect Ubuntu Version....
#---------------------------------------------------#

version=$(lsb_release -sd)
codename=$(lsb_release -sc)

echo
/bin/echo -e "\e[1;33m |-| Detecting Ubuntu version \e[0m"
if [[ "$version" = *"Ubuntu 16.04"* ]];
then
/bin/echo -e "\e[1;32m |-| Ubuntu Version : $version\e[0m"
echo
elif [[ "$version" = *"Ubuntu 18.04"* ]];
then
/bin/echo -e "\e[1;32m |-| Ubuntu Version : $version\e[0m"
echo
elif [[ "$version" = *"Ubuntu 19.04"* ]];
then
/bin/echo -e "\e[1;32m |-| Ubuntu Version : $version\e[0m"
echo
elif [[ "$version" = *"Ubuntu 19.10"* ]];
then
/bin/echo -e "\e[1;32m |-| Ubuntu Version : $version\e[0m"
echo
else
/bin/echo -e "\e[1;31m !--------------------------------------------------------------!\e[0m"
/bin/echo -e "\e[1;31m ! Your system is not running a supported version !\e[0m"
/bin/echo -e "\e[1;31m ! The script has been tested only on the following versions !\e[0m"
/bin/echo -e "\e[1;31m ! U16.04.x/18.04.x/19.04.x/19.10 !\e[0m"
/bin/echo -e "\e[1;31m ! The script is exiting... !\e[0m"
/bin/echo -e "\e[1;31m !--------------------------------------------------------------!\e[0m"
echo
exit
fi

#--------------------------------------------------------------------------------#
#-- Step 3 - Check if Removal Option Selected
#--------------------------------------------------------------------------------#

if [ "$removal" = "yes" ];
then
remove_xrdp
echo
sh_credits
exit
fi

#---------------------------------------------------------#
# Step 3 - Executing the installation & config tasks .... #
#---------------------------------------------------------#

#-------------------------------------------------------------------
#- If Ubuntu 16.04 detected, we always perform a custom installation
#-------------------------------------------------------------------

#Check if script has run once...
if [ -f /etc/xrdp/xrdp-installer-check.log ]
then
echo
/bin/echo -e "\e[1;36m !----------------------------------------------------------------!\e[0m"
/bin/echo -e "\e[1;36m ! INFO : xrdp-install script ran at least once on this computer. !\e[0m"
/bin/echo -e "\e[1;36m !----------------------------------------------------------------!\e[0m"
else
if [[ "$version" = *"Ubuntu 16.04"* ]];
then
echo
/bin/echo -e "\e[1;36m !-------------------------------------------------------------!\e[0m"
/bin/echo -e "\e[1;36m ! Custom Installation for Ubuntu 16.04.x !\e[0m"
/bin/echo -e "\e[1;36m !-------------------------------------------------------------!\e[0m"
echo
install_custom
install_common
fi

#---------------------------------------------------------------------------------------
#- If custom option detected, additional check for U16.04 so skipped
#----------------------------------------------------------------------------------------

if [[ "$version" != *"Ubuntu 16.04"* ]];
then
if [ "$adv" = "yes" ];
then
echo
/bin/echo -e "\e[1;36m !-------------------------------------------------------------!\e[0m"
/bin/echo -e "\e[1;36m ! Custom Installation Option Selected..... !\e[0m"
/bin/echo -e "\e[1;36m !-------------------------------------------------------------!\e[0m"
echo
install_custom
install_tweak
install_common
else
echo
/bin/echo -e "\e[1;36m !-------------------------------------------------------------!\e[0m"
/bin/echo -e "\e[1;36m ! Standard Installation Mode Selected - U18.04 and later !\e[0m"
/bin/echo -e "\e[1;36m !-------------------------------------------------------------!\e[0m"
echo
install_xrdp
install_tweak
install_common

fi #end if Adv option
fi # end if version check not like U16.04
fi # End check if file exists
#---------------------------------------------------------------------------------------
#- Check for Additional Options selected
#----------------------------------------------------------------------------------------

if [ "$fixSound" = "yes" ];
then
enable_sound
fi

if [ "$fixlogin" = "yes" ];
then
echo
custom_login
fi

#-----------------------------------------------------------------------
# Create Check fil to see if script has run at least once...
#----------------------------------------------------------------------
#Create the log file
sudo touch /etc/xrdp/xrdp-installer-check.log

#---------------------------------------------------------------------------------------
#- show Credits and finishing script
#---------------------------------------------------------------------------------------

sh_credits
How to Use the Script
The xrdp-installer-1.1 script will work in a similar way as the previous versions. First, we will need to set the execute permission on the script. Then, you will need to choose between standard and custom installation. Finally, you would need to decide if additional options would be enabled or not… So, let’s see how this would be working….
Step 1 – Set Execute Right on the script
Download the xrdp-installer-1.1.sh script to your system, extract content and mark it as executable . To do this, perform the following action in a terminal console
chmod +x ~/Downloads/xrdp-installer-1.1.sh
Note : Adjust the path where the xrdp-Installer-1.1.sh script to reflect your environment
Step 2 – Run as normal user
The script needs to be run as a normal user. The script will start running and will prompt you for password when sudo actions are initiated. If you run the script as root or using sudo command, the Download folder does not exist for the root user and the script fails to run as expected. To overcome this situation, the script also check which user is executing the script. If the script is run under sudo or root accounts, a warning message will be displayed and the script will not execute
Step 3 – Switches and parameters
The xrdp-installer-1.1.sh script can be executed as is (with no parameters or switches). This will perform a standard (and basic) installation of xRDP. No sound or custom xrdp login script will be made available. However, remote desktop, drive redirection and clipboard redirection would be available with this installation mode.
The xrdp-installer-1.1.sh script accept also some additional parameters that will help customize the xrdp installation and enable additional features. The script provides the following parameters
--help or -h          => will display a basic help menu
--sound or -s         => will enable sound redirection
--loginscreen or -l   => will customize the xRDP login screen
--remove or -r        => will remove the xrdp package
--custom or -c        => will perform a custom installation (i.e. compiled from sources)
Step 4 – Perform xRDP installation using the script
The following sections will provide some examples and scenario on how you can use the script…..
Standard Installation – No Parameter
As mentioned above, you can decide to use the default xrdp package available in the Ubuntu repository and perform a basic installation which will provide you remote desktop capability and will also customize the remote sesssion. The script will ensure that the same look n’ feel will be maintained when the user logs on locally or remotely.
To perform a standard installation, you execute the script with no parameters. Open a Terminal console, browse to the location where the script has been downloaded and issue the following command
./xrdp-installer-1.1.sh
When the xrdp installation package will start, you be requested to enter your password. Provide the password and proceed with the installation. Wait for completion of the script. The machine will not reboot automatically when done so you can review the actions performed by the script….
Important Notes
If you are running the script on Ubuntu 16.04.x, the custom installation will always be performed even if you have not specified any parameters. This is because Ubuntu 16.04.x ships with a really old xrdp package (version 0.6) and does not provides all needed features. The custom installation provide drive redirection,clipboard and access to Unity Desktop
Standard Installation with Parameters
The script can be used to perform a standard installation and still passes some parameters to get the most of the xRDP packages and their features. For all the Ubuntu versions, we could use the following combination of parameters
./xrdp-installer-1.1.sh -s      (this would enable the sound redirection)
./xrdp-installer-1.1.sh -l      (this would customize the xrdp login screen -see here)
Obviously, you can combine the switches (any order) to have more features enabled
./xrdp-installer-1.1.sh -s -l (this would enable the sound redirection and customize the xrdp login screen)
Important Notes
The script can be run multiple times on the same machine. If you have run initially the script with no parameters but you decide afterward to enable additional features, the script can be re-executed and the additional features will be enabled.
Custom Installation – Default Installation
Custom installation script is really flexible and help avoiding issues like we have encountered in Ubuntu 18.04.x (see here,here and here). Custom installation means that the script will compile the xrdp package from the source binaries. The custom installation script always uses the latest xrdp package version available
To perform a custom installation, you will need at minimum to pass one parameter. The following command line shows you how to perform a custom installation
./xrdp-installer-1.1.sh -c (this would perform a custom installation but will not enabled adv features like sound redirection or custom login screen)
Important Notes
If you are running the script on Ubuntu 16.04.x, the -c switch will be ignored and a custom installation process will be performed. This is because Ubuntu 16.04.x ships with a really old xrdp package (version 0.6) and does not provides all needed features. The custom installation provide drive redirection,clipboard and access to Unity Desktop
Custom Installation – Additional Options
If a user wants to enable additional features, you will pass some additional parameters as shown in the following examples
./xrdp-installer-1.1.sh -c -s     (this would perform a custom install and enable sound redirection)
./xrdp-installer-1.1.sh -c -l     (this would perform a custom install and customize xrdp login screen)
./xrdp-installer-1.1.sh -c -l -s  (this would perform a custom install, enable sound and customize login screen)
Important Notes
The script can be run multiple times on the same machine. If you have run initially the script with no parameters but you decide afterward to enable additional features, the script can be re-executed and the additional features will be enabled.
Remove Installation option
This version of the script also ship with the option to remove xRDP package. The removal option should be only used if you have uses this version of the script to perform the installation. To remove the xrdp package, you would simply execute the following command
./xrdp-installer-1.1.sh -r (to remove the xrdp packages)
Step 5 – Test your configuration
After the script has run and after the reboot/shutdown and start process, it’s time to test and see if you can indeed perform a smooth remote connection to your Ubuntu machine. Remember that a user can either be logged on locally or logged on remotely on the machine when working with xRDP solution. If the user, performing the remote connection, is logged into the system locally the remote connection will start but will be terminated immediately. This is the way it works nowadays.
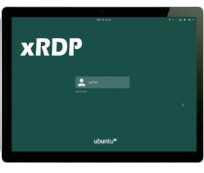
So, ensure that the user performing the test is not locally logged on, start your favorite remote desktop client and perform your connection. Based on your options, you will be presented either with the green xrdp login screen or with the custom login screen (purple background). Simply enter your credentials and start testing your installation. If everything is ok, you will see a similar Desktop interface where Gnome Desktop is used and the Dock is visible.
Known issues and limitations
Known Issues
Sound redirection Issue
If the Sound redirection option has been selected, rebooting the Ubuntu system is not enough and the sound redirection might not work. if the sound redirection option has been selected, you will have to shutdown your Ubuntu machine and then start it again in order to ensure that the sound redirection feature would work as expected.
Sound redirection is not working as expected on Ubuntu 19.10. The modules are created and copied to the correct location. However, the xrdp sink modules are never loaded in the remote session or randomly loaded in the remote session. To fix this, you simply need to execute the following command within your remote session and the sound will start working
pulseaudio -k
For Detailed information, see post below
Limitations
One session per user limitation
Only one session is allowed per user. This means that if a user is logged on locally on the Ubuntu machine, the user will not be able to perform a remote session (the xRDP connection will initiate but will end up immediately). If a user is logged on remotely on the system, it will not be able to login locally (if the user tries to login locally, the login screen will loop and the login screen will be presented again to the user)
Switch between standard and Custom install
This version of the script can be run multiple times on the same machine. However, because of this new behavior, you cannot perform a standard installation and then decide to perform the custom installation. Once you have selected your installation mode, you will have to stick to it. This is kind of checked by the script.
So, if you have performed a standard installation but afterwards you might want to use the custom installation option, the script will ignore the request. If you want to move from standard install mode to custom mode (or vice versa), the correct process is
- remove xrdp (using the xrdp-installer-1.1.sh -r option)
- perform a new installation using your selected installation mode (standard or custom install mode)
Download the Script
The script can be download at this location : xrdp-installer-1.1.zip
Note : All the xrdp scripts can be found at https://www.c-nergy.be/products.html
Final Notes
This is it for this post !
Please if you have time or want to help us in creating the best xrdp installer script, download the script and provide constructive feedback. If you find a bug or an issue with the script, let us know as well so we can try to fix it.
Till next time
See ya
after installing the script i get the following message when trying to logon;
xrdp session: Login failed for display 0
I am running Ubuntu desktop 19:10 and used the custom script
I ran the script in custom mode, after the restart i tried logging in from a different machine and received the message XRDP sending login failed for display 0
I then login the machine to check if the service was running and got the following message
I then checked that the service was running
Loaded: loaded (/lib/systemd/system/xrdp.service; enabled; vendor preset: enabled)
Active: active (running) since Fri 2019-11-15 18:19:53 +04; 49s ago
Docs: man:xrdp(8)
man:xrdp.ini(5)
Process: 1096 ExecStartPre=/bin/sh /usr/share/xrdp/socksetup (code=exited, status=0/SUCCESS)
Process: 1109 ExecStart=/usr/sbin/xrdp $XRDP_OPTIONS (code=exited, status=0/SUCCESS)
Main PID: 1113 (xrdp)
Tasks: 1 (limit: 4915)
Memory: 3.6M
CGroup: /system.slice/xrdp.service
└─1113 /usr/sbin/xrdp
Most importantly I also saw this message;
Starting xrdp daemon…
Testing if xrdp can listen on 0.0.0.0 port 3389.
Closed socket 7 (AF_INET6 :: port 3389)
xrdp.service: Can’t open PID file /run/xrdp/xrdp.pid (yet?) after start: No such file or directory
Started xrdp daemon.
1113)(140386815317824)[INFO ] starting xrdp with pid 1113
(1113)(140386815317824)[INFO ] listening to port 3389 on 0.0.0.0
This message in particular is the main concern
xrdp.service: Can’t open PID file /run/xrdp/xrdp.pid (yet?) after start: No such file or directory
Tried several times on a fresh install of ubuntu 18.04 — script said it was running, gave the red text block about sudo, then said it was completed. It didnt do anything though.
@Robert,
Have you read the red text block ?…. My guess (I’m might be wrong)…. you are trying to run the script using the sudo command… (i.e. sudo ./xrdp-installer-1.1.sh ).. This will not work….
You have to run the script as a standard user meaning no sudo (i.e. ./xrdp-installer-1.1.sh ). When admin rights will be needed (i.e. sudo usage), you will be prompted for password and then it will go through….
Hope this help
Till next time
See ya
@Donald Thomas,
This is too generic info to provide help….
We need to get access to more details… can you check the logs on your system… Have a look at /var/log/xrdp.log and /var/log/xrdp-sesman.log
You might also need to check the ~/.xsession-errors log file
Can you provide a full screenshot of the xRDP login screen failing… Login failed for Display O…. this could be that you have typed a wrong password…for example…
Hope this help
Till next time
See ya
@Dom,
This is an expected error… The service is actually running fine. You just demonstrated using the systemctl status command. The other way you demonstrated the fact that the service is working correctly is by performing a remote desktop connection and you have received the xrdp login screen….so, service is running….
Again, we need to have more information about your setup, dig the logs for xrdp and ensure that you have typed the correct password (as a first idea that comes to our mind)… check that the keyboard layout is the expected one….
Provide full details about the error you are getting on the xrdp login screen…
Hope this help
Till next time
See ya
Dear Griffon
Thank you so much for your brilliant script!
It enables the true copy/paste capability, which has long been an annoying issue using outdated xrdp package on ubuntu 16.04.xx
Just one comment: Since I installed Mate desktop, manual tweak of /etc/xrdp/startwm.sh is required for my case. I simply comment out the line “wm_start” and add a new line “mate-session”
SzemeiBon
@Szemei,
Thank you for the positive feedback and for visiting our blog. Yes indeed, the consolidated script supports only the traditional Ubuntu Operating system version…. We might add additional flavors to the script but we want first to ensure that this new consolidated scripts covers most of the issues and minor annoyances that can occur when running xRDP on top of UBuntu
Till next time
See ya
Most importantly, great script and thx so much for your contribution to the linux community!
Less importantly, after a successful -c installation I have two folders left in my ~/Downloads directory:
xorgxrdp
xrdp
Can these be safely deleted?
Thanks bro! Your script is awesome. Congratulations.
@JRock,
Sorry for the late answer… Yes, these files can be safely deleted…These folders are only used when performing a custom installation… These are the sources file indeed….
Just delete them and you should be fine
Thank for the visit and the comments
Till next time
See ya
@Vinicius,
Thanks for the visit and for the positive comments…
Till next time
See ya
Why not put this in a github repository? It would be easier to track changes.
@Rui,
We are discussing internally the way to move forward…GitHub is one of the option on the table.. If changes happens, it would be in 2020 as we are really really busy closing projects
Thanks for the visit and the feedback…
Till next time
See ya
Hi, Griffon.
First of all, thank you very much for providing this XRDP script. It helps a lot!
I’ve followed your instructions and ran it on a machine with Ubuntu 16.04, but noticed there’s no console option on the login screen. Then I ran it on a machine with Ubuntu 18.04 and it shows the console option.
Is there a way to use the console option to log in Ubuntu 16.04?
Thanks again and best regards,
Marcio Almeida.
@Marcio,
It’s seems that’s a change in the /etc/xrdp/sesman.ini file when you are using the latest xrdp version
We would assume that you have used the standard install mode against Ubuntu 18.04 (while when using the script on Ubuntu 16.04, it’s always using the custom installation and thus installing the latest xrdp version)
You could try to compare both /etc/xrdp/sesman.ini file and modify the file on ubuntu 16.04 to add the console option…
Using VNC-ANY option would technically provide the same option
Thanks for visiting us and providing positive feedback on the topic
Till next time
See ya
This is terrific!I’ve installed xrdp for like five servers this year, and each time it is a nightmare to me; compiling from source, tweaking the configuration and analyze the logs. Well, I should really tried this before digging into the dirty field.
@Johnny;
Please test the script and provide feedback so we can try even improve it
thank for the visit and for leaving the comment
Till next time
See ya
I just tried the xrdp-installer-1.1.sh on Ubuntu Desktop 18.04.3 LTS. It seems to work well.
However, I also installed nautilus-admin to have “Open as Administrator” in the context menu. Clicking that menu item in an xrdp session now opens a window with a cursor that keeps on spinning, without asking the sudo user password.
Any idea what is going on?
Kind regards
Jean Goyens
@Jean Goyens,
I would expect that this might be related to polkit where the Open as Administrator functionality is blocked by the a policy… I have no clue which one might be blocking the feature so we will have to look at it…..
To have some additional information about polkit and xrdp, start your journey by reading this post ( http://c-nergy.be/blog/?p=12073
Hope this help
Till next time
See ya
Hello. Looks like it doesn’t work with fresh install of Ubuntu 18.04
After do fresh install (as user ‘admin’ ) and downloaded the script, I run:
./xrdp-installer-1.1.sh -c
Then from other computer( thinclient) in the same network I logged into the system (xorg) (as a new user ‘user1’ ) then it terminated immediately.
I never successfully use xrdp as multiseat setup. I have been trying for months. None of instruction from entire internet work. The only one work is ‘x two go’ . Just use single line command on server and client. Then you’re done. As simple as that.
Thanks for wonderful script!
Ah.. would you please consider to overcome the limitation on next version script (One session per user limitation)?
Normally, I assign some works on my desktop before heading to home, and access it for checking status in my home.
Thus, if your script provides multple session per user, it would be more wonderful, in my view.
Once again, thanks for making wonderful script! (actually, I don’t like mate theme 🙂 ).
Regards
Seo
Hello Rico;
Sorry to hear that this didn’t work for you.. The xrdp install script is working for us most of the time and works also for other users. xRDP is not the perfect solution but can help…
You do not provide enough info about your configuration and your setup…Maybe the info below can be useful to you
– are you using physical or virtual machine ? xRDP is known not to play well with Physical machines where NVIDIA cards are present…..
– have you logged out from physical machine before trying to perform a remote connection…. xRPD Does not support concurrent connection for the same user. If the user (user1) is logged on locally on the ubuntu machine, the user (user1) will not be able to perform a remote connection through xrdp (after passing valid credential, session disconnect immediately). If the user (user1) is remotely connected through xRDP, User1 will not be able to access the local ubuntu machine (after passing the credentials, login prompt is shown….)
To try to investigate your issue; you can always have a look at the logs (located at /var/log and the file ~/.xsession….
Hope this help
Till next time
See ya
@Seo,
The script cannot fix something that xRDP software is not allowing….Maybe in the future; this would be an option. A possible workaround would be to configure your system to have vnc startup at boot time and then use xRDP to always connect to the console session….
As said, this is a workaround !!!. Not too difficult to implement but you need to connect twice before being able to access your xRDP session…..
Btw, Thanks for the visit and the comments….
Hope this help
Till next time
See ya
Why does this break Google Chrome Browser?
@ChromeFinch,
Possibly polkit or other restrictions when running on remote sessions.. This is kind of a known limitations…Some software might not work as expected. we recently encountered a similar issue with Gnome Boxes… working fine when logged on locally but does not start or run when remote logged one…. We might need to perform a more deep analysis to see what’s preventing chrome to run as expected… What’s the experience ? is chrome starting and disappearing immediately, have you tried to start it from a command line (with sudo ) ??
Hope this help
Till next time
Thank you for the amazing tool. It worked on a fresh Ubuntu 19.10 install on the first try. I know that the script is not intended for other Ubuntu flavors, but I wanted to see whether it could be modified to work. I setup a vm in vmware and installed Kubuntu 19.10. To my surprise, the script worked! I am still testing things and have to work around some of the security glitches, but I am impressed.
@Hank;
Hello there.. Thank you for the visit and the positive feedback. Indeed the script has not been tested on other Ubuntu flavors and this is why we cannot guarantee that the script would work on them.
However, we are checking if we can slowly add support to other Ubuntu Flavors…This might come mid of the year… we could start with Kubuntu 🙂
Again, thank for your comments… it helps us pushing forward….
Till next time
See ya
Hi Griffon,
I can confirm Rico’s comment from January 15th. On a fresh Ubuntu 18.04.4 LTS install the RDP client on a Windows 10 shows the login windows and after entering the login data and pressing enter it crashes.
I could provide the xrdp.log and xrdp-sesman.log files from /var/log.
Best regards,
Andrei
@Andrei,
In order to investigate we would need to know
– which OS and version you are running (lsb_release -a)
– which install method you have selected (Standard or custom).Provide the parameters you have used during the installation
– which version of xrdp you are using (xrdp -v )
– which version of xorgxrdp
– logs xrdp-sesman.log and xrdp.log
– Confirm that none is logged on (locally or remotely) on the Ubuntu machine when trying to perform the remote connection from Windows 10
– is your computer a virtual machine or a physical machine (if physical, are you using nvidia GPU ??)
– When you say it crashes, describe in more details the problem. After you passed credentials in xRDP Login page, do you see a black screen and then nothing, a colored background but nothing happens, a message box indicating some error code….
Based on this info, we can try to provide some feedback
Till next time
See ya
Hi Griffon,
here are the answers:
– which OS and version you are running (lsb_release -a)
Distributor ID: Ubuntu
Description: Ubuntu 18.04.4 LTS
Release: 18.04
Codename: bionic
– which install method you have selected (Standard or custom).Provide the parameters you have used during the installation
$ ./xrdp-installer-1.1.sh -c
– which version of xrdp you are using (xrdp -v )
$ xrdp 0.9.12
– which version of xorgxrdp
$ xorgxrdp/now 0.2.11-1 amd64 [installed,upgradable to: 0.9.5-2]
But I can’t upgrade to 0.9.5-2 with “sudo apt upgrade” because apt says it has unmet dependecies:
The following packages have unmet dependencies:
xorgxrdp : Depends: xorg-video-abi-23
Depends: xserver-xorg-core (>= 2:1.18.99.901)
E: Broken packages
– logs xrdp-sesman.log and xrdp.log
xrdp.log
[20200218-12:28:49] [INFO ] address [0.0.0.0] port [3389] mode 1
[20200218-12:28:49] [INFO ] listening to port 3389 on 0.0.0.0
[20200218-12:28:49] [INFO ] xrdp_listen_pp done
[20200218-12:28:49] [DEBUG] Closed socket 7 (AF_INET 0.0.0.0:3389)
[20200218-12:28:51] [INFO ] starting xrdp with pid 18090
[20200218-12:28:51] [INFO ] address [0.0.0.0] port [3389] mode 1
[20200218-12:28:51] [INFO ] listening to port 3389 on 0.0.0.0
[20200218-12:28:51] [INFO ] xrdp_listen_pp done
[20200218-12:28:54] [INFO ] Socket 12: AF_INET connection received from 146.254.45.99 port 56618
[20200218-12:28:54] [DEBUG] Closed socket 12 (AF_INET 146.254.13.196:3389)
[20200218-12:28:54] [DEBUG] Closed socket 11 (AF_INET 0.0.0.0:3389)
[20200218-12:28:54] [INFO ] Using default X.509 certificate: /etc/xrdp/cert.pem
[20200218-12:28:54] [INFO ] Using default X.509 key file: /etc/xrdp/key.pem
[20200218-12:28:54] [DEBUG] TLSv1.3 enabled
[20200218-12:28:54] [DEBUG] TLSv1.2 enabled
[20200218-12:28:54] [DEBUG] Security layer: requested 11, selected 1
[20200218-12:28:54] [DEBUG] Closed socket 12 (AF_INET 146.254.13.196:3389)
[20200218-12:28:55] [INFO ] Socket 12: AF_INET connection received from 146.254.45.99 port 56619
[20200218-12:28:55] [DEBUG] Closed socket 12 (AF_INET 146.254.13.196:3389)
[20200218-12:28:55] [DEBUG] Closed socket 11 (AF_INET 0.0.0.0:3389)
[20200218-12:28:55] [INFO ] Using default X.509 certificate: /etc/xrdp/cert.pem
[20200218-12:28:55] [INFO ] Using default X.509 key file: /etc/xrdp/key.pem
[20200218-12:28:55] [DEBUG] TLSv1.3 enabled
[20200218-12:28:55] [DEBUG] TLSv1.2 enabled
[20200218-12:28:55] [DEBUG] Security layer: requested 11, selected 1
[20200218-12:28:55] [INFO ] connected client computer name: MD1ZV89C
[20200218-12:28:55] [INFO ] adding channel item name rdpdr chan_id 1004 flags 0x80800000
[20200218-12:28:55] [INFO ] adding channel item name rdpsnd chan_id 1005 flags 0xc0000000
[20200218-12:28:55] [INFO ] adding channel item name cliprdr chan_id 1006 flags 0xc0a00000
[20200218-12:28:55] [INFO ] adding channel item name drdynvc chan_id 1007 flags 0xc0800000
[20200218-12:28:55] [INFO ] TLS connection established from 146.254.45.99 port 56619: TLSv1.2 with cipher ECDHE-RSA-AES256-GCM-SHA384
[20200218-12:28:55] [DEBUG] xrdp_000046ad_wm_login_mode_event_00000001
[20200218-12:28:55] [INFO ] Loading keymap file /etc/xrdp/km-00000407.ini
[20200218-12:28:55] [WARN ] local keymap file for 0x00000407 found and doesn’t match built in keymap, using local keymap file
[20200218-12:29:01] [DEBUG] xrdp_wm_log_msg: connecting to sesman ip 127.0.0.1 port 3350
[20200218-12:29:01] [INFO ] xrdp_wm_log_msg: sesman connect ok
[20200218-12:29:01] [DEBUG] xrdp_wm_log_msg: sending login info to session manager, please wait…
[20200218-12:29:01] [DEBUG] return value from xrdp_mm_connect 0
[20200218-12:29:01] [INFO ] xrdp_wm_log_msg: login successful for display 11
[20200218-12:29:01] [DEBUG] xrdp_wm_log_msg: started connecting
[20200218-12:29:01] [INFO ] lib_mod_log_peer: xrdp_pid=18093 connected to X11rdp_pid=18096 X11rdp_uid=1000 X11rdp_gid=1000 client_ip=146.254.45.99 client_port=56619
[20200218-12:29:01] [DEBUG] xrdp_wm_log_msg: connected ok
[20200218-12:29:01] [DEBUG] xrdp_mm_connect_chansrv: chansrv connect successful
[20200218-12:29:01] [DEBUG] Closed socket 20 (AF_INET 127.0.0.1:54184)
[20200218-12:29:01] [DEBUG] Closed socket 12 (AF_INET 146.254.13.196:3389)
[20200218-12:29:01] [DEBUG] xrdp_mm_module_cleanup
[20200218-12:29:01] [DEBUG] Closed socket 21 (AF_UNIX)
[20200218-12:29:01] [DEBUG] Closed socket 22 (AF_UNIX)
xrdp-sesman.log
[20200218-12:28:49] [DEBUG] libscp initialized
[20200218-12:28:49] [DEBUG] Testing if xrdp-sesman can listen on 127.0.0.1 port 3350.
[20200218-12:28:49] [DEBUG] Closed socket 5 (AF_INET 127.0.0.1:3350)
[20200218-12:28:49] [INFO ] starting xrdp-sesman with pid 18088
[20200218-12:28:49] [INFO ] listening to port 3350 on 127.0.0.1
[20200218-12:29:01] [INFO ] A connection received from 127.0.0.1 port 54184
[20200218-12:29:01] [INFO ] ++ created session (access granted): username andrei, ip 146.254.45.99:56619 – socket: 12
[20200218-12:29:01] [INFO ] starting Xorg session…
[20200218-12:29:01] [DEBUG] Closed socket 9 (AF_INET 0.0.0.0:5910)
[20200218-12:29:01] [DEBUG] Closed socket 9 (AF_INET 0.0.0.0:0)
[20200218-12:29:01] [DEBUG] Closed socket 9 (AF_INET 0.0.0.0:5911)
[20200218-12:29:01] [DEBUG] Closed socket 9 (AF_INET 0.0.0.0:6011)
[20200218-12:29:01] [DEBUG] Closed socket 9 (AF_INET 0.0.0.0:6211)
[20200218-12:29:01] [DEBUG] Closed socket 8 (AF_INET 127.0.0.1:3350)
[20200218-12:29:01] [INFO ] calling auth_start_session from pid 18094
[20200218-12:29:01] [DEBUG] Closed socket 7 (AF_INET 127.0.0.1:3350)
[20200218-12:29:01] [DEBUG] Closed socket 8 (AF_INET 127.0.0.1:3350)
[20200218-12:29:01] [INFO ] Xorg :11 -auth .Xauthority -config xrdp/xorg.conf -noreset -nolisten tcp -logfile .xorgxrdp.%s.log
[20200218-12:29:01] [CORE ] waiting for window manager (pid 18095) to exit
[20200218-12:29:01] [CORE ] window manager (pid 18095) did exit, cleaning up session
[20200218-12:29:01] [INFO ] calling auth_stop_session and auth_end from pid 18094
[20200218-12:29:01] [DEBUG] cleanup_sockets:
[20200218-12:29:01] [DEBUG] cleanup_sockets: deleting /tmp/.xrdp/xrdp_chansrv_audio_out_socket_11
[20200218-12:29:01] [DEBUG] cleanup_sockets: deleting /tmp/.xrdp/xrdp_chansrv_audio_in_socket_11
[20200218-12:29:01] [DEBUG] cleanup_sockets: deleting /tmp/.xrdp/xrdpapi_11
[20200218-12:29:01] [INFO ] ++ terminated session: username andrei, display :11.0, session_pid 18094, ip 146.254.45.99:56619 – socket: 12
– Confirm that none is logged on (locally or remotely) on the Ubuntu machine when trying to perform the remote connection from Windows 10
Nobody is logged on to the Ubuntu machine.
– is your computer a virtual machine or a physical machine (if physical, are you using nvidia GPU ??)
The two computers are physical machines, admittedly on a company LAN, i.e. I don’t have complete control over the LAN configuration. Ubuntu 16.04 LTS ran xrdp with mate with no problems on the same machines, on the same LAN.
– When you say it crashes, describe in more details the problem. After you passed credentials in xRDP Login page, do you see a black screen and then nothing, a colored background but nothing happens, a message box indicating some error code….
After I pass credentials in xRDP Login page, I see a black screen for a fraction of a second and then nothing, i.e. there is no full screen anything, just back to windows 10, with the initial RDP window, that asks for the computer name to connect to.
Hi there,
Thanks for all your hard work with this xrdp thing – unfortunately I’m no expert and I can’t get this new script working . Before trying your scripts I tried installing xrdp directly, with:
sudo apt-get install xrdp -y
sudo apt-get intall xorgxrdp-hwe-18.04
but I was still getting a ‘login failed for display 0 error’ when trying to log in (I’m trying to connect from Windows 10 to Ubuntu 18.04.3 LTS), so I thought I’d try your scripts, after sudo apt remove -ing the two above packages. On this page you suggest that the custom installation helps avoid the problems with Ubuntu 18.04, so I tried:
./xrdp-installer-1.1.sh -c
and it seems to install ok (there were a few red warnings about some things being re-linked but nothing that looked serious). However the ‘login failed for display 0 error’ is still happening every time I try to connect. I also tried uninstalling, and trying the default non-custom installation, but that didn’t improve matters. Do you know what might be going wrong? I’m certain I’m typing the password correctly – I have an English keyboard and the password has only letters and numbers, no symbols!
When I type sudo systemctl status xrdp I get:
xrdp.service – xrdp daemon
Loaded: loaded (/lib/systemd/system/xrdp.service; enabled; vendor preset: enabled)
Active: active (running) since Tue 2020-02-18 17:46:44 GMT; 9min ago
Docs: man:xrdp(8)
man:xrdp.ini(5)
Process: 642 ExecStart=/usr/local/sbin/xrdp $XRDP_OPTIONS (code=exited, status=0/SUCCESS)
Main PID: 643 (xrdp)
Tasks: 1 (limit: 4915)
CGroup: /system.slice/xrdp.service
└─643 /usr/local/sbin/xrdp
Feb 18 17:51:10 c-19-32 xrdp[767]: (767)(140688348272448)[DEBUG] Closed socket 20 (AF_INET 127.0.0.1:37804)
Feb 18 17:51:17 c-19-32 xrdp[767]: (767)(140688348272448)[DEBUG] xrdp_wm_log_msg: connecting to sesman ip 127.0.0.1
Feb 18 17:51:17 c-19-32 xrdp[767]: (767)(140688348272448)[INFO ] xrdp_wm_log_msg: sesman connect ok
Feb 18 17:51:17 c-19-32 xrdp[767]: (767)(140688348272448)[DEBUG] xrdp_wm_log_msg: sending login info to session man
Feb 18 17:51:17 c-19-32 xrdp[767]: (767)(140688348272448)[DEBUG] return value from xrdp_mm_connect 0
Feb 18 17:51:19 c-19-32 xrdp[767]: (767)(140688348272448)[INFO ] xrdp_wm_log_msg: login failed for display 0
Feb 18 17:51:20 c-19-32 xrdp[767]: (767)(140688348272448)[DEBUG] xrdp_mm_module_cleanup
Feb 18 17:51:20 c-19-32 xrdp[767]: (767)(140688348272448)[DEBUG] Closed socket 20 (AF_INET 127.0.0.1:37806)
Feb 18 17:51:23 c-19-32 xrdp[767]: (767)(140688348272448)[DEBUG] Closed socket 12 (AF_INET 129.169.142.244:3389)
Feb 18 17:51:23 c-19-32 xrdp[767]: (767)(140688348272448)[DEBUG] xrdp_mm_module_cleanup
so it’s clearly active and doing stuff. Also, I’m getting to the xorg login screen, so it’s definitely installed at least partly! My system info:
lsb_release -a gives me:
No LSB modules are available.
Distributor ID: Ubuntu
Description: Ubuntu 18.04.3 LTS
Release: 18.04
Codename: bionic
xrdp -v tells me I’m using 0.9.12
xorgxrdp -v gives me nothing (can’t find the command xorgxrdp), so I don’t know what version of that I have, or whether it even installed.
The desktop is physical, is logged out when I try to remote access, as required, and it has no NVIDIA graphics card.
The exact error I get on the xorg login screen is:
connecting to sesman ip 127.0.0.1 port 3350
sesman connect ok
sending login info to session manager, please wait…
login failed for display 0
Then when I exit, I get a message from RDP in windows saying:
Your session ended because there was a data encryption error.
Any ideas what might be going wrong? Cheers
@DanD,
We are currently investigating this issue as multiple people have reported this issue. The script is probably not the issue as you have tried an normal installation and this is still not working…..
We will try to come back with some updated information (and reply in more detail to your comments or try to provide advises or more actions to be performed in order to get more debug info…)
Till next time
See ya
@Andrei;
We can confirm that indeed the issue you have reported exists…It can be caused by the package xrdp 0.9.12 or the recent release of Ubuntu 18.04.4… We are looking into the issue…
working on it….:-)
till next time
See ya
@Andrei,
After some quick investigation, it seems that the custom installation method which is using the latest xrdp package (0.9.12) is indeed not working as expected. More specifically, the xorgxrdp package used to perform the compilation seems to be causing the issue.
To try to fix your issue (and no guarantee it would work), you could perform one of the following actions….
Option 1 – Perform a standard install (i.e. execute the script with no options)
in your case, you have to uninstall the xrdp package installed by the script… So from command line, run the following
./xrdp-installer-1.1.sh -r (to remove xrdp custom install)
Check that the /etc/xrdp folder has been deleted accordingly
reboot
./xrdp-installer-1.1.sh (to perform a standard installation)
Option 2 – Only remove the xorgxrdp package (compiled from the script) and replace it with the one shipping with Ubuntu 18.04.4
from a command line type
sudo dpkg -r xorgxrdp
sudo apt-get install xorgxrdp-hwe-18.04
Try to perform the remote connection and see if this is working for you
p.s. new post on its way to try to explain and fix the issue….
Hope this help
Till next time
See ya
thank you very much for your work.
There is new problem when install xorgxrdp-hwe-18.04: it will auto remove xserver-xorg-input-all, which cause keyboard and mouse don’t work when ubuntu is reboot(https://techwiser.com/fix-keyboard-not-working-in-ubuntu-18-04/), when reinstall xserver-xorg-input-all, xorgxrdp-hwe-18.04 alse will be removed. How to solve the problem. thanks
@Sdking,
The link you provided has nothing to do with UBuntu 18.04 and xRDP……
To clarify,
If you are using the script against Ubuntu 18.04.4 and performing a standard installation, you have no problems with keyboard and mouse
The script check which version of xserver-xorg-core version is present and perform the correct installation of xorgxrdp package or xorgxrdp-hwe-18.04 package
If you are using the script against UBuntu 18.04 and perform a custom installation, you might hit a problem because the latest version of xorgxrdp is installed. If this is the case, use the procedure described at http://c-nergy.be/blog/?p=14396
Finally, I think your statement is not correct. You can install xorgxrdp-hwe-18.04.4 and this will not affect keyboard and mouse functionality
If you decide to install “legacy” package xserver-xorg-core, then you will loose keyboard/mouse functionality if you do no also install the xserver-xorg-input-all as well (maybe more info useful for this topic at https://c-nergy.be/blog/?p=13390)
Hope this help
Till next time
You Rock!
Smooth Install on 19.10 following your instructions. Thank you !
@Bernard,
Thank you for visiting our blog and providing positive feedback… We happy to see that the script is useful and working in most of the case
Till next Time
See ya
just installed on fresh ubuntu 18.04.04 LTS and when starting rap I am getting a blank window in the upper right.
then the login window is also blank with the user cursor having a bunch of spaces.
when I delete the spaces and log in it works though.
Just installed a fresh ubuntu 19.10 LTS desktop and I get the following error when I try to login from a Windows 10 Surface.
Connecting to sesman ip 127.0.0.1 port 3350
sesman connect ok
sending login info to session manager, please wait …
login failed to display 0
I did nothing other than try to login again, and now I don’t get prompted for, the protocol, my name, and password, and I get a blank screen.
@Trevor Miles,
Ok, not enough information in your comments……:-(
Which mode have you used ? -> Standard installation mode or Custom installation mode ? )
If you have used custom installation mode, can you check which version of xrdp and xorgxrdp version you are using (xrdp -v and dpkg -l | grep xorgxrdp )
If you have performed a custom installation, can you try the following
step 1 – remove the xrdp install using the script (I.e. xrdp-installer-1.1.sh -r)
Step 2 – After script finishes, check that /etc/xrdp folder does not exist anymore
Step 3 – Install the standard mode
If this is still not fixing your issues, check your logs /var/logs/xrdp.log and /var/log/xrdp-sesman.log and check if you can see something that could explain the behavior
hope this help
Till next time
See ya
Hello Griffon,
thank you very much for your work, your script worked like a charm on Ubuntu 16.04 LTS, saving me a lot of time!
There is a small mistake in the fix_ssl function:
The line
if [[ “id -Gn xrdp | grep ssl-cert” ]]
always evaluates to true and the fix is never applied.
I found it using shellcheck, an open source shell script linter tool that has proven to be very useful to me so far for findng small bugs like this.
Best regards,
Andrej
@Andrej,
Thank you for the visit and the feedback 🙂 As Ubuntu 20.04 is almost out, we will release a new version of the script and correct the small bug…Thank you for catching this one….
Good to see that the script is working and can be useful to other people…. Let us fix this small bug and give a try to the new script version (euh..when out )
Till next time
See ya
I ran into a similar issue as SdKing [1] when running xrdp-installer-1.1.sh, but in my case on Ubuntu 16.04.6 — the installation removed xserver-xorg-input-all, so when I rebooted to test the install of xrdp, my keyboard and mouse didn’t work anymore. I needed to reboot into single-user mode and re-install the package to get things working again. Not sure why this happened or what I could have done to avoid it.
[1] http://c-nergy.be/blog/?p=14093#comment-4352
@Ryan,
Ok, will need to have a look…normally, the script re-install the xserver-xorg-input-all package. However, recent changes and releases of xrdp package might have changed the way the script is performing the installation….As Ubuntu 20.04 is almost out, we will work on the script and check if any updates are needed to still have a smooth install experience..
Thank you for letting us know about this possible issue..and for visiting our blog… We hope to release new version of the script end of April, begin of May 2020 (depends workloads given the current covid crisis period)
Till next time
See ya
@Griffon
I had this problem starting from today after the ubuntu update/upgrade…
Connecting to sesman ip 127.0.0.1 port 3350
sesman connect ok
sending login info to session manager, please wait …
login failed to display 0
Before that it was working smoothly, I had to take a day off from my work because right now i’m unable to work anymore.
I had try many things such as purge remove xrdp and anything related with, I also used your script with the ‘ -r ‘ option and perfom and classic and custom install. Both so far didn’t succeed and still have this same error message…
I’ve found into logs that error message ” X server — no display in range is available ” which I believe found a solution out there:
https://www.fatalerrors.org/a/error-x-server-no-display-in-range-is-available.html
But now my session just got terminated right after start:
”[20200407-16:07:49] [INFO ] ++ terminated session: username slawtrlnx, display :61.0, session_pid 1678, ip ::1:50309 – socket: 11”
Here are my full logs:
[xrdp-sesman.log]: https://pastebin.com/PcekKGci
[xrdp.log]: https://pastebin.com/D3bW9hSG
I’m running on windows 10 Using WSL 2, accessing to my linux from local with Windows Remote Desktop
Cheers.
@SLD,
xrdp has released a new version of the package xrdp v0.9.13 which might have changed the behavior. We have tried the installation and it worked as expected..So maybe something specific with your infra
Please provide the following information
Which installation mode have you used (custom or normal)
which xrdp version is installed (xrdp -v)
which version of xorgxrdp is running (dpkg -l | grep xorgxrdp)
which version of UBuntu (lsb_release -a)
Blank screen is usually caused by missing xorgxrdp package from installation….
waiting for your feedback
Hope this help
Till next time
See ya
Thanks Griffon for the wonderful script ! During these times when WFH is the only way out, this script saves hours of time.
Just a feedback,
I noticed that the xrdp connection has noticeable lag when Xorg backend is used. The same is not the case with XVnc. Also the lag is considerably reduced when single monitor option is chosen. I am using windows 10 mstsc client for connecting to my remote ubuntu 16.04 machine. Are there any xrdp options which I can use to make the experience better and faster ? Also the environment is such that, there is no security concern.
Till then will have to be with single monitor setup !
Thanks once again.